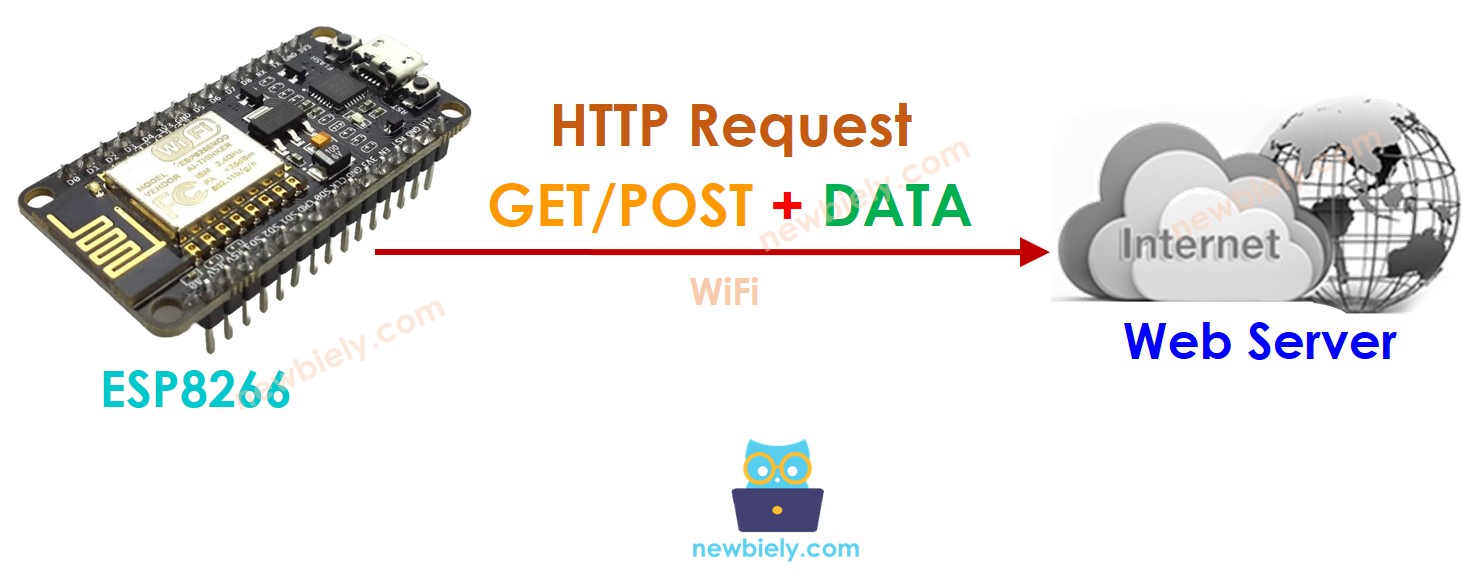
ESP8266 Yêu cầu HTTP
Hướng dẫn này chỉ cho bạn cách sử dụng ESP8266 để thực hiện yêu cầu HTTP tới máy chủ web, API hoặc dịch vụ web. Cụ thể, bạn sẽ học được:
- Cách sử dụng ESP8266 để gửi yêu cầu HTTP (GET và POST)
- Cách đưa dữ liệu của cảm biến vào yêu cầu HTTP
Phần cứng cần chuẩn bị
| 1 | × | ESP8266 NodeMCU ESP-12F | Amazon | |
| 1 | × | Alternatively, ESP8266 D1 Mini NodeMCU ESP-12F | Amazon | |
| 1 | × | Micro USB Cable | Amazon | |
| 1 | × | Alternatively, ESP8266 NodeMCU ESP-12E (Uno-form) | Amazon | |
| 1 | × | USB Cable Type-A to Type-C (for USB-A PC) | Amazon | |
| 1 | × | USB Cable Type-C to Type-C (for USB-C PC) | Amazon | |
| 1 | × | breadboard | Amazon | |
| 1 | × | dây jumper | Amazon | |
| 1 | × | (Tùy chọn) DC Power Jack | Amazon | |
| 1 | × | (Khuyến nghị) Screw Terminal Expansion Board for ESP8266 | Amazon |
Or you can buy the following kits:
| 1 | × | DIYables Sensor Kit (18 sensors/displays) | Amazon |
Tiết lộ: Một số liên kết trong bài viết này là liên kết tiếp thị Amazon và có thể nhận hoa hồng theo chính sách của chương trình.
Các khái niệm cơ bản về máy khách Web và máy chủ Web
Có một số khái niệm cơ bản về web như: địa chỉ web (URL), tên máy chủ, đường dẫn (pathname), chuỗi truy vấn, yêu cầu HTTP... Bạn có thể tìm hiểu chi tiết về chúng trong Hướng dẫn HTTP.
Cách gửi một yêu cầu HTTP
- Bao gồm các thư viện
#include <WiFi.h>
#include <HTTPClient.h>
- Khai báo SSID và mật khẩu WiFi
const char WIFI_SSID[] = "YOUR_WIFI_SSID"; // CHANGE IT
const char WIFI_PASSWORD[] = "YOUR_WIFI_PASSWORD"; // CHANGE IT
- Khai báo tên máy chủ, đường dẫn, chuỗi truy vấn
String HOST_NAME = "http://YOUR_DOMAIN.com"; // CHANGE IT
String PATH_NAME = "/products/arduino"; // CHANGE IT
//String PATH_NAME = "/products/arduino.php"; // CHANGE IT
String queryString = "temperature=26&humidity=70"; // OPTIONAL
- Khai báo một đối tượng HTTP client
HTTPClient http;
- Nếu đã kết nối với máy chủ và gửi yêu cầu HTTP. Ví dụ: HTTP GET
http.begin(HOST_NAME + PATH_NAME); //HTTP
int httpCode = http.GET();
- Đọc dữ liệu phản hồi từ máy chủ web
// httpCode will be negative on error
if (httpCode > 0) {
// file found at server
if (httpCode == HTTP_CODE_OK) {
String payload = http.getString();
Serial.println(payload);
} else {
// HTTP header has been send and Server response header has been handled
Serial.printf("[HTTP] GET... code: %d\n", httpCode);
}
} else {
Serial.printf("[HTTP] GET... failed, error: %s\n", http.errorToString(httpCode).c_str());
}
http.end();
Cách đưa dữ liệu vào yêu cầu HTTP
Chúng ta có thể gửi dữ liệu đến máy chủ web bằng cách đưa dữ liệu vào yêu cầu HTTP. Định dạng dữ liệu phụ thuộc vào phương thức của yêu cầu HTTP:
- Đối với yêu cầu HTTP GET
- Dữ liệu chỉ có thể được gửi thông qua chuỗi tham số (query string) trong đường dẫn.
- Đối với yêu cầu HTTP POST
- Dữ liệu có thể được gửi KHÔNG CHỈ ở định dạng chuỗi tham số MÀ CÒN ở bất kỳ định dạng nào khác như JSON, XML, hình ảnh ...
- Dữ liệu được đặt trong thân của yêu cầu HTTP.
- Tạo một chuỗi tham số truy vấn
- HTTP GET: thêm chuỗi truy vấn vào đường dẫn
- HTTP POST: đưa chuỗi truy vấn vào phần thân HTTP
- Đối với cả GET và POST, đọc dữ liệu phản hồi từ máy chủ web
Hãy cùng tìm hiểu cách gửi dữ liệu ở định dạng chuỗi truy vấn cho cả HTTP GET và POST
int temp = // from sensor
int humi = // from sensor
String queryString = String("temperature=") + String(temp) + String("&humidity=") + String(humi);
http.begin(HOST_NAME + PATH_NAME + "?" + queryString);
http.addHeader("Content-Type", "application/x-www-form-urlencoded");
int httpCode = http.GET();
http.begin(HOST_NAME + PATH_NAME);
http.addHeader("Content-Type", "application/x-www-form-urlencoded");
int httpCode = http.POST(queryString);
// httpCode will be negative on error
if (httpCode > 0) {
// file found at server
if (httpCode == HTTP_CODE_OK) {
String payload = http.getString();
Serial.println(payload);
} else {
// HTTP header has been send and Server response header has been handled
Serial.printf("[HTTP] GET/POST... code: %d\n", httpCode);
}
} else {
Serial.printf("[HTTP] GET/POST... failed, error: %s\n", http.errorToString(httpCode).c_str());
}
http.end();
Mã ESP8266 đầy đủ để thực hiện yêu cầu HTTP
Dưới đây là mã ESP8266 hoàn chỉnh để thực hiện các yêu cầu HTTP GET/POST.
/*
* Mã ESP8266 NodeMCU này được phát triển bởi newbiely.vn
* Mã ESP8266 NodeMCU này được cung cấp để sử dụng công khai, không có ràng buộc.
* Để xem hướng dẫn chi tiết và sơ đồ kết nối, vui lòng truy cập:
* https://newbiely.vn/tutorials/esp8266/esp8266-http-request
*/
#include <ESP8266WiFi.h>
#include <ESP8266HTTPClient.h>
const char WIFI_SSID[] = "YOUR_WIFI_SSID"; // CHANGE IT
const char WIFI_PASSWORD[] = "YOUR_WIFI_PASSWORD"; // CHANGE IT
String HOST_NAME = "http://YOUR_DOMAIN.com"; // CHANGE IT
String PATH_NAME = "/products/arduino.php"; // CHANGE IT
WiFiClient client; // Create a WiFiClient object
HTTPClient http;
void setup() {
Serial.begin(9600);
WiFi.begin(WIFI_SSID, WIFI_PASSWORD);
Serial.println("Connecting");
while (WiFi.status() != WL_CONNECTED) {
delay(500);
Serial.print(".");
}
Serial.println("");
Serial.print("Connected to WiFi network with IP Address: ");
Serial.println(WiFi.localIP());
http.begin(client, HOST_NAME + PATH_NAME); //HTTP
int httpCode = http.GET();
// httpCode will be negative on error
if (httpCode > 0) {
// file found at server
if (httpCode == HTTP_CODE_OK) {
String payload = http.getString();
Serial.println(payload);
} else {
// HTTP header has been sent and Server response header has been handled
Serial.printf("[HTTP] GET... code: %d\n", httpCode);
}
} else {
Serial.printf("[HTTP] GET... failed, error: %s\n", http.errorToString(httpCode).c_str());
}
http.end();
}
void loop() {
// Your loop code here (if needed)
}
Mã ESP8266 đầy đủ để thực hiện yêu cầu HTTP GET với dữ liệu
/*
* Mã ESP8266 NodeMCU này được phát triển bởi newbiely.vn
* Mã ESP8266 NodeMCU này được cung cấp để sử dụng công khai, không có ràng buộc.
* Để xem hướng dẫn chi tiết và sơ đồ kết nối, vui lòng truy cập:
* https://newbiely.vn/tutorials/esp8266/esp8266-http-request
*/
#include <ESP8266WiFi.h>
#include <ESP8266HTTPClient.h>
const char WIFI_SSID[] = "YOUR_WIFI_SSID"; // CHANGE IT
const char WIFI_PASSWORD[] = "YOUR_WIFI_PASSWORD"; // CHANGE IT
String HOST_NAME = "http://YOUR_DOMAIN.com"; // CHANGE IT
String PATH_NAME = "/products/arduino"; // CHANGE IT
//String PATH_NAME = "/products/arduino.php"; // CHANGE IT
String queryString = "temperature=26&humidity=70";
void setup() {
Serial.begin(9600);
WiFi.begin(WIFI_SSID, WIFI_PASSWORD);
Serial.println("Connecting");
while (WiFi.status() != WL_CONNECTED) {
delay(500);
Serial.print(".");
}
Serial.println("");
Serial.print("Connected to WiFi network with IP Address: ");
Serial.println(WiFi.localIP());
WiFiClient client; // Create a WiFiClient object
HTTPClient http;
http.begin(client, HOST_NAME + PATH_NAME + "?" + queryString);
http.addHeader("Content-Type", "application/x-www-form-urlencoded");
int httpCode = http.GET();
// httpCode will be negative on error
if (httpCode > 0) {
// file found at the server
if (httpCode == HTTP_CODE_OK) {
String payload = http.getString();
Serial.println(payload);
} else {
// HTTP header has been sent, and Server response header has been handled
Serial.printf("[HTTP] GET... code: %d\n", httpCode);
}
} else {
Serial.printf("[HTTP] GET... failed, error: %s\n", http.errorToString(httpCode).c_str());
}
http.end();
}
void loop() {
// Your loop code here (if needed)
}
Mã ESP8266 hoàn chỉnh để thực hiện yêu cầu POST HTTP với dữ liệu
/*
* Mã ESP8266 NodeMCU này được phát triển bởi newbiely.vn
* Mã ESP8266 NodeMCU này được cung cấp để sử dụng công khai, không có ràng buộc.
* Để xem hướng dẫn chi tiết và sơ đồ kết nối, vui lòng truy cập:
* https://newbiely.vn/tutorials/esp8266/esp8266-http-request
*/
#include <ESP8266WiFi.h>
#include <ESP8266HTTPClient.h>
const char WIFI_SSID[] = "YOUR_WIFI_SSID"; // CHANGE IT
const char WIFI_PASSWORD[] = "YOUR_WIFI_PASSWORD"; // CHANGE IT
String HOST_NAME = "http://YOUR_DOMAIN.com"; // CHANGE IT
String PATH_NAME = "/products/arduino"; // CHANGE IT
//String PATH_NAME = "/products/arduino.php"; // CHANGE IT
String queryString = "temperature=26&humidity=70";
void setup() {
Serial.begin(9600);
WiFi.begin(WIFI_SSID, WIFI_PASSWORD);
Serial.println("Connecting");
while (WiFi.status() != WL_CONNECTED) {
delay(500);
Serial.print(".");
}
Serial.println("");
Serial.print("Connected to WiFi network with IP Address: ");
Serial.println(WiFi.localIP());
WiFiClient client; // Create a WiFiClient object
HTTPClient http;
http.begin(client, HOST_NAME + PATH_NAME);
http.addHeader("Content-Type", "application/x-www-form-urlencoded");
int httpCode = http.POST(queryString);
// httpCode will be negative on error
if (httpCode > 0) {
// file found at server
if (httpCode == HTTP_CODE_OK) {
String payload = http.getString();
Serial.println(payload);
} else {
// HTTP header has been sent and Server response header has been handled
Serial.printf("[HTTP] POST... code: %d\n", httpCode);
}
} else {
Serial.printf("[HTTP] POST... failed, error: %s\n", http.errorToString(httpCode).c_str());
}
http.end();
}
void loop() {
// Your loop code here (if needed)
}
Bài hướng dẫn liên quan
📱 Ứng dụng đề xuất
 English for KidsHọc tiếng Anh vui nhộn cho trẻ nhỏ.Tải về trênGoogle PlayTải về trênApp Store
 Bubble NoteGhi chú tự xóa — viết như nhắn tin.Tải về trênGoogle PlayTải về trênApp Store
 Tôi Không MuaĐánh bại mua sắm bốc đồng, tiết kiệm hơn.Tải về trênGoogle PlayTải về trênApp Store
 Con Đường Tri ThứcBài thi thử để học mọi thứ.Tải về trênGoogle PlayTải về trênApp Store