Arduino UNO R4 WiFi Bluetooth Đồng Hồ Đo Analog Hướng Dẫn Hiển Thị Đồng Hồ Đo qua BLE
Tổng Quan
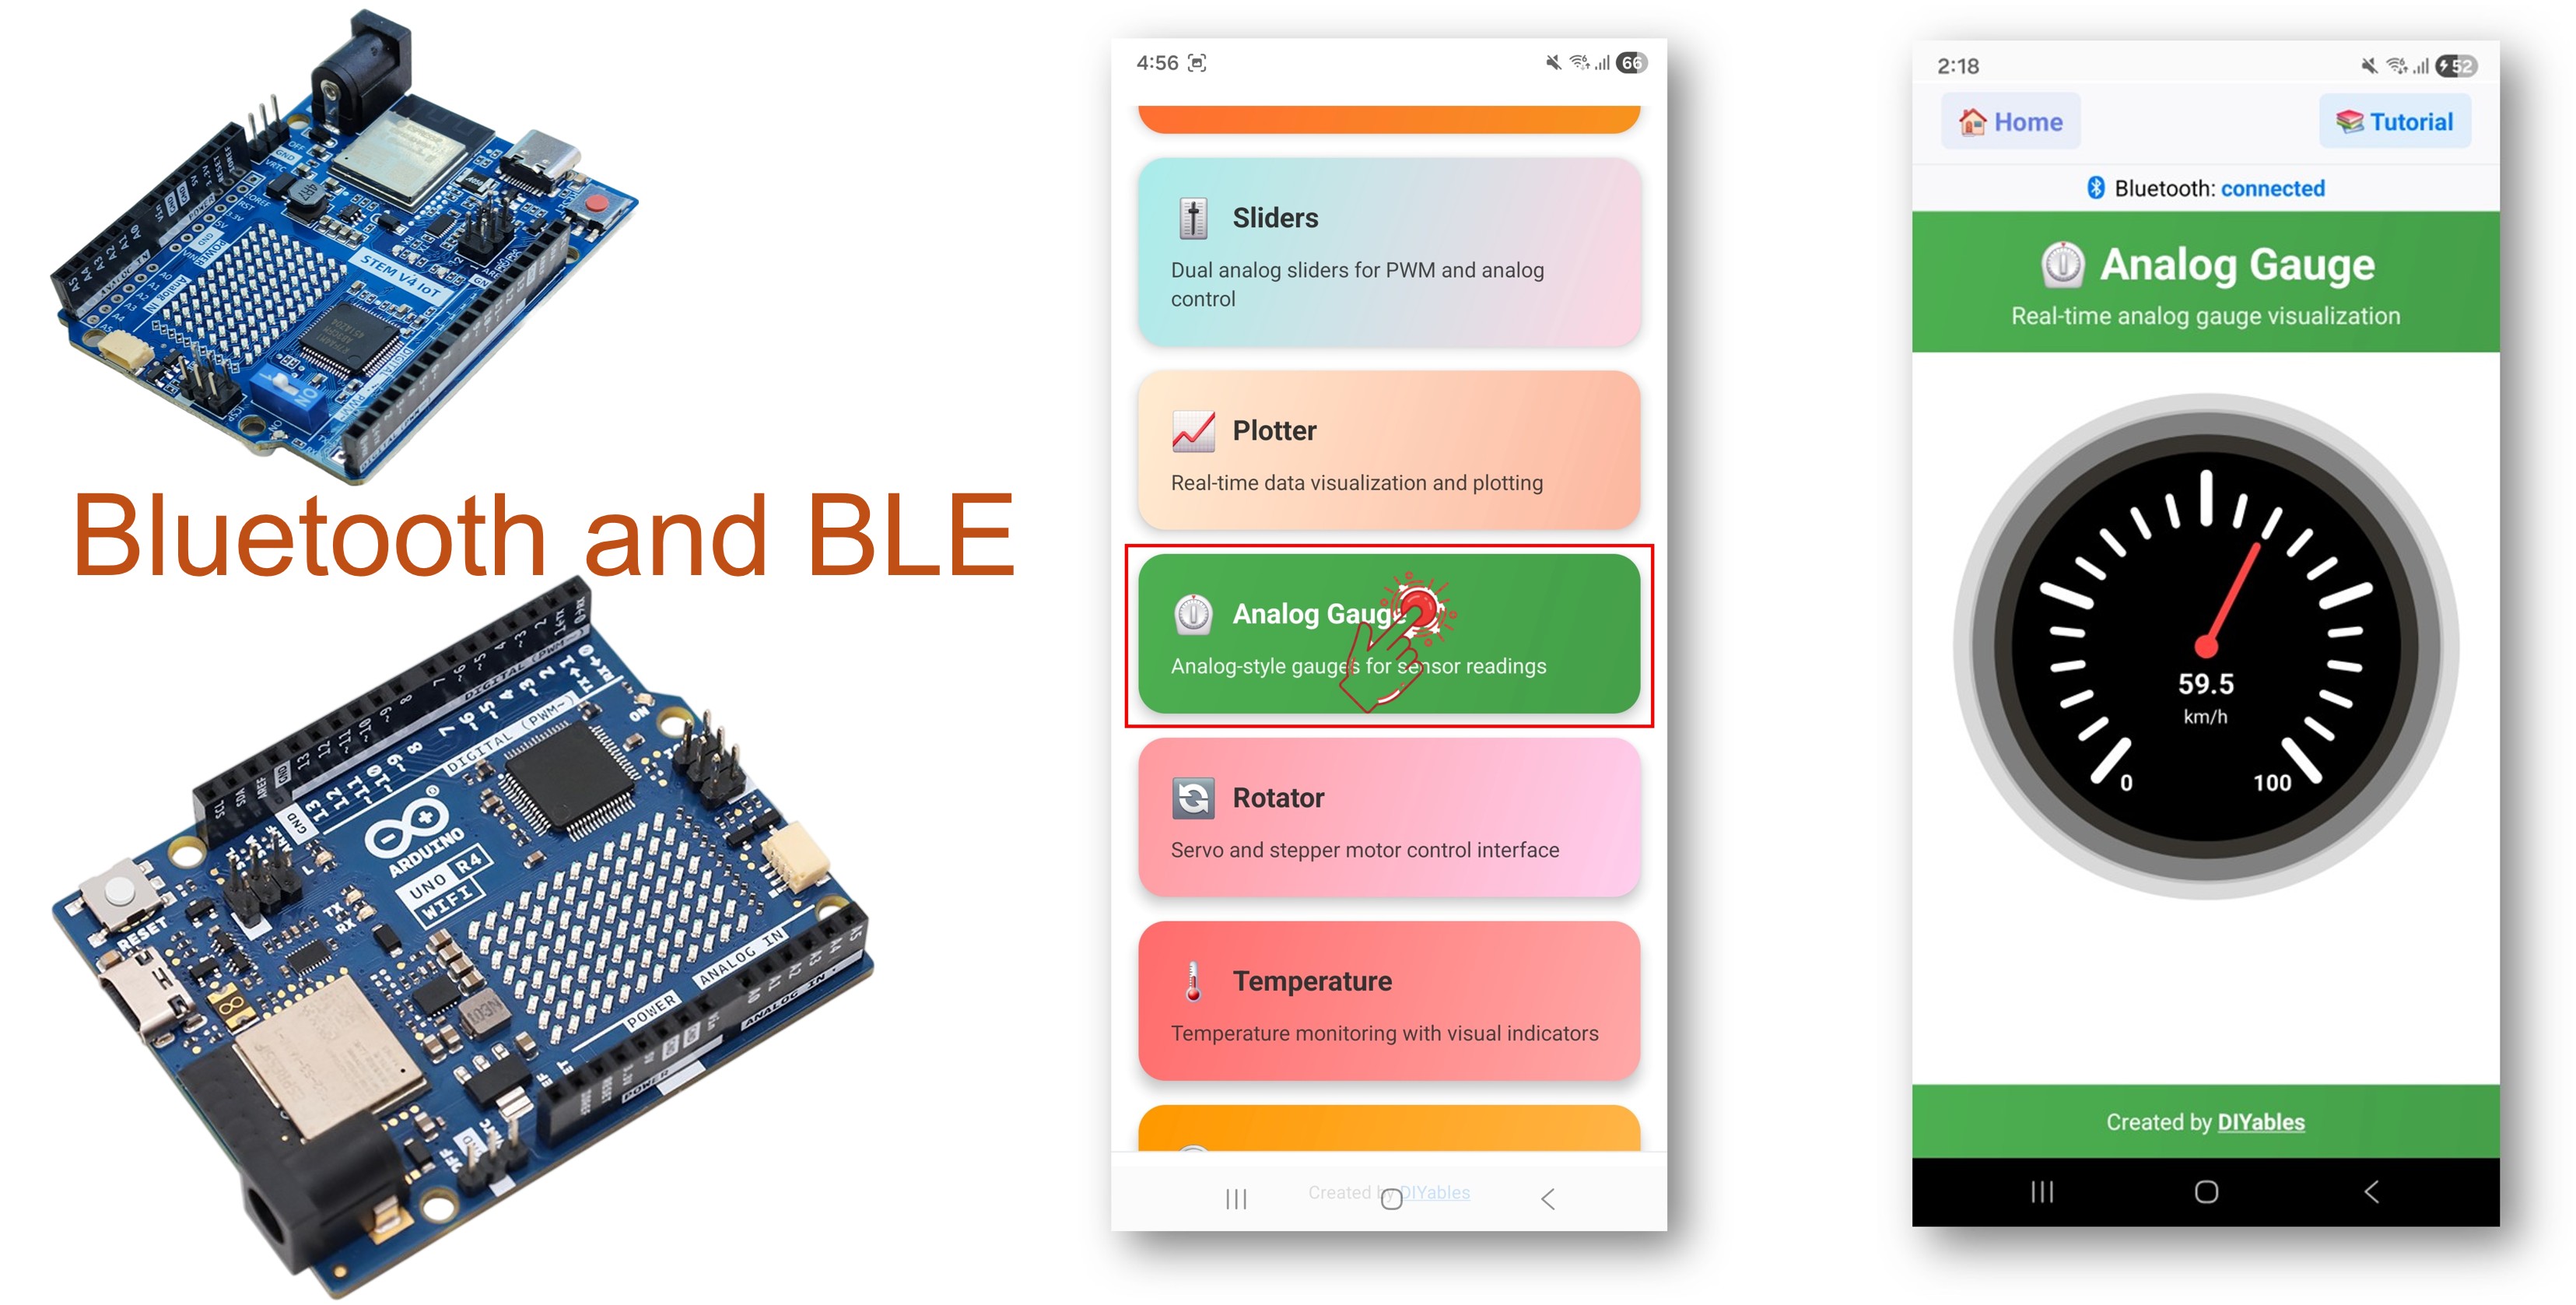
Ví dụ Bluetooth Analog Gauge (Đồng hồ đo Analog) cung cấp màn hình hiển thị đồng hồ đo kiểu analog trực quan thông qua ứng dụng DIYables Bluetooth STEM. Được thiết kế cho Arduino UNO R4 WiFi sử dụng BLE (Bluetooth Low Energy) — hiển thị bất kỳ giá trị analog nào trên đồng hồ đo đẹp mắt với phạm vi và đơn vị có thể cấu hình trên smartphone của bạn. Hoàn hảo cho đồng hồ tốc độ, đồng hồ áp suất, màn hình RPM và bất kỳ giá trị nào có lợi từ việc hiển thị kiểu mặt số.
Lưu ý: Arduino UNO R4 WiFi chỉ hỗ trợ BLE (Bluetooth Low Energy). Nó không hỗ trợ Classic Bluetooth. Ứng dụng DIYables Bluetooth hỗ trợ cả BLE và Classic Bluetooth trên Android, và BLE trên iOS. Vì board này sử dụng BLE nên ứng dụng hoạt động trên cả Android và iOS.
Tính Năng
- Hiển Thị Đồng Hồ Đo Analog: Đồng hồ đo kiểu mặt số đẹp mắt trên smartphone
- Phạm Vi Có Thể Cấu Hình: Đặt giá trị tối thiểu và tối đa
- Đơn Vị Tùy Chỉnh: Hiển thị km/h, RPM, PSI hoặc bất kỳ đơn vị tùy chỉnh nào
- Cập Nhật Nhanh: Lên đến 5 lần cập nhật mỗi giây (khoảng cách 200ms)
- Yêu Cầu Theo Nhu Cầu: Ứng dụng có thể yêu cầu giá trị hiện tại
- Hoạt Động trên Android & iOS: BLE được hỗ trợ trên cả hai nền tảng
- Không Cần Ghép Nối: BLE tự động kết nối mà không cần ghép nối thủ công
Phần Cứng Cần Thiết
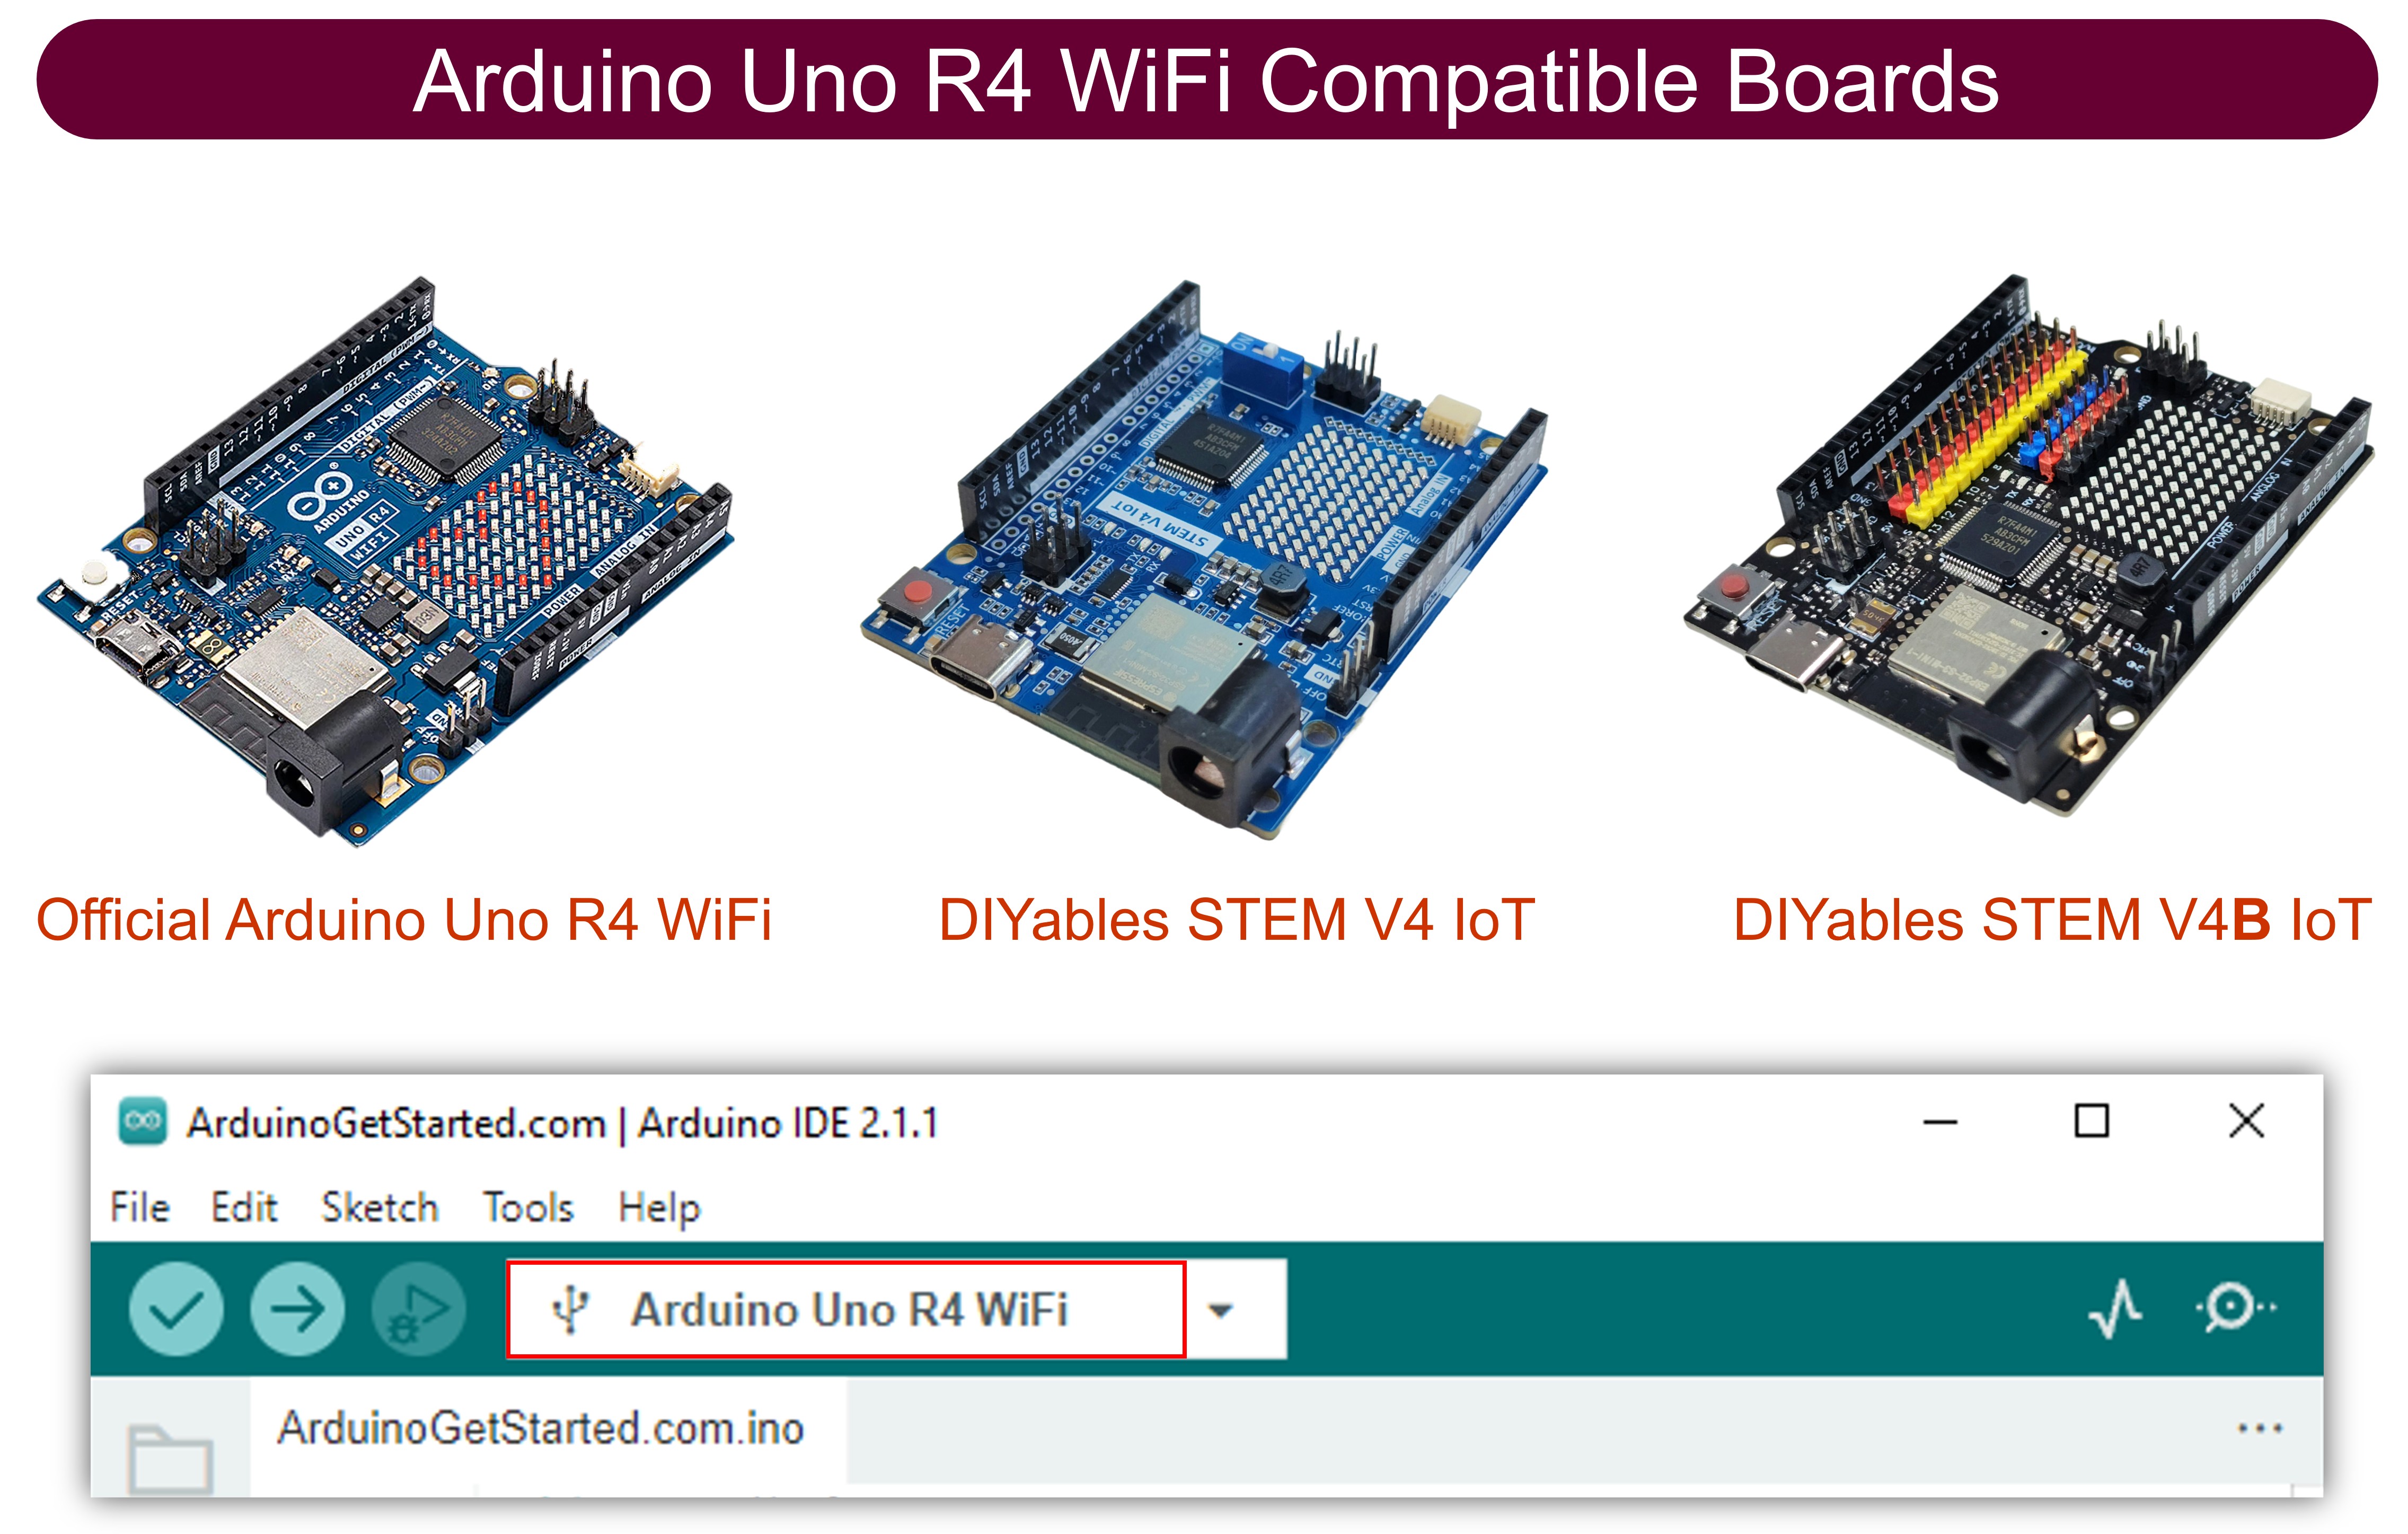
| 1 | × | Arduino UNO R4 WiFi | Amazon | |
| 1 | × | Alternatively, DIYables STEM V4 IoT | Amazon | |
| 1 | × | Alternatively, DIYables STEM V4B IoT | Amazon | |
| 1 | × | (Tùy chọn) DIYables STEM V4 IoT | Amazon | |
| 1 | × | Cáp USB Type-C | Amazon | |
| 1 | × | (Khuyến nghị) Screw Terminal Block Shield for Arduino UNO R4 | Amazon | |
| 1 | × | (Khuyến nghị) Sensors/Servo Expansion Shield for Arduino UNO R4 | Amazon | |
| 1 | × | (Khuyến nghị) Breadboard Shield for Arduino UNO R4 | Amazon | |
| 1 | × | (Khuyến nghị) Enclosure for Arduino UNO R4 | Amazon | |
| 1 | × | (Khuyến nghị) Power Splitter for Arduino UNO R4 | Amazon | |
| 1 | × | (Khuyến nghị) Prototyping Base Plate & Breadboard Kit for Arduino UNO | Amazon |
Or you can buy the following kits:
| 1 | × | DIYables STEM V4 IoT Starter Kit (Arduino included) | Amazon | |
| 1 | × | DIYables Sensor Kit (18 sensors/displays) | Amazon |
Code Arduino UNO R4 WiFi
Các Bước Nhanh
Làm theo hướng dẫn từng bước sau:
- Nếu đây là lần đầu tiên bạn sử dụng Arduino UNO R4 WiFi, hãy tham khảo Arduino UNO R4 - Cài Đặt Phần Mềm.
- Kết nối board Arduino UNO R4 WiFi với máy tính của bạn bằng cáp USB.
- Khởi động Arduino IDE trên máy tính của bạn.
- Chọn board Arduino UNO R4 WiFi và COM port phù hợp.
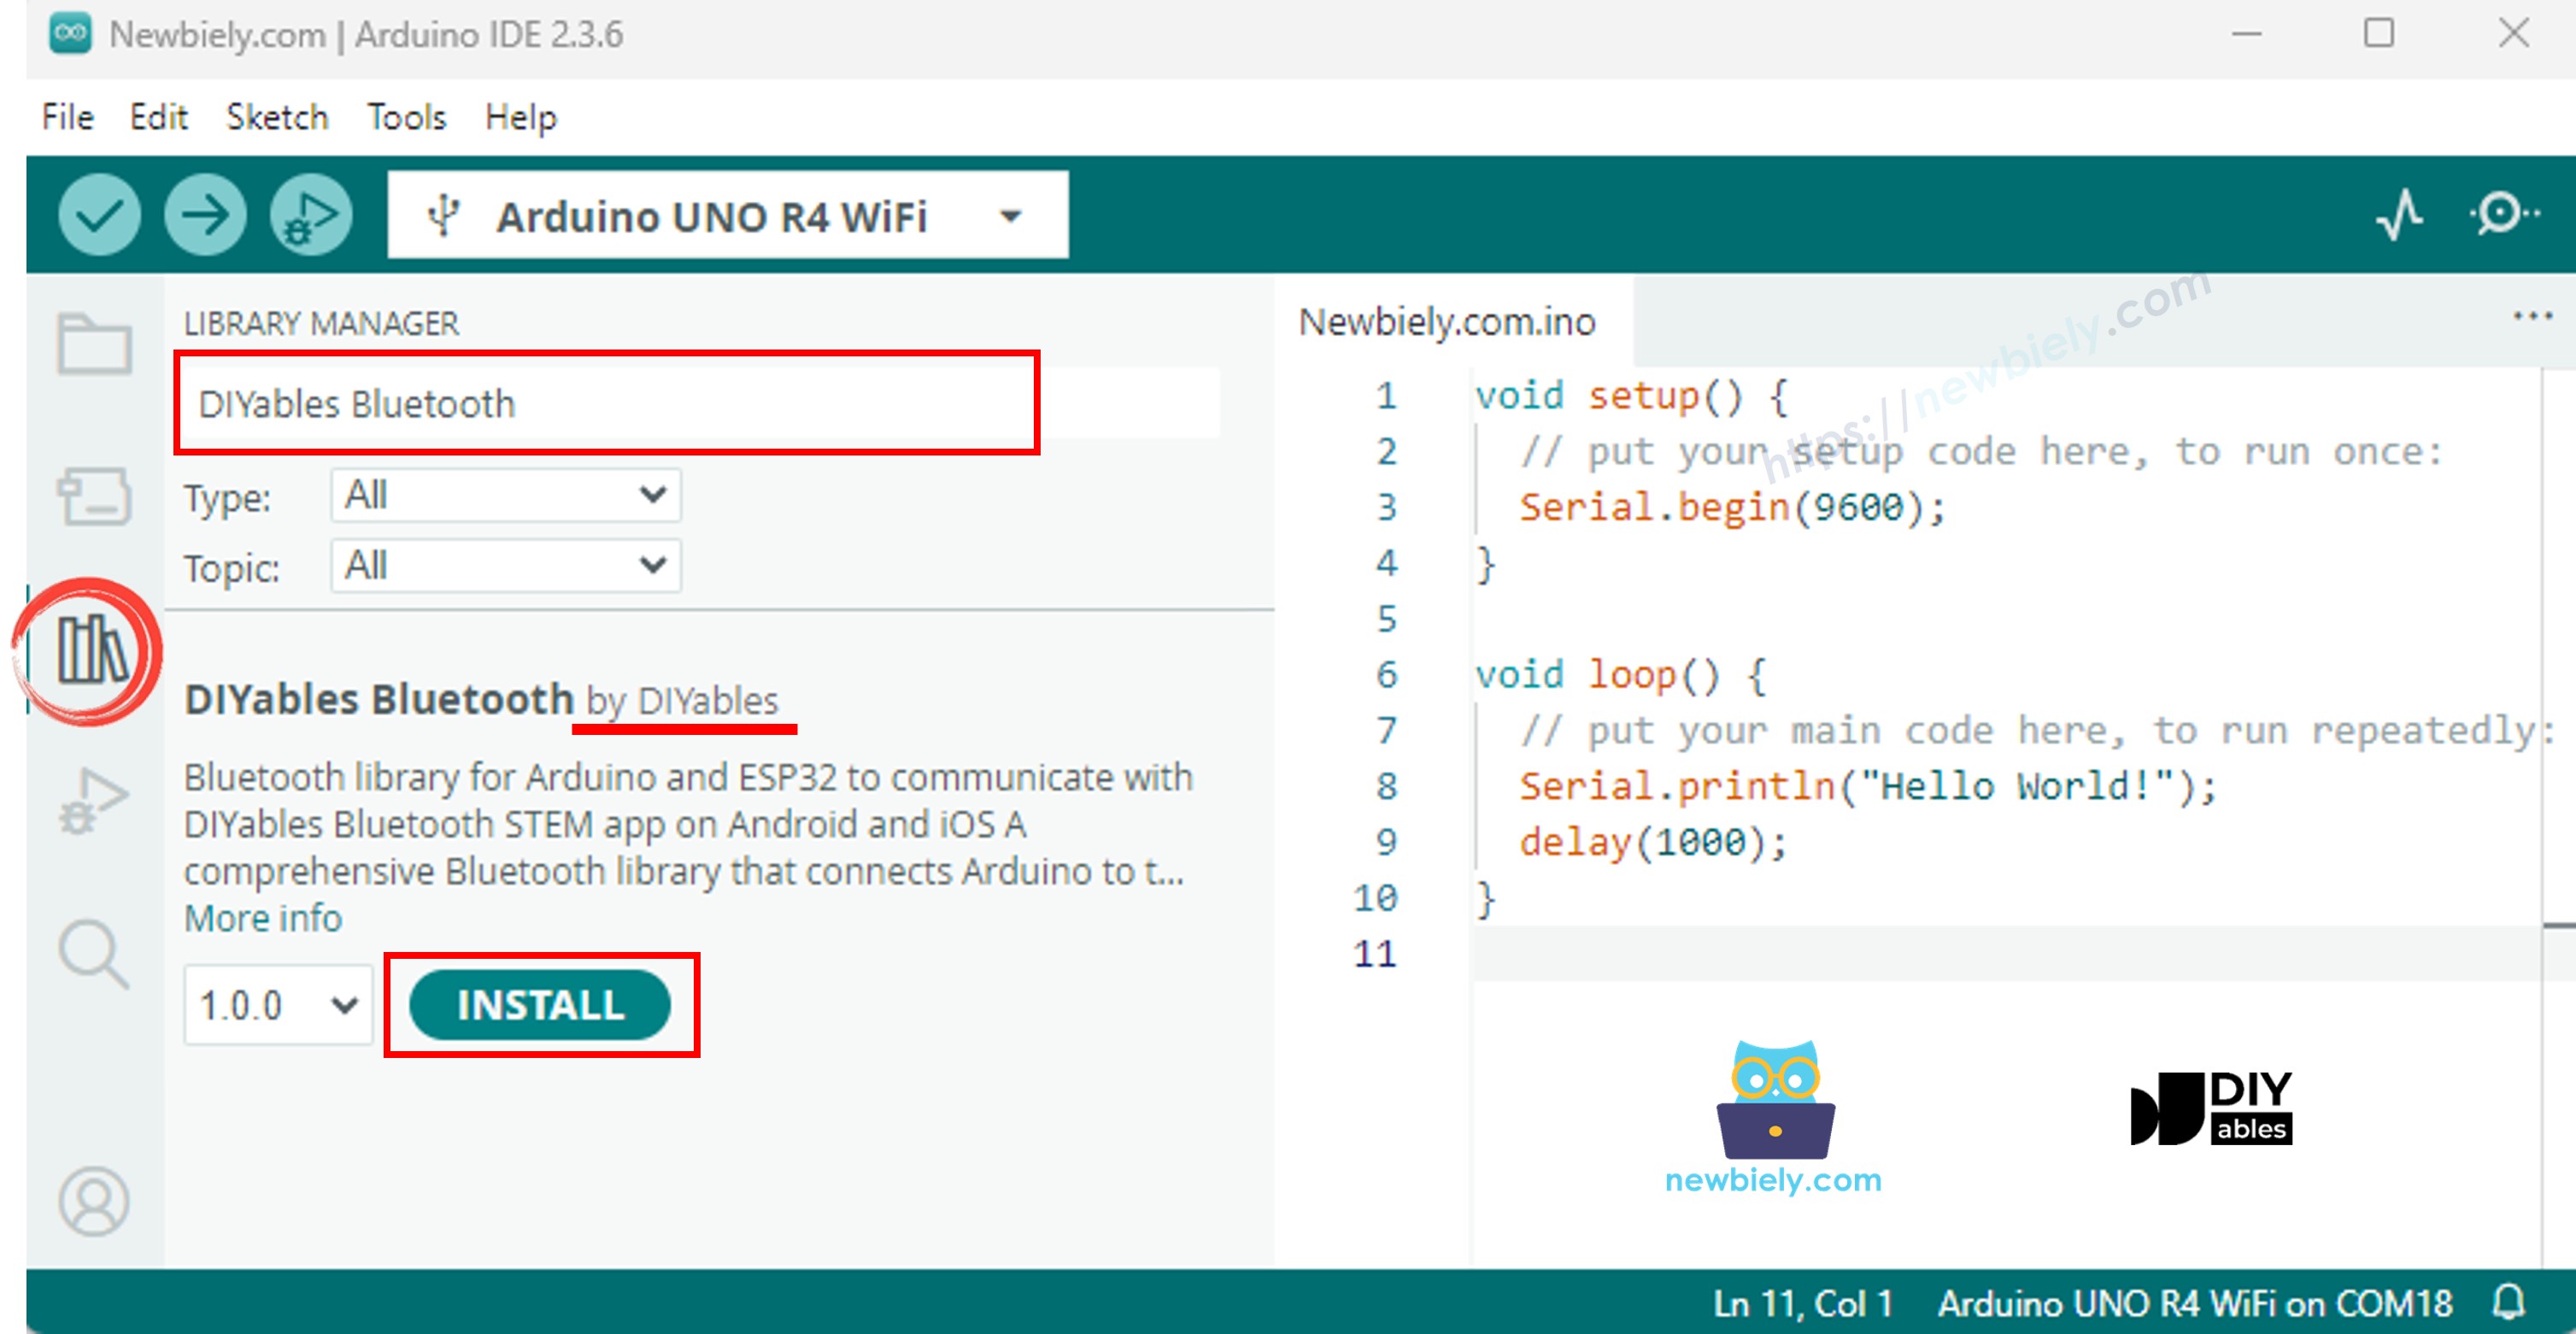
- Điều hướng đến biểu tượng Libraries trên thanh bên trái của Arduino IDE.
- Tìm kiếm "DIYables Bluetooth", sau đó tìm thư viện DIYables Bluetooth của DIYables
- Nhấp vào nút Install để cài đặt thư viện.
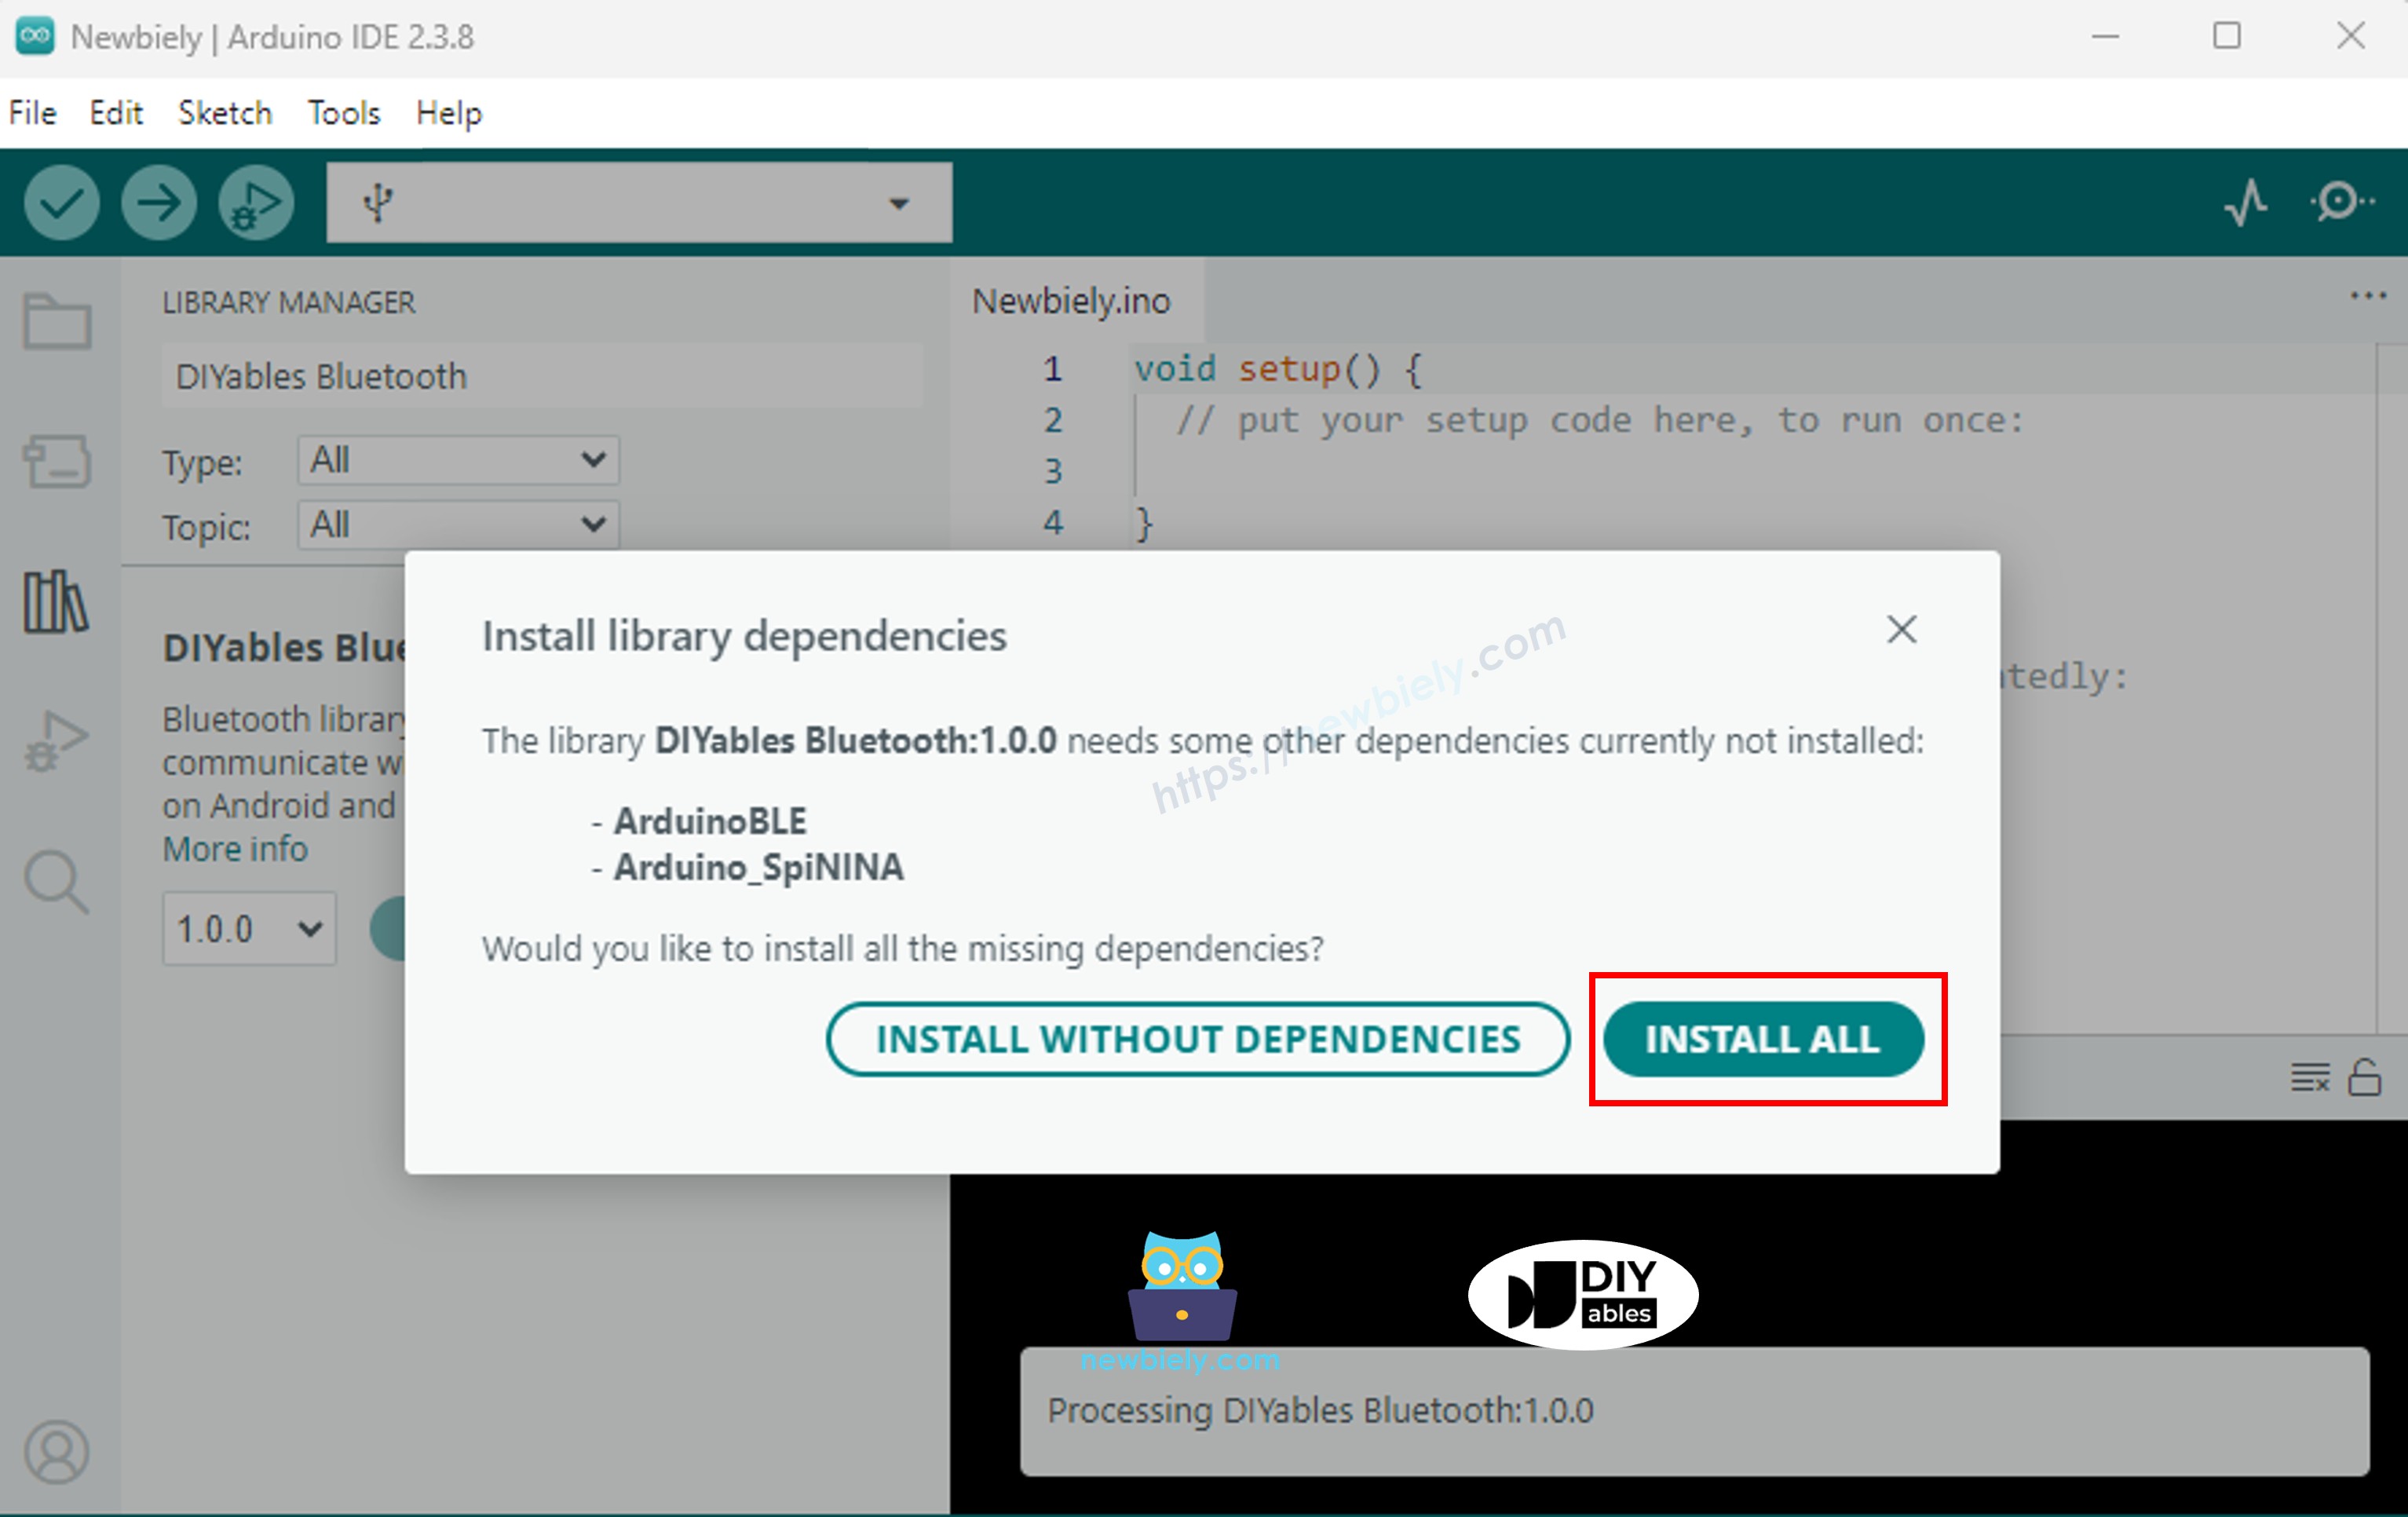
- Bạn sẽ được hỏi về việc cài đặt một số thư viện phụ thuộc khác
- Nhấp vào nút Install All để cài đặt tất cả thư viện phụ thuộc.
Code BLE
- Trên Arduino IDE, đi đến File Examples DIYables Bluetooth ArduinoBLE_AnalogGauge example, hoặc sao chép code trên và dán vào editor của Arduino IDE
- Nhấp vào nút Upload trên Arduino IDE để upload code lên Arduino UNO R4 WiFi
- Mở Serial Monitor
- Kiểm tra kết quả trên Serial Monitor. Nó sẽ trông như thế này:
Ứng Dụng Di Động
Lưu ý: Ứng dụng DIYables Bluetooth hỗ trợ cả BLE và Classic Bluetooth trên Android, và BLE trên iOS. Vì Arduino UNO R4 WiFi sử dụng BLE nên ứng dụng hoạt động trên cả Android và iOS. Không cần ghép nối thủ công cho BLE — chỉ cần quét và kết nối.
- Mở ứng dụng DIYables Bluetooth
- Khi mở ứng dụng lần đầu tiên, nó sẽ yêu cầu quyền. Vui lòng cấp các quyền sau:
- Quyền Nearby Devices (Android 12+) / quyền Bluetooth (iOS) - cần thiết để quét và kết nối thiết bị Bluetooth
- Quyền Location (chỉ Android 11 trở xuống) - được yêu cầu bởi các phiên bản Android cũ để quét thiết bị BLE
- Đảm bảo Bluetooth được bật trên điện thoại của bạn
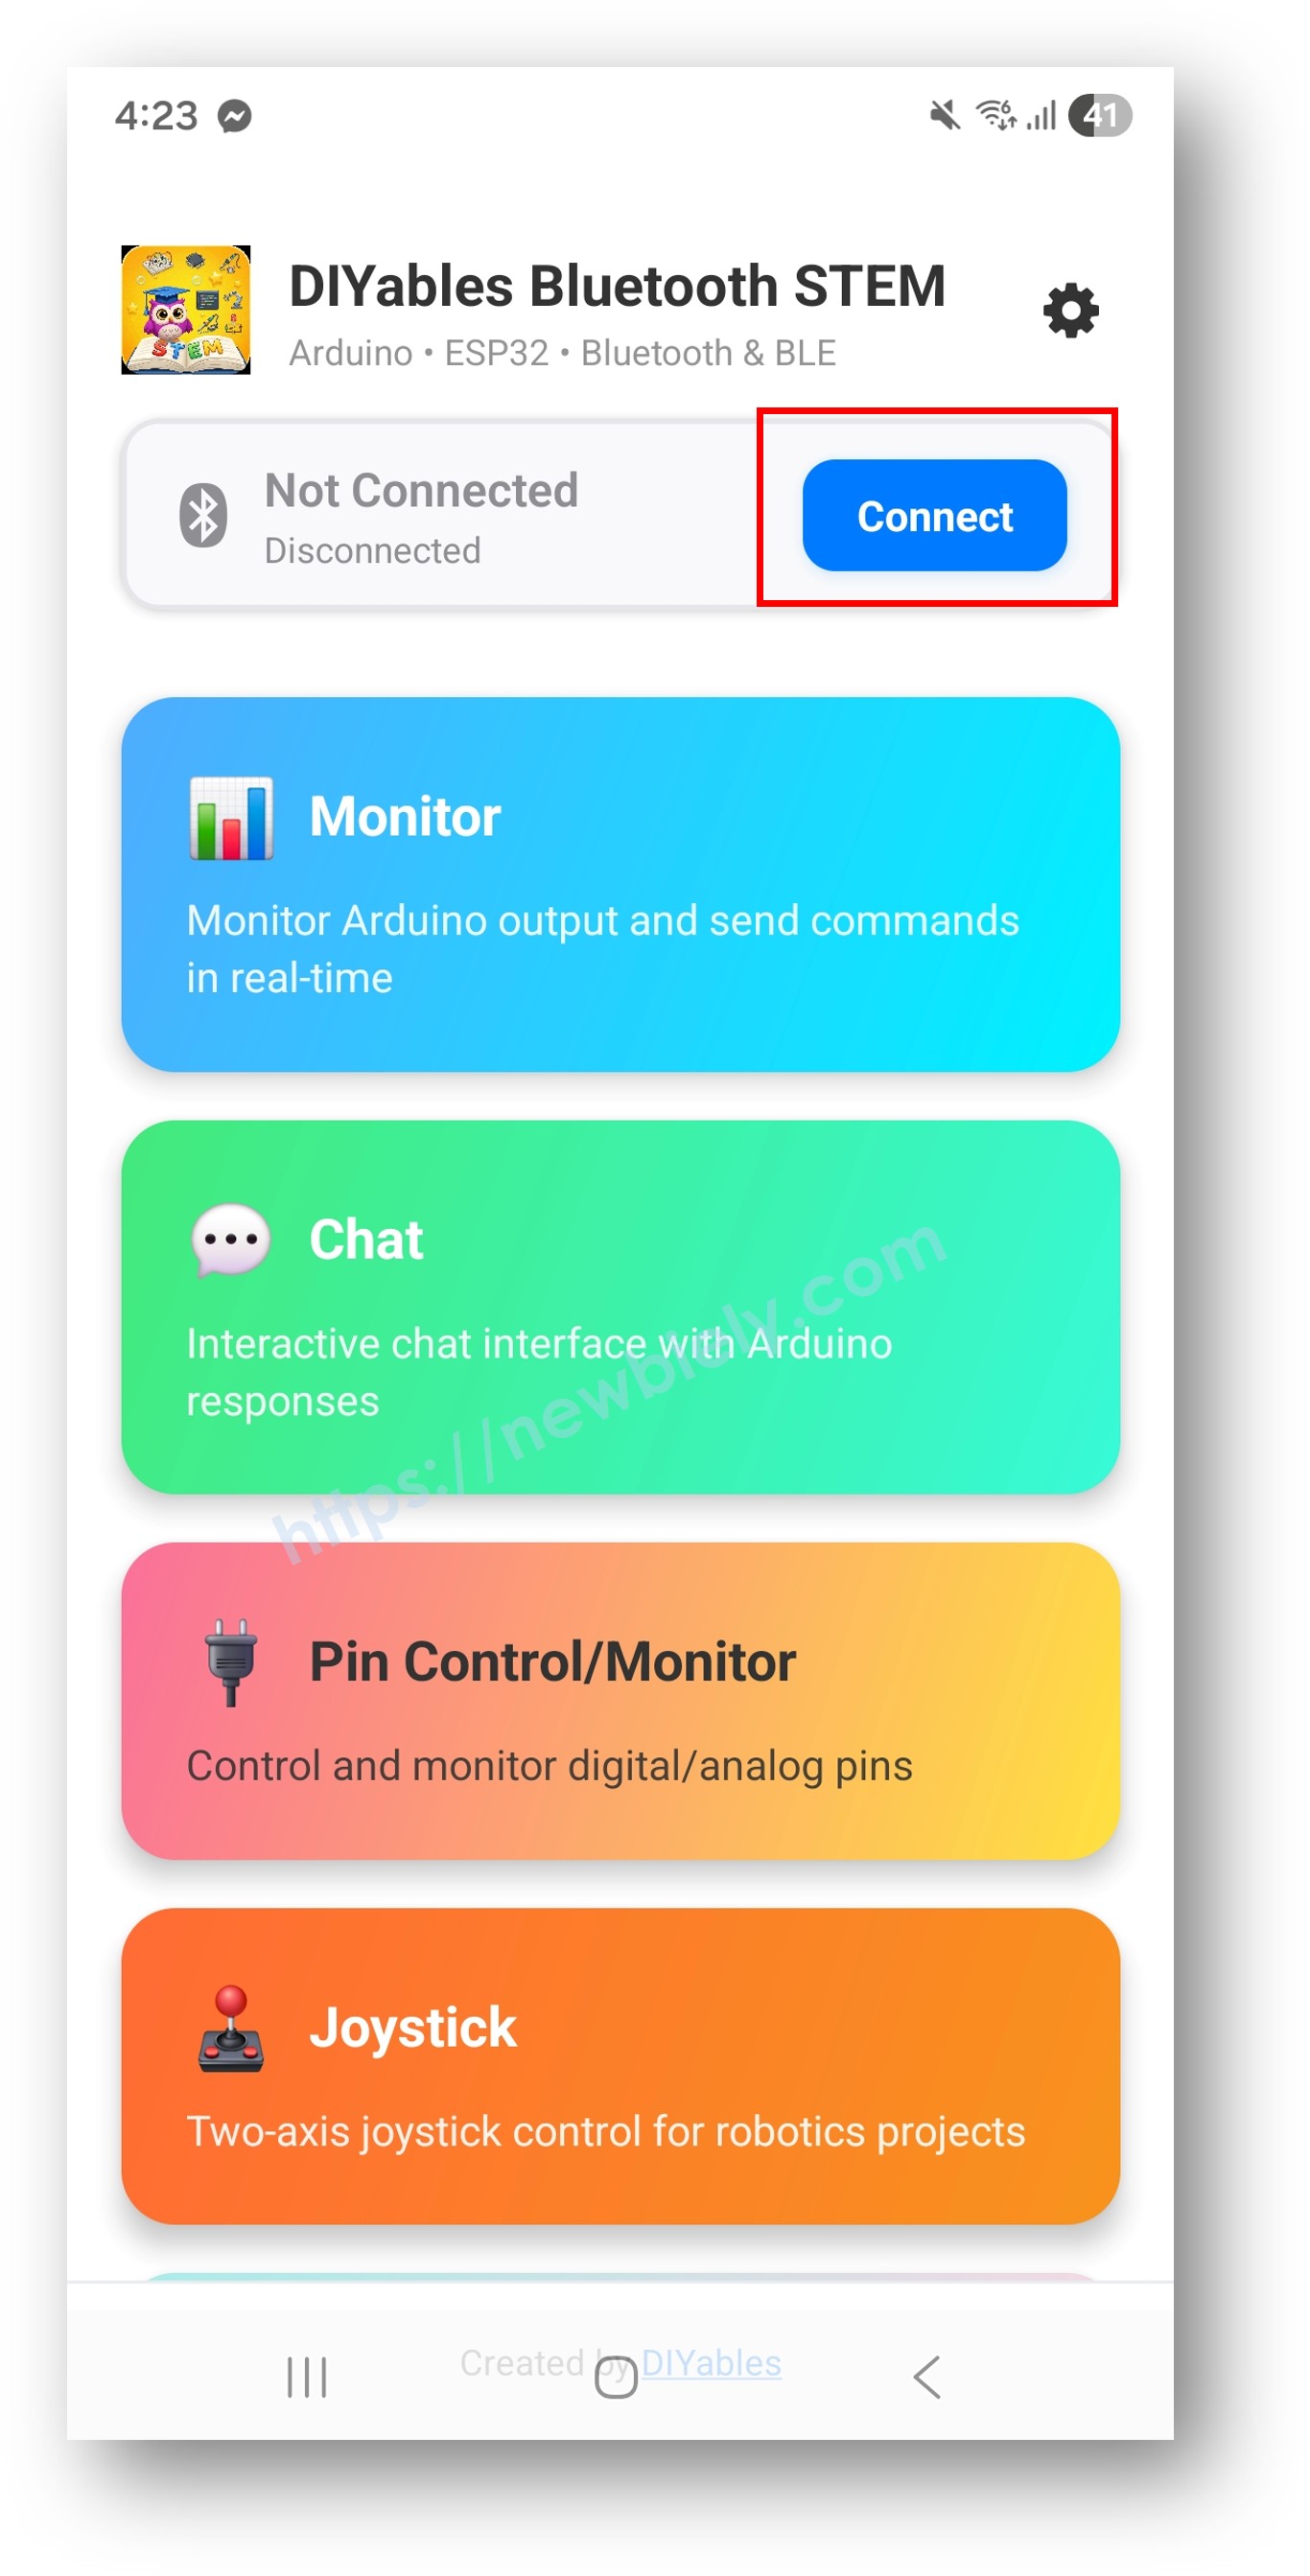
- Trên màn hình chính, nhấn nút Connect. Ứng dụng sẽ quét các thiết bị BLE.
- Tìm và nhấn "Arduino_Gauge" trong kết quả quét để kết nối.
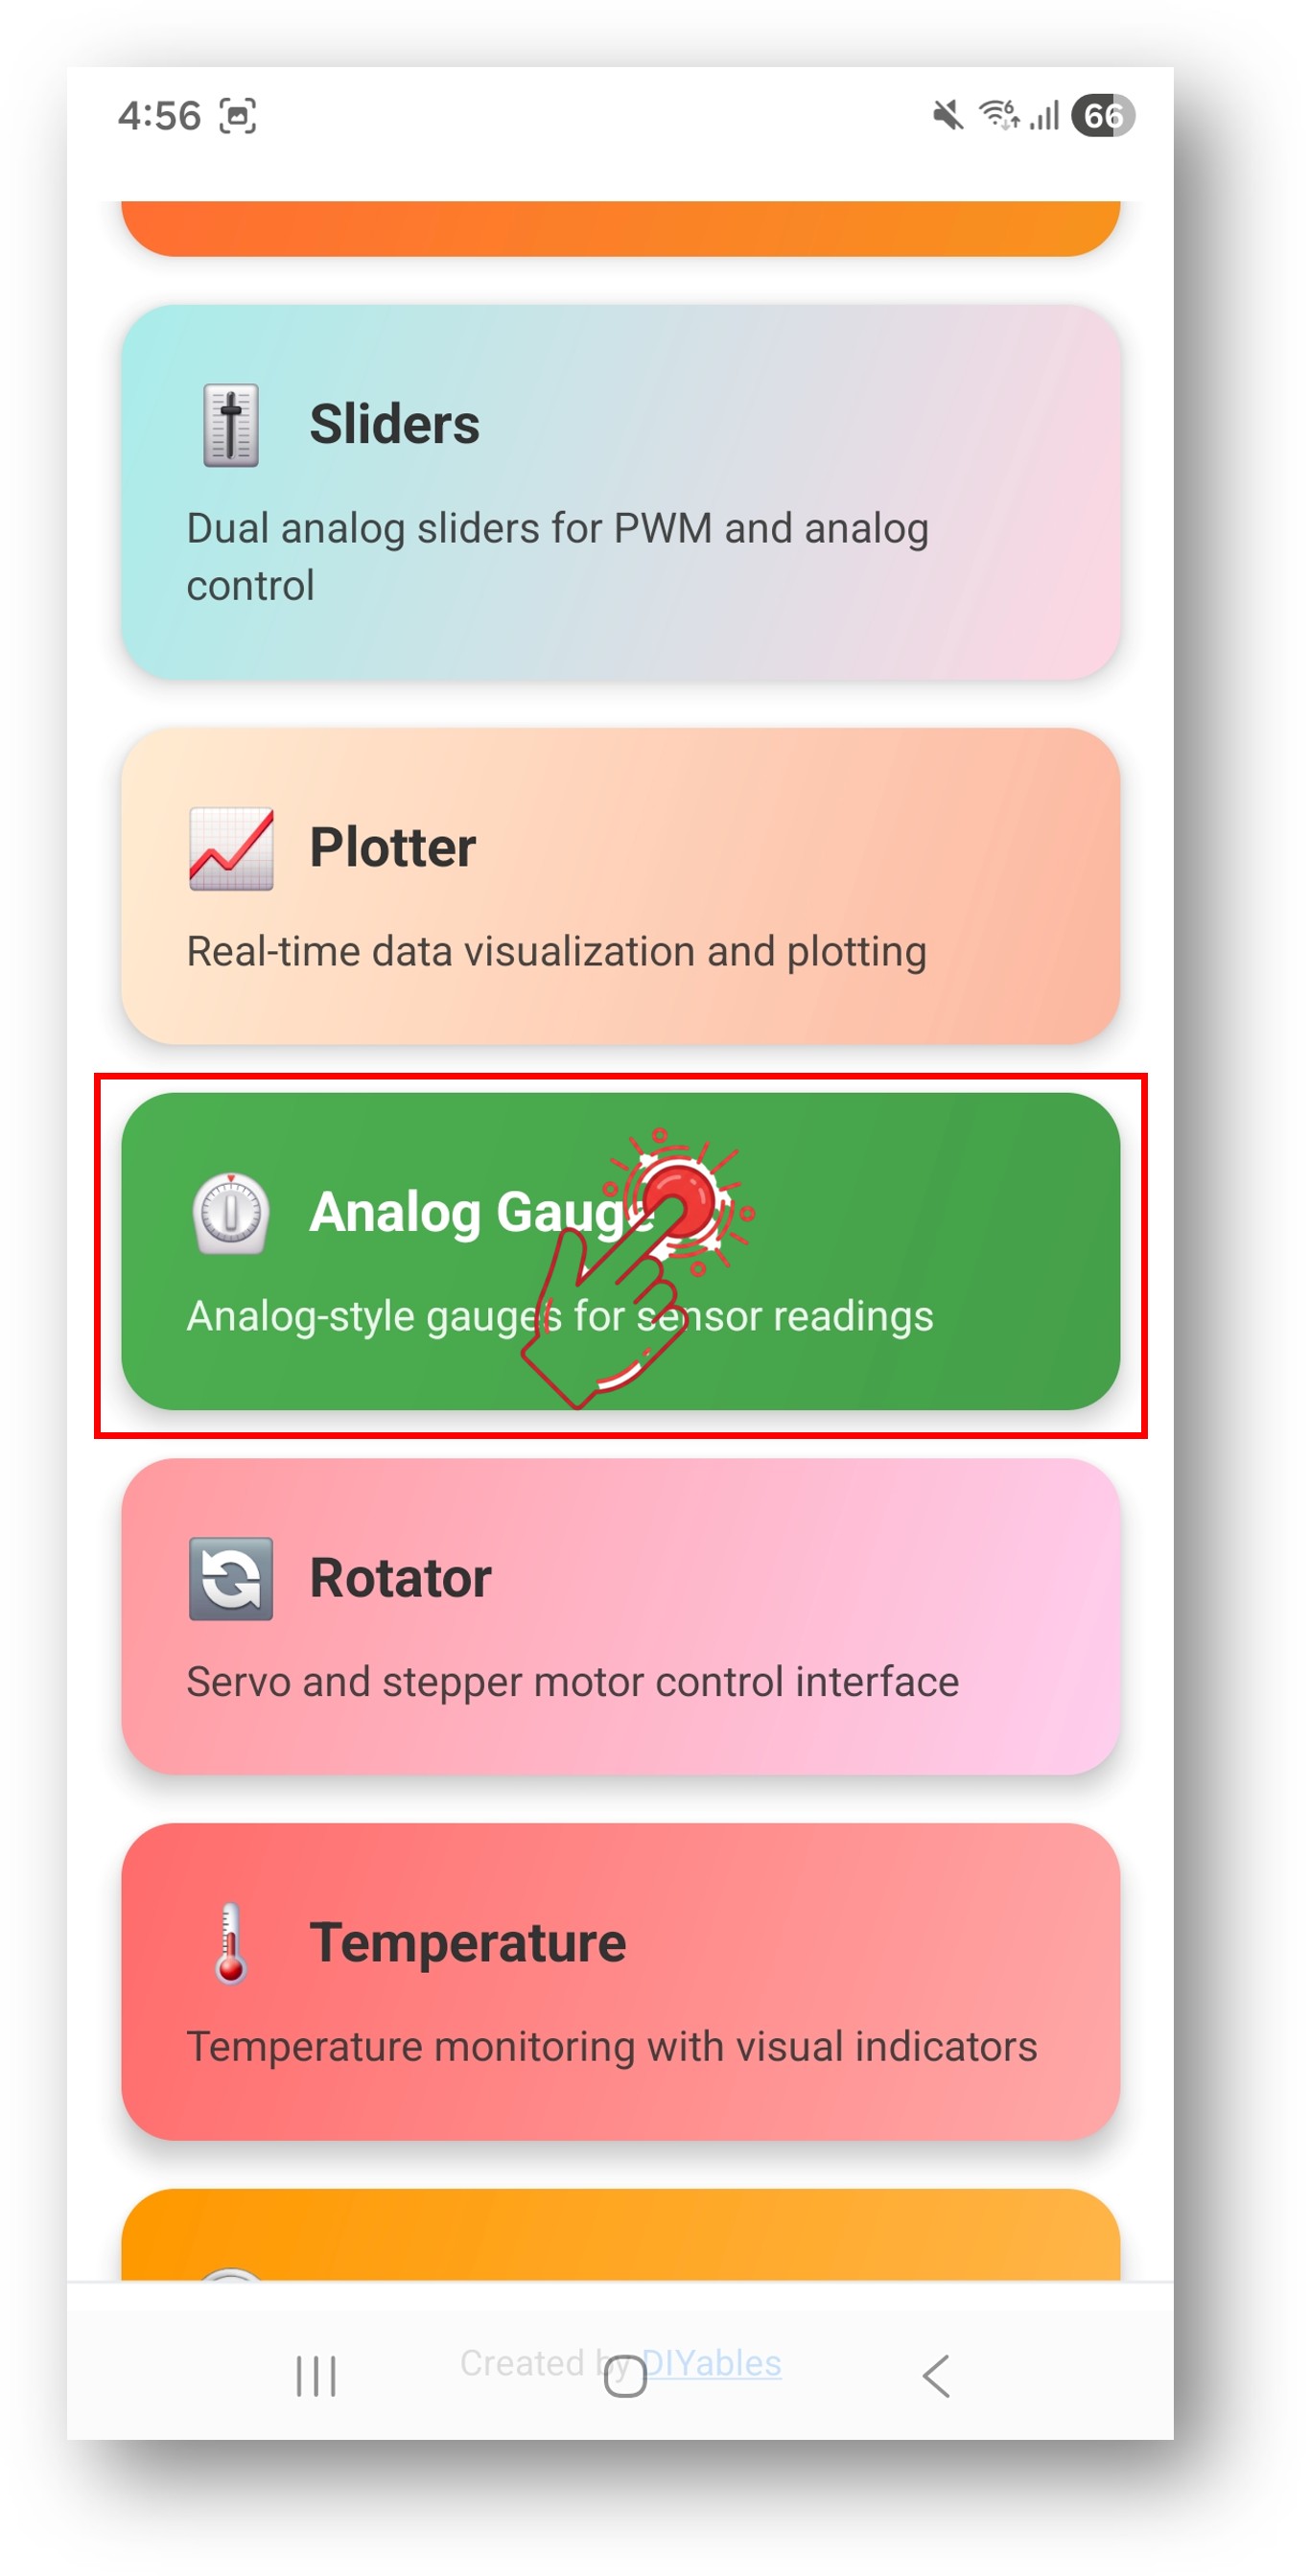
- Sau khi kết nối, ứng dụng tự động quay về màn hình chính. Chọn ứng dụng Analog Gauge từ menu ứng dụng.
Lưu ý: Bạn có thể nhấn vào biểu tượng cài đặt trên màn hình chính để ẩn/hiện các ứng dụng trên màn hình chính. Để biết thêm chi tiết, xem Hướng Dẫn Sử Dụng Ứng Dụng DIYables Bluetooth.
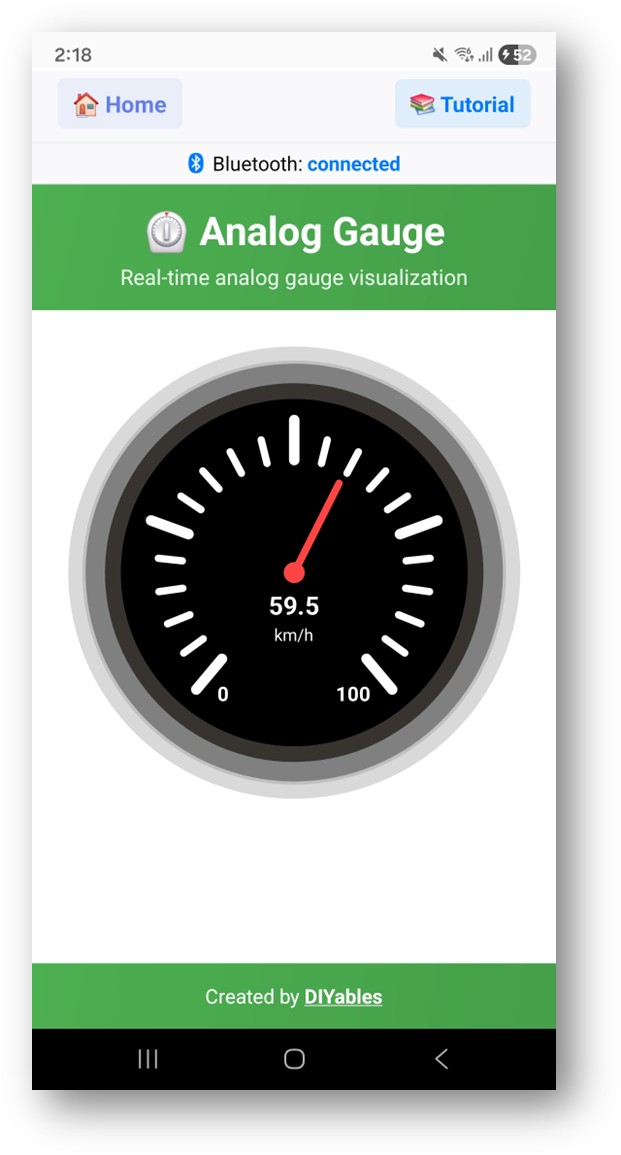
- Bạn sẽ thấy đồng hồ đo analog hiển thị các giá trị với chuyển động kim mượt mà, mô phỏng đồng hồ tốc độ
Bây giờ hãy nhìn lại Serial Monitor trên Arduino IDE. Bạn sẽ thấy:
Tùy Chỉnh Sáng Tạo - Điều Chỉnh Code Cho Dự Án của Bạn
Cấu Hình Phạm Vi và Đơn Vị Đồng Hồ Đo
Gửi Giá Trị Đồng Hồ Đo
Xử Lý Yêu Cầu Giá Trị
Ví Dụ Lập Trình
Đồng Hồ Đo Potentiometer
Màn Hình Mức Pin
Khắc Phục Sự Cố
Các Vấn Đề Thường Gặp
1. Không thể tìm thấy thiết bị trong ứng dụng
- Đảm bảo Arduino UNO R4 WiFi được bật nguồn và sketch đã được upload
- Đảm bảo Bluetooth của điện thoại bạn được bật
- Trên Android 11 trở xuống, cũng bật dịch vụ Location
2. Đồng hồ đo không cập nhật
- Kiểm tra xem send() có được gọi trong vòng lặp không
- Xác minh thời gian khoảng cách cập nhật
- Đảm bảo bluetoothServer.loop() được gọi
3. Đồng hồ đo hiển thị phạm vi sai
- Kiểm tra giá trị min/max trong constructor
- Đảm bảo chuỗi đơn vị đúng
- Các giá trị ngoài phạm vi sẽ bị giới hạn
4. Kim nhảy không đều
- Thêm làm mượt hoặc lấy trung bình cho các đọc cảm biến
- Giảm tần suất cập nhật nếu cần
- Kiểm tra đầu vào analog có nhiễu
5. Upload thất bại hoặc board không được nhận diện
- Cài đặt gói board Arduino UNO R4 mới nhất qua Board Manager
- Thử cáp USB hoặc cổng khác
Ý Tưởng Dự Án
- Đồng hồ tốc độ cho xe RC
- Đồng hồ áp suất cho hệ thống pneumatic
- Chỉ báo mức pin
- Đồng hồ RPM cho motor (động cơ)
- Đồng hồ đo cường độ tín hiệu
Các Bước Tiếp Theo
Sau khi làm chủ ví dụ Bluetooth Analog Gauge, hãy thử:
- Bluetooth Temperature - Cho đồng hồ đo nhiệt độ cụ thể
- Bluetooth Plotter - Cho dữ liệu theo thời gian
- Bluetooth Slider - Cho việc đặt giá trị ngược lại Arduino
- Nhiều Ứng Dụng Bluetooth - Kết hợp đồng hồ đo với các ứng dụng khác
Hỗ Trợ
Để được trợ giúp thêm:
- Kiểm tra tài liệu API Reference
- Truy cập hướng dẫn DIYables
- Diễn đàn cộng đồng Arduino
Bài hướng dẫn liên quan
📱 Ứng dụng đề xuất
 English for KidsHọc tiếng Anh vui nhộn cho trẻ nhỏ.Tải về trênGoogle PlayTải về trênApp Store
 Bubble NoteGhi chú tự xóa — viết như nhắn tin.Tải về trênGoogle PlayTải về trênApp Store
 Tôi Không MuaĐánh bại mua sắm bốc đồng, tiết kiệm hơn.Tải về trênGoogle PlayTải về trênApp Store
 Con Đường Tri ThứcBài thi thử để học mọi thứ.Tải về trênGoogle PlayTải về trênApp Store