Arduino WebRotator Example Hướng Dẫn Điều Khiển Xoay Tương Tác

Tổng Quan

Ví dụ WebRotator tạo ra một giao diện điều khiển đĩa xoay tương tác có thể truy cập từ bất kỳ trình duyệt web nào. Được thiết kế cho Arduino Uno R4 WiFi và nền tảng giáo dục DIYables STEM V4 IoT với khả năng điều khiển động cơ nâng cao, tính năng điều khiển servo/stepper tích hợp, và tích hợp liền mạch với các module giáo dục robotics. Hoàn hảo cho việc điều khiển servo motor, stepper motor, cánh tay robot, anten, hoặc bất kỳ hệ thống nào cần điều khiển xoay chính xác.

Arduino webrotator example - hướng dẫn Điều khiển xoay tương tác

Xem video hướng dẫn từng bước này minh họa cách sử dụng ứng dụng Web Rotator với điều khiển servo motor:

Tính Năng

  • Đĩa Xoay Tương Tác: Giao diện đĩa điều khiển bằng cảm ứng và chuột
  • Hai Chế Độ Hoạt Động: Liên tục (0-360°) và Phạm vi góc giới hạn
  • Phản Hồi Góc Thời Gian Thực: Hiển thị và điều khiển góc chính xác
  • Chỉ Báo Vị Trí Trực Quan: Marker vị trí đĩa rõ ràng với thiết kế gradient
  • Hỗ Trợ Cảm Ứng & Chuột: Hoạt động trên desktop, tablet và thiết bị di động
  • Xử Lý Cấu Hình Tự Động: Đặt chế độ và phạm vi một lần trong constructor
  • Giao Tiếp WebSocket: Phản hồi tức thì không cần refresh trang
  • Giao Diện Chuyên Nghiệp: Thiết kế conic gradient với xoay mượt mà
  • Mở Rộng Nền Tảng: Hiện đã triển khai cho Arduino Uno R4 WiFi, nhưng có thể mở rộng cho các nền tảng phần cứng khác. Xem DIYables_WebApps_ESP32

Phần Cứng Cần Thiết

1×Arduino UNO R4 WiFi
1×Alternatively, DIYables STEM V4 IoT
1×(Tùy chọn) DIYables STEM V4 IoT
1×USB Cable Type-A to Type-C (for USB-A PC)
1×USB Cable Type-C to Type-C (for USB-C PC)
1×động cơ servo (tùy chọn để test)
1×breadboard
1×dây jumper
1×(Khuyến nghị) Screw Terminal Block Shield for Arduino UNO R4
1×(Khuyến nghị) Breadboard Shield for Arduino UNO R4
1×(Khuyến nghị) Enclosure for Arduino UNO R4
1×(Khuyến nghị) Power Splitter for Arduino UNO R4
1×(Khuyến nghị) Prototyping Base Plate & Breadboard Kit for Arduino UNO

Or you can buy the following kits:

1×DIYables STEM V4 IoT Starter Kit (Arduino included)
1×DIYables Sensor Kit (30 sensors/displays)
1×DIYables Sensor Kit (18 sensors/displays)

Hướng Dẫn Cài Đặt

Các Bước Nhanh

Làm theo các hướng dẫn này từng bước:

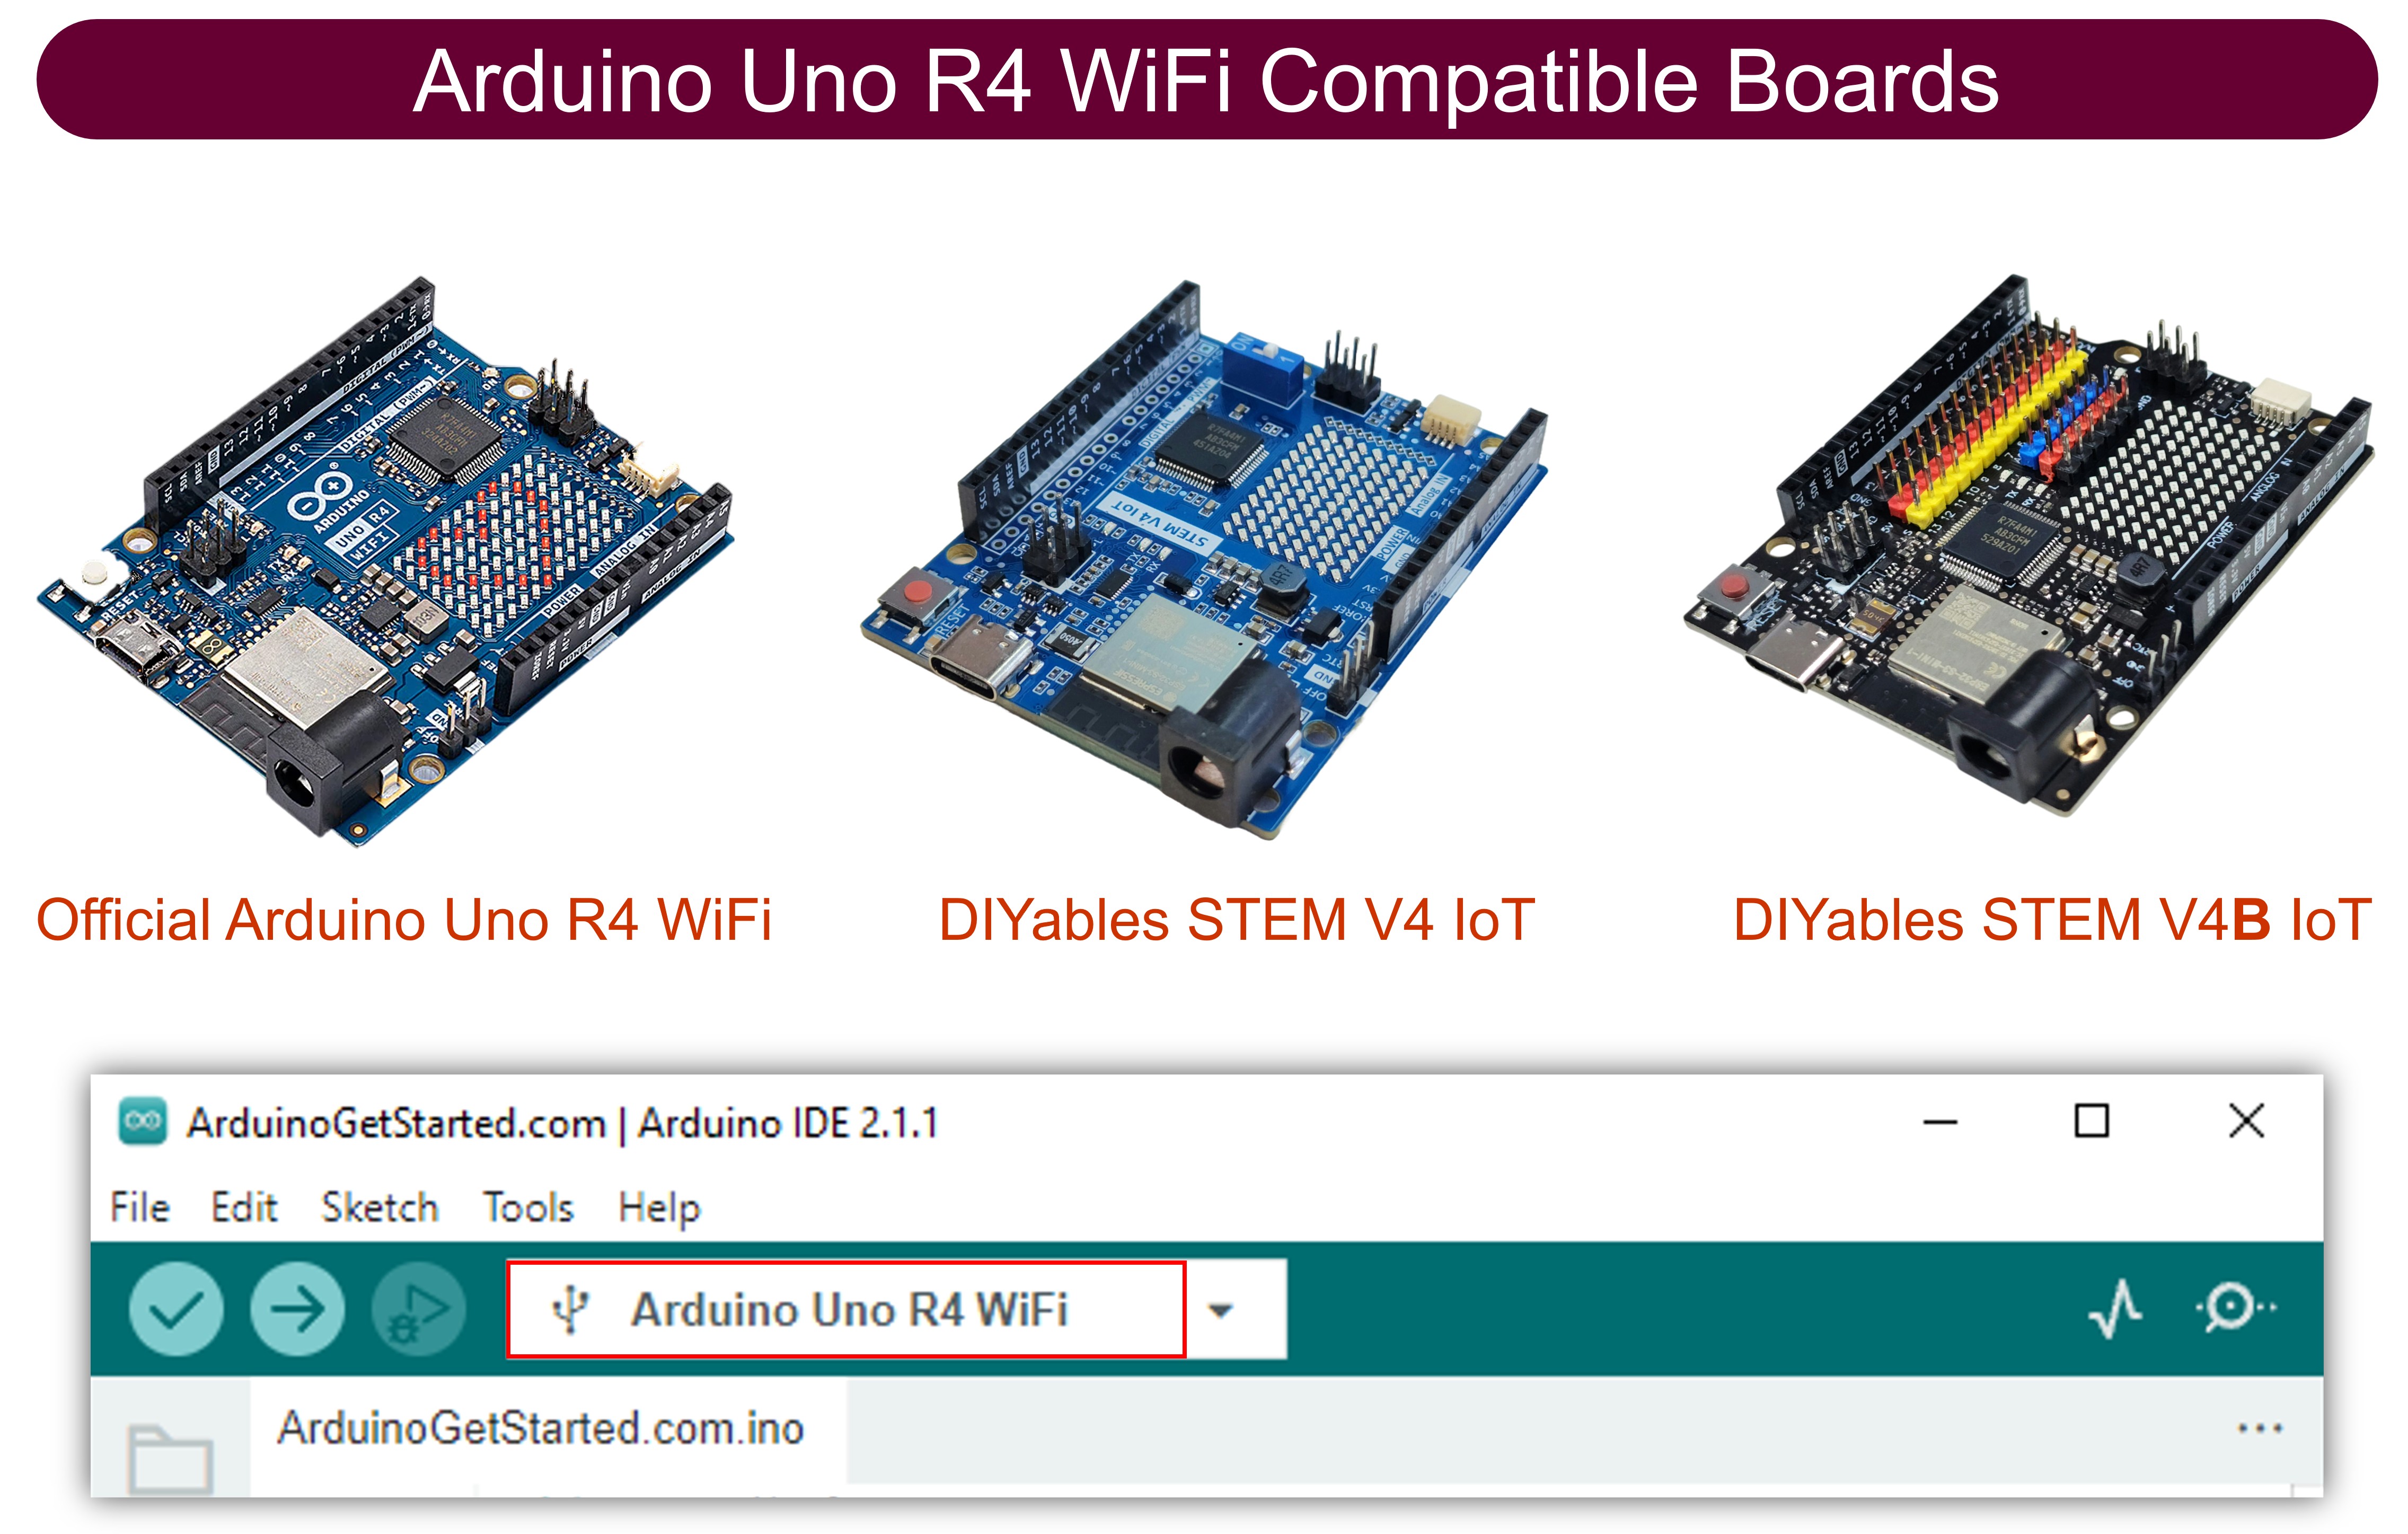
  • Nếu đây là lần đầu bạn sử dụng Arduino Uno R4 WiFi/DIYables STEM V4 IoT, hãy tham khảo hướng dẫn về Arduino UNO R4 - Cài Đặt Phần Mềm.
  • Kết nối board Arduino Uno R4/DIYables STEM V4 IoT với máy tính bằng cáp USB.
  • Khởi động Arduino IDE trên máy tính.
  • Chọn board Arduino Uno R4 phù hợp (ví dụ: Arduino Uno R4 WiFi) và cổng COM.
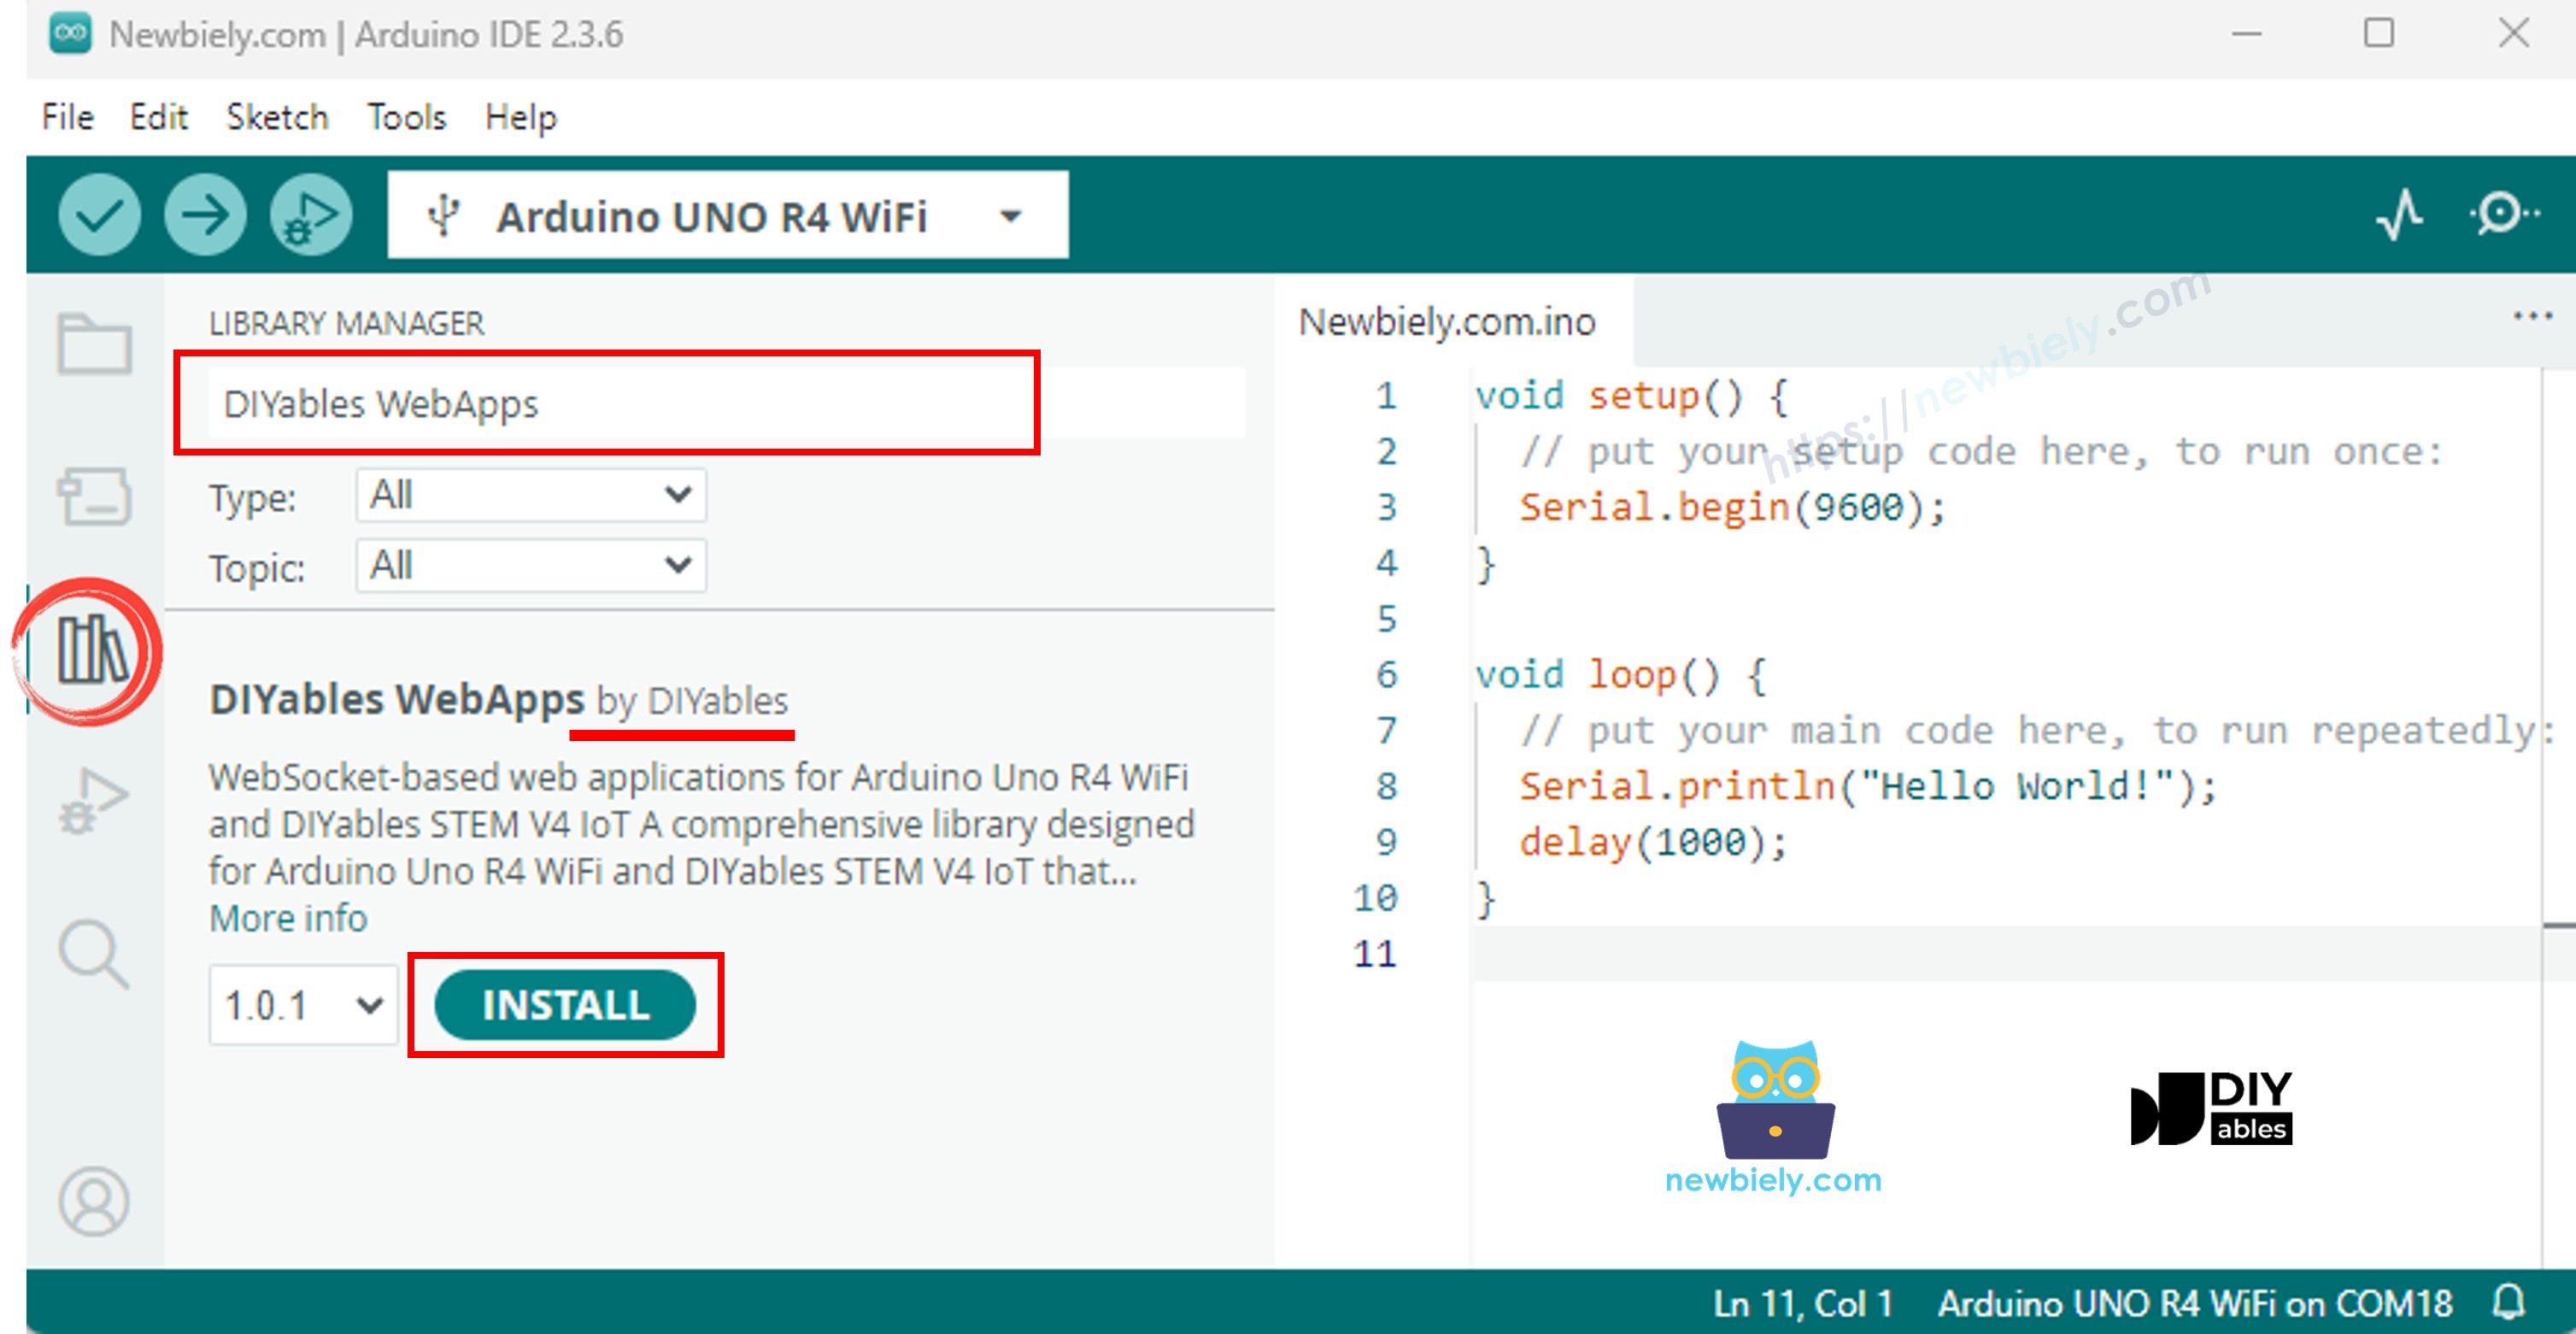
  • Điều hướng đến biểu tượng Libraries ở thanh bên trái của Arduino IDE.
  • Tìm kiếm "DIYables WebApps", sau đó tìm thư viện DIYables WebApps của DIYables
  • Nhấp nút Install để cài đặt thư viện.
Arduino UNO R4 diyables webapps thư viện
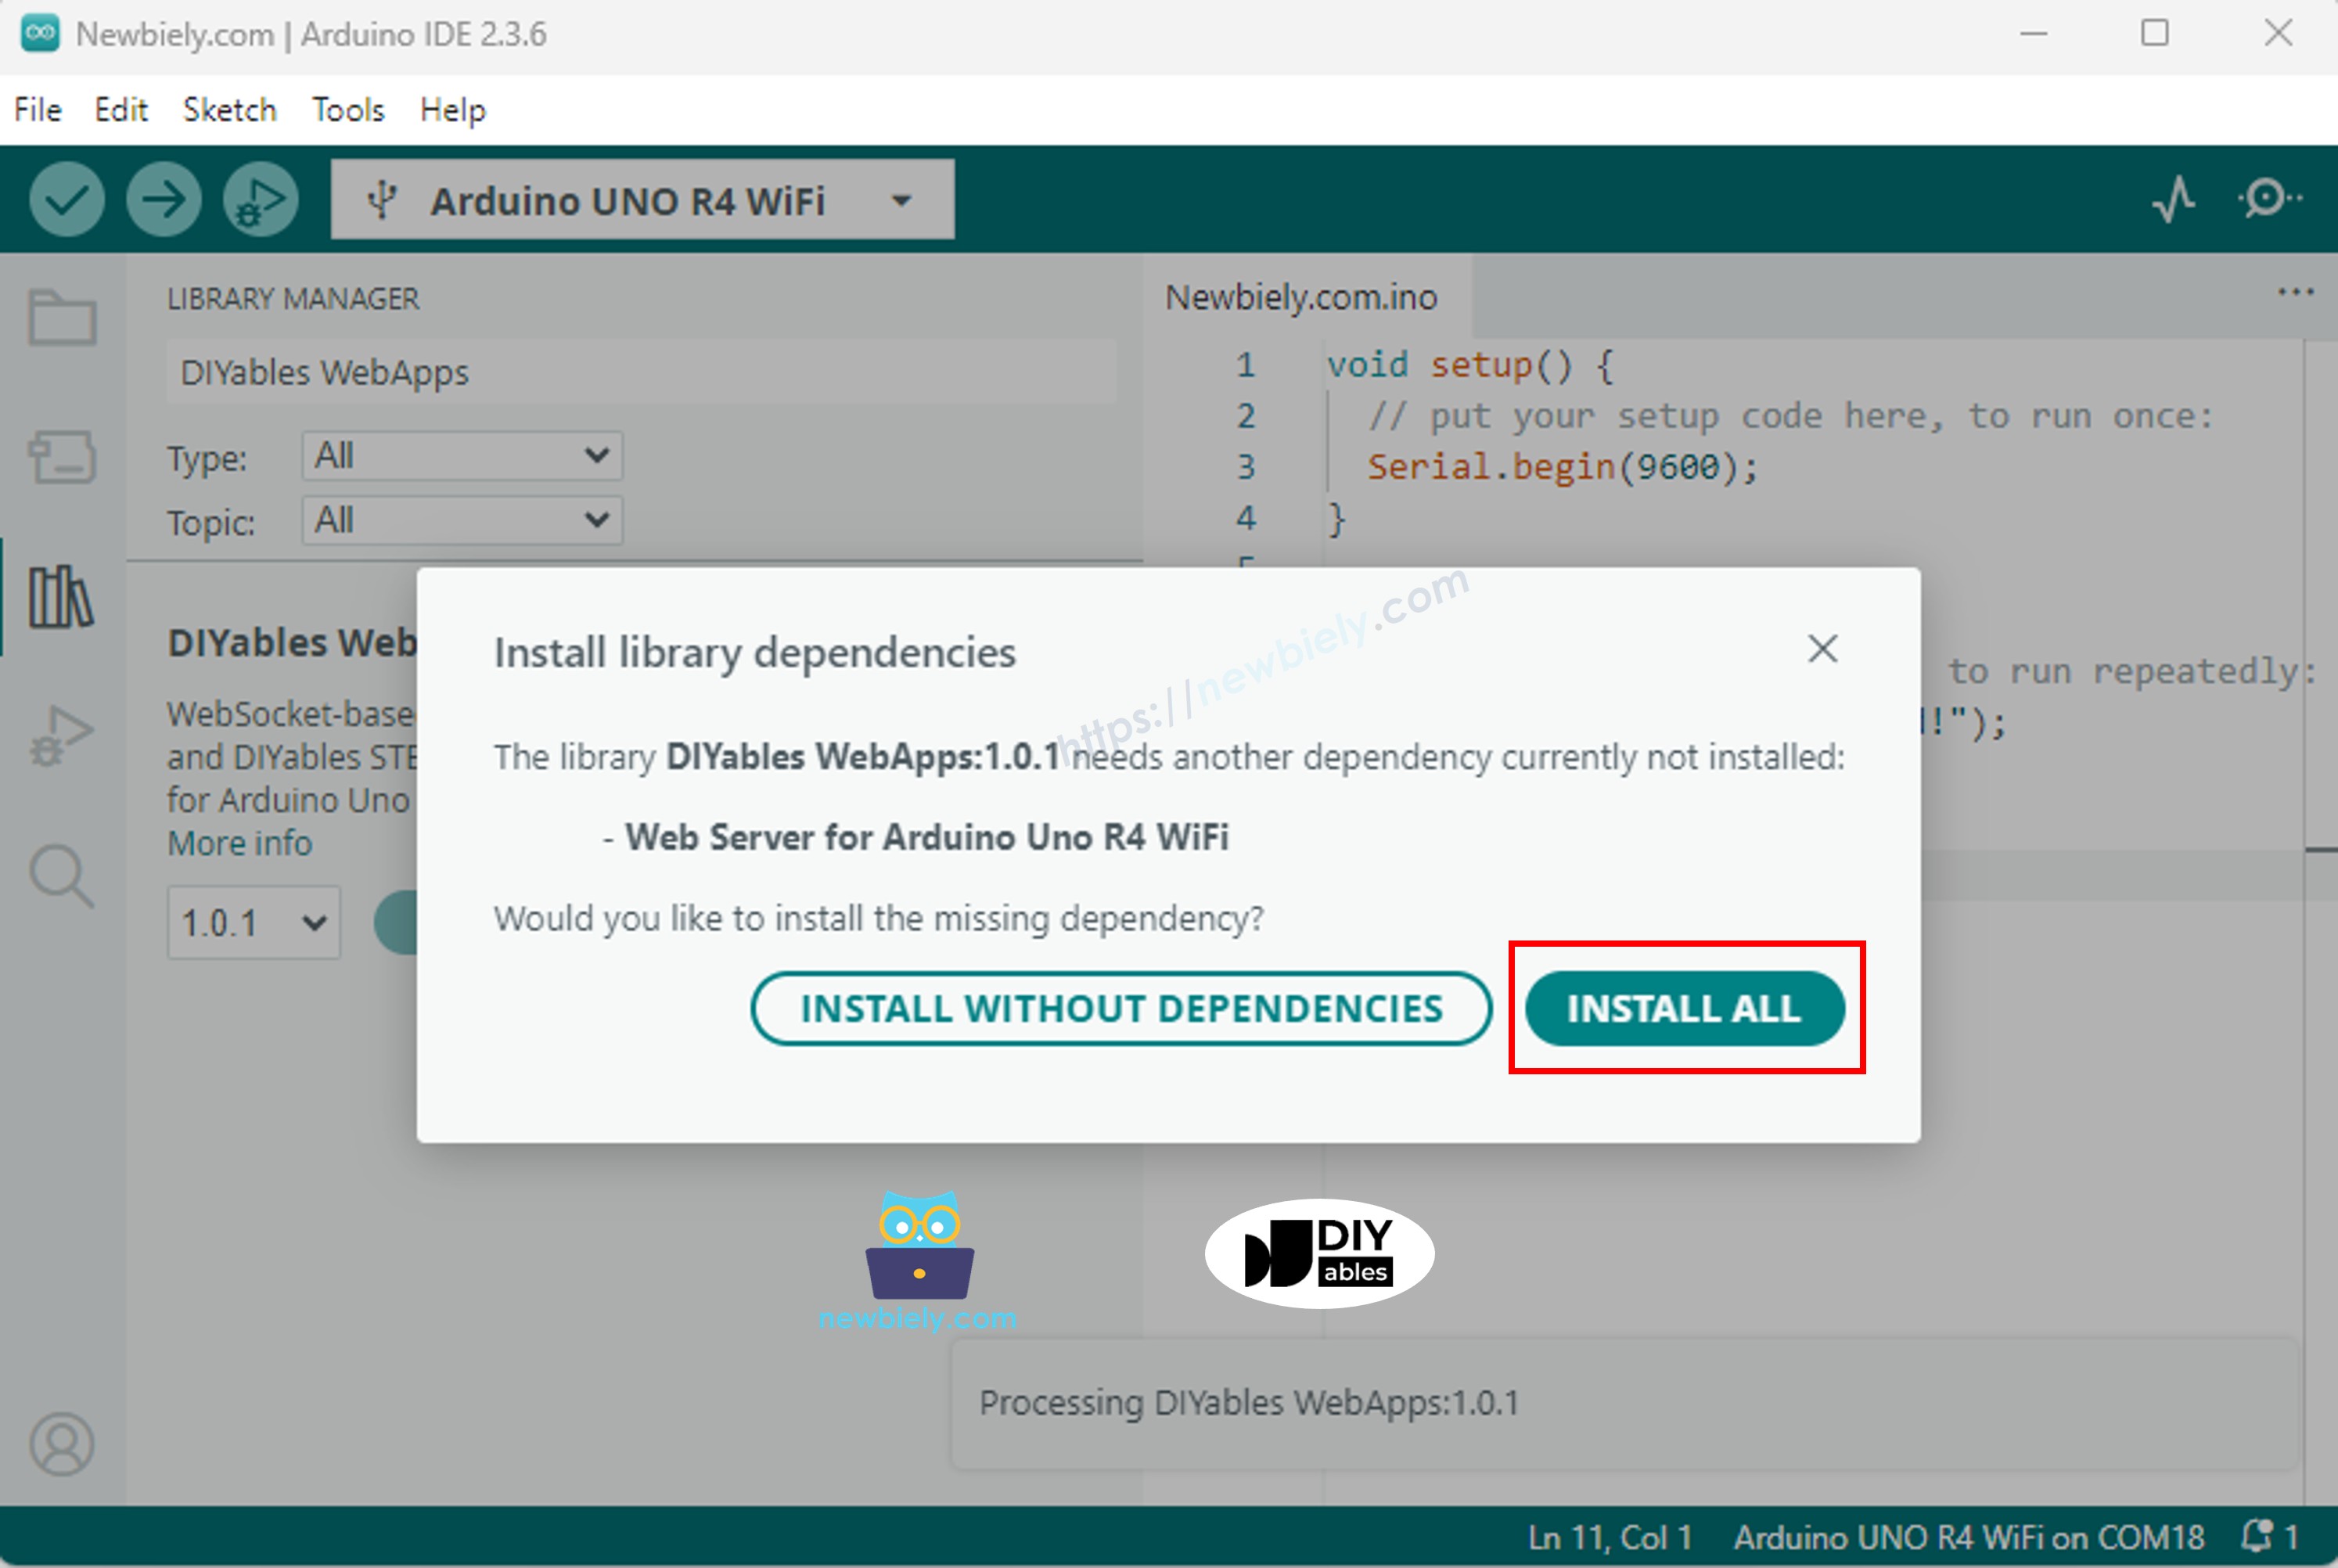
  • Bạn sẽ được yêu cầu cài đặt một số thư viện phụ thuộc khác
  • Nhấp nút Install All để cài đặt tất cả thư viện phụ thuộc.
Arduino UNO R4 diyables webapps dependency
  • Trên Arduino IDE, đi đến File Examples DIYables WebApps WebRotator example, hoặc copy code ở trên và paste vào editor của Arduino IDE
/* * DIYables WebApp Library - Web Rotator Example * * This example demonstrates the Web Rotator application: * - Interactive rotatable disc control * - Two modes: Continuous rotation and Limited angle range * - Real-time angle feedback with WebSocket communication * - Touch and mouse support for desktop and mobile * * Features: * - Configurable rotation modes (continuous or limited) * - Beautiful conic gradient disc with visual indicator * - Real-time angle display and feedback * - WebSocket communication for live updates * - Professional responsive UI design * * Hardware: Arduino Uno R4 WiFi or DIYables STEM V4 IoT * * Setup: * 1. Update WiFi credentials below * 2. Upload the sketch to your Arduino * 3. Open Serial Monitor to see the IP address * 4. Navigate to http://[arduino-ip]/web-rotator in your web browser */ #include <DIYablesWebApps.h> // WiFi credentials - UPDATE THESE WITH YOUR NETWORK const char WIFI_SSID[] = "YOUR_WIFI_SSID"; const char WIFI_PASSWORD[] = "YOUR_WIFI_PASSWORD"; // Create WebApp server and page instances UnoR4ServerFactory serverFactory; DIYablesWebAppServer webAppsServer(serverFactory, 80, 81); DIYablesHomePage homePage; // Rotator configuration constants const int ROTATOR_MODE = ROTATOR_MODE_CONTINUOUS; // Change to ROTATOR_MODE_LIMITED for limited rotation const float MIN_ANGLE = 0.0; // Minimum angle for limited mode const float MAX_ANGLE = 180.0; // Maximum angle for limited mode // Create WebRotator page with configuration //DIYablesWebRotatorPage webRotatorPage(ROTATOR_MODE_CONTINUOUS); DIYablesWebRotatorPage webRotatorPage(ROTATOR_MODE_LIMITED, MIN_ANGLE, MAX_ANGLE); // Variables for angle tracking float currentAngle = 0.0; void setup() { Serial.begin(9600); delay(1000); // TODO: Initialize your hardware pins here Serial.println("DIYables WebApp - Web Rotator Example"); // Add pages to server webAppsServer.addApp(&homePage); webAppsServer.addApp(&webRotatorPage); // Set 404 Not Found page (optional - for better user experience) webAppsServer.setNotFoundPage(DIYablesNotFoundPage()); // Set callback functions for WebRotator webRotatorPage.onRotatorAngleFromWeb(onRotatorAngleReceived); // Start server webAppsServer.begin(WIFI_SSID, WIFI_PASSWORD); if (ROTATOR_MODE == ROTATOR_MODE_LIMITED) { Serial.println("\nRotator Mode: Limited"); Serial.print("Angle Range: "); Serial.print(MIN_ANGLE); Serial.print("° to "); Serial.print(MAX_ANGLE); Serial.println("°"); } else { Serial.println("\nRotator Mode: Continuous Rotation"); } Serial.println("\nTurn the disc in your web browser to control the rotator!"); } void loop() { // Handle web server and WebSocket connections webAppsServer.loop(); // Simulate rotator movement or control actual hardware here // For demonstration, we'll just echo back the received angle delay(10); } /** * Callback function called when angle is received from web interface * This is where you would control your actual rotator hardware */ void onRotatorAngleReceived(float angle) { currentAngle = angle; Serial.print("Rotator angle received: "); Serial.print(angle, 1); Serial.println("°"); // TODO: Add your rotator control code here // Examples: // - Control servo motor: servo.write(map(angle, 0, 360, 0, 180)); // - Control stepper motor: stepper.moveTo(angle * stepsPerDegree); // - Control DC motor with encoder feedback // - Send commands to external rotator controller // Note: No echo back to avoid interfering with smooth web interface rotation } /** * Example function to change rotator mode at runtime * Call this function to switch between continuous and limited modes */ void setRotatorMode(int mode, float minAng = 0, float maxAng = 360) { webRotatorPage.setRotatorMode(mode, minAng, maxAng); Serial.print("Rotator mode changed to: "); if (mode == ROTATOR_MODE_LIMITED) { Serial.print("Limited ("); Serial.print(minAng); Serial.print("° to "); Serial.print(maxAng); Serial.println("°)"); } else { Serial.println("Continuous"); } } /** * Example function to send angle updates to web interface * Call this function when your rotator position changes */ void sendAngleUpdate(float angle) { currentAngle = angle; webRotatorPage.sendToWebRotator(angle); Serial.print("Angle update sent to web: "); Serial.print(angle, 1); Serial.println("°"); }
  • Cấu hình thông tin đăng nhập WiFi trong code bằng cách cập nhật các dòng này:
const char WIFI_SSID[] = "YOUR_WIFI_NETWORK"; const char WIFI_PASSWORD[] = "YOUR_WIFI_PASSWORD";
  • Nhấp nút Upload trên Arduino IDE để upload code lên Arduino UNO R4/DIYables STEM V4 IoT
  • Mở Serial Monitor
  • Kiểm tra kết quả trên Serial Monitor. Nó sẽ trông giống như dưới đây
COM6
Send
DIYables WebApp - Web Rotator Example INFO: Added app / INFO: Added app /web-rotator DIYables WebApp Library Platform: Arduino Uno R4 WiFi Network connected! IP address: 192.168.0.2 HTTP server started on port 80 Configuring WebSocket server callbacks... WebSocket server started on port 81 WebSocket URL: ws://192.168.0.2:81 WebSocket server started on port 81 ========================================== DIYables WebApp Ready! ========================================== 📱 Web Interface: http://192.168.0.2 🔗 WebSocket: ws://192.168.0.2:81 📋 Available Applications: 🏠 Home Page: http://192.168.0.2/ 🔄 Web Rotator: http://192.168.0.2/web-rotator ==========================================
Autoscroll Show timestamp
Clear output
9600 baud  
Newline  
  • Nếu bạn không thấy gì, hãy khởi động lại board Arduino.
  • Mở trình duyệt web trên PC hoặc điện thoại di động.
  • Gõ địa chỉ IP hiển thị trong Serial Monitor vào trình duyệt web
  • Ví dụ: http://192.168.1.100
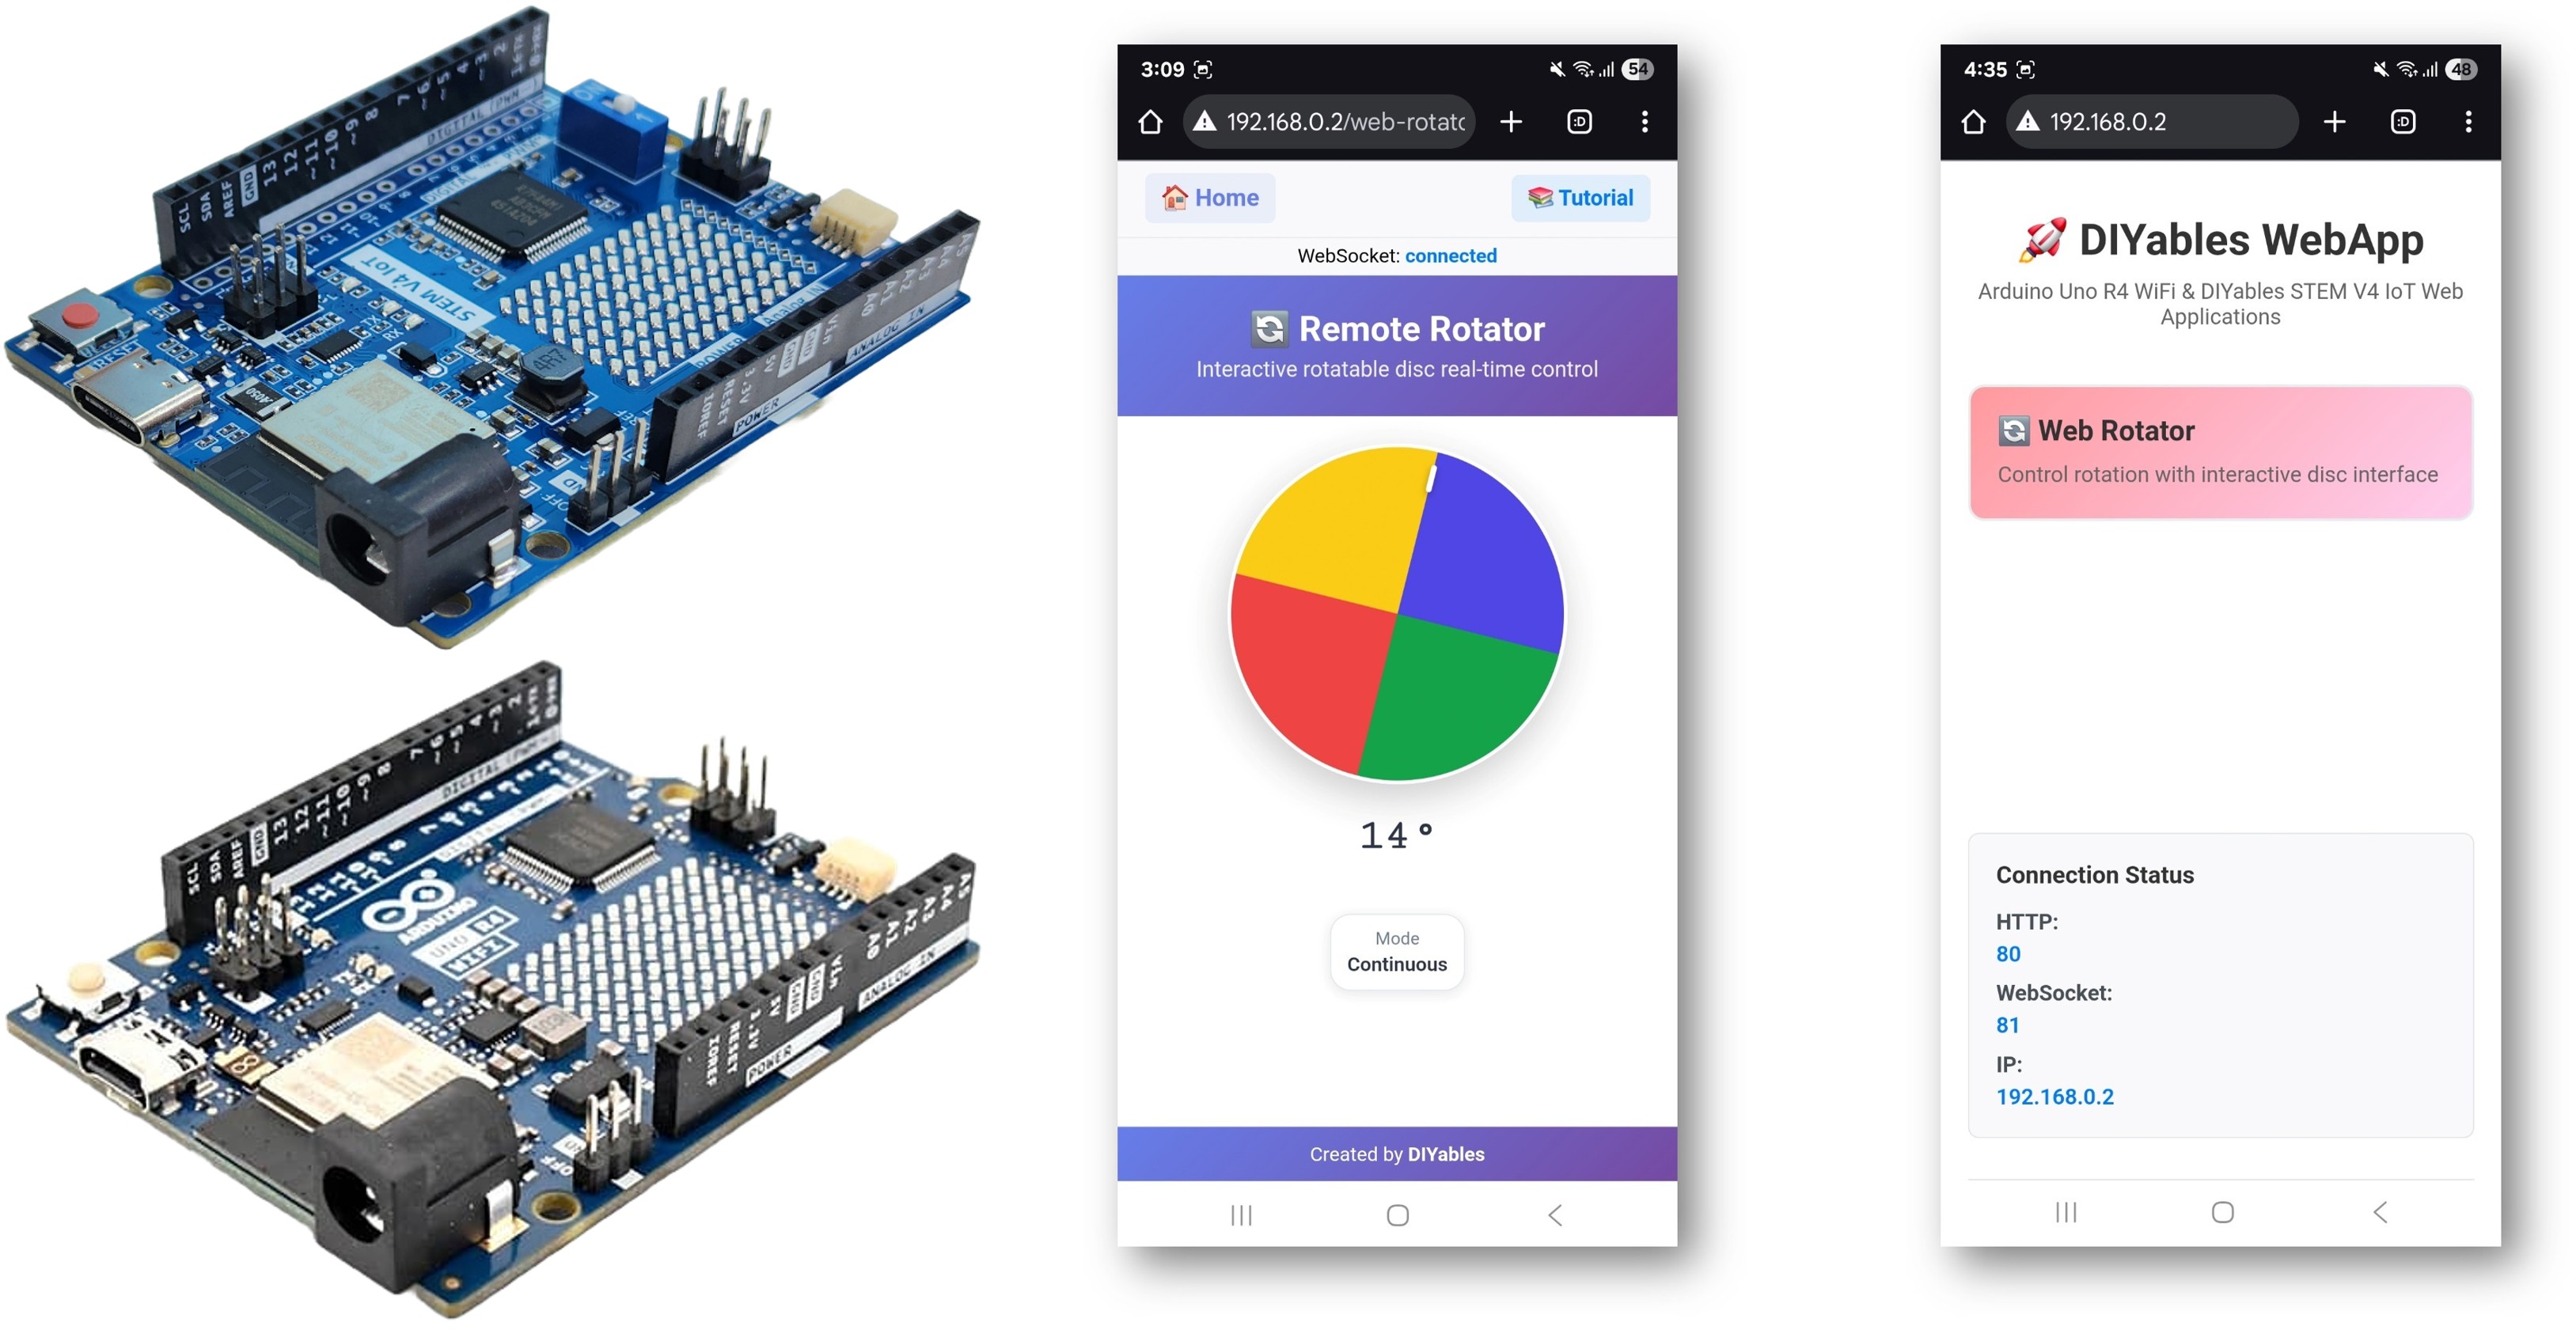
  • Bạn sẽ thấy trang chủ như hình dưới:
Arduino UNO R4 diyables webapp home page with web rotator app
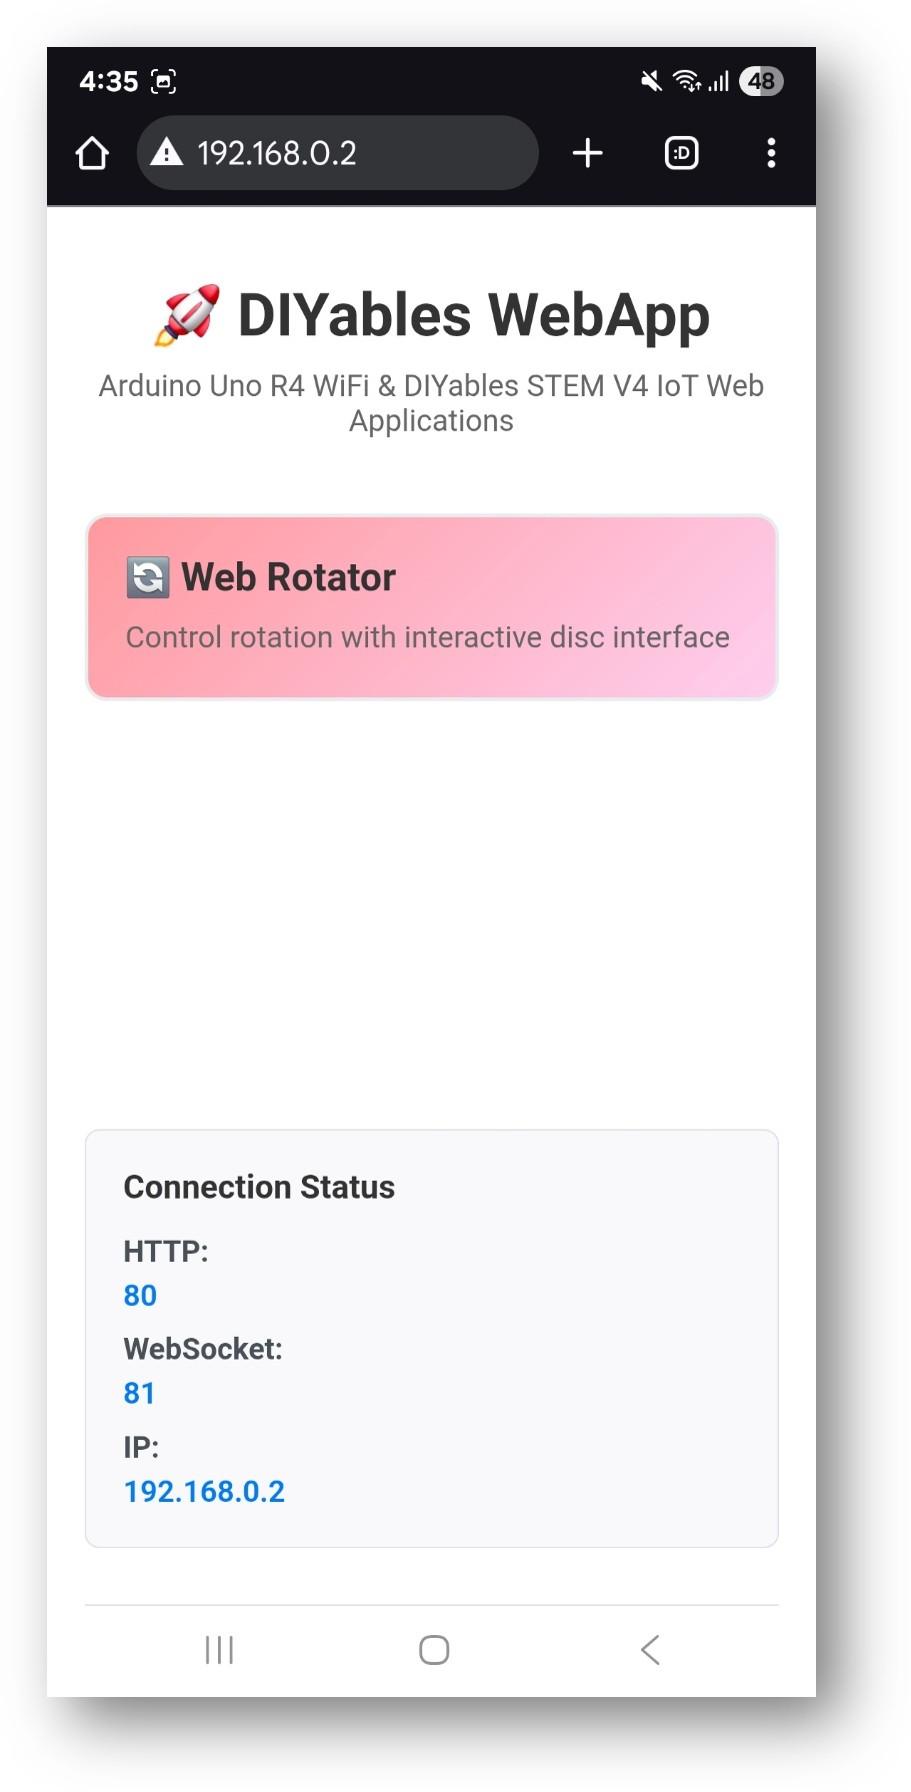
  • Nhấp vào link Web Rotator, bạn sẽ thấy giao diện của ứng dụng Web Rotator như dưới đây:
Arduino UNO R4 diyables webapp web rotator app
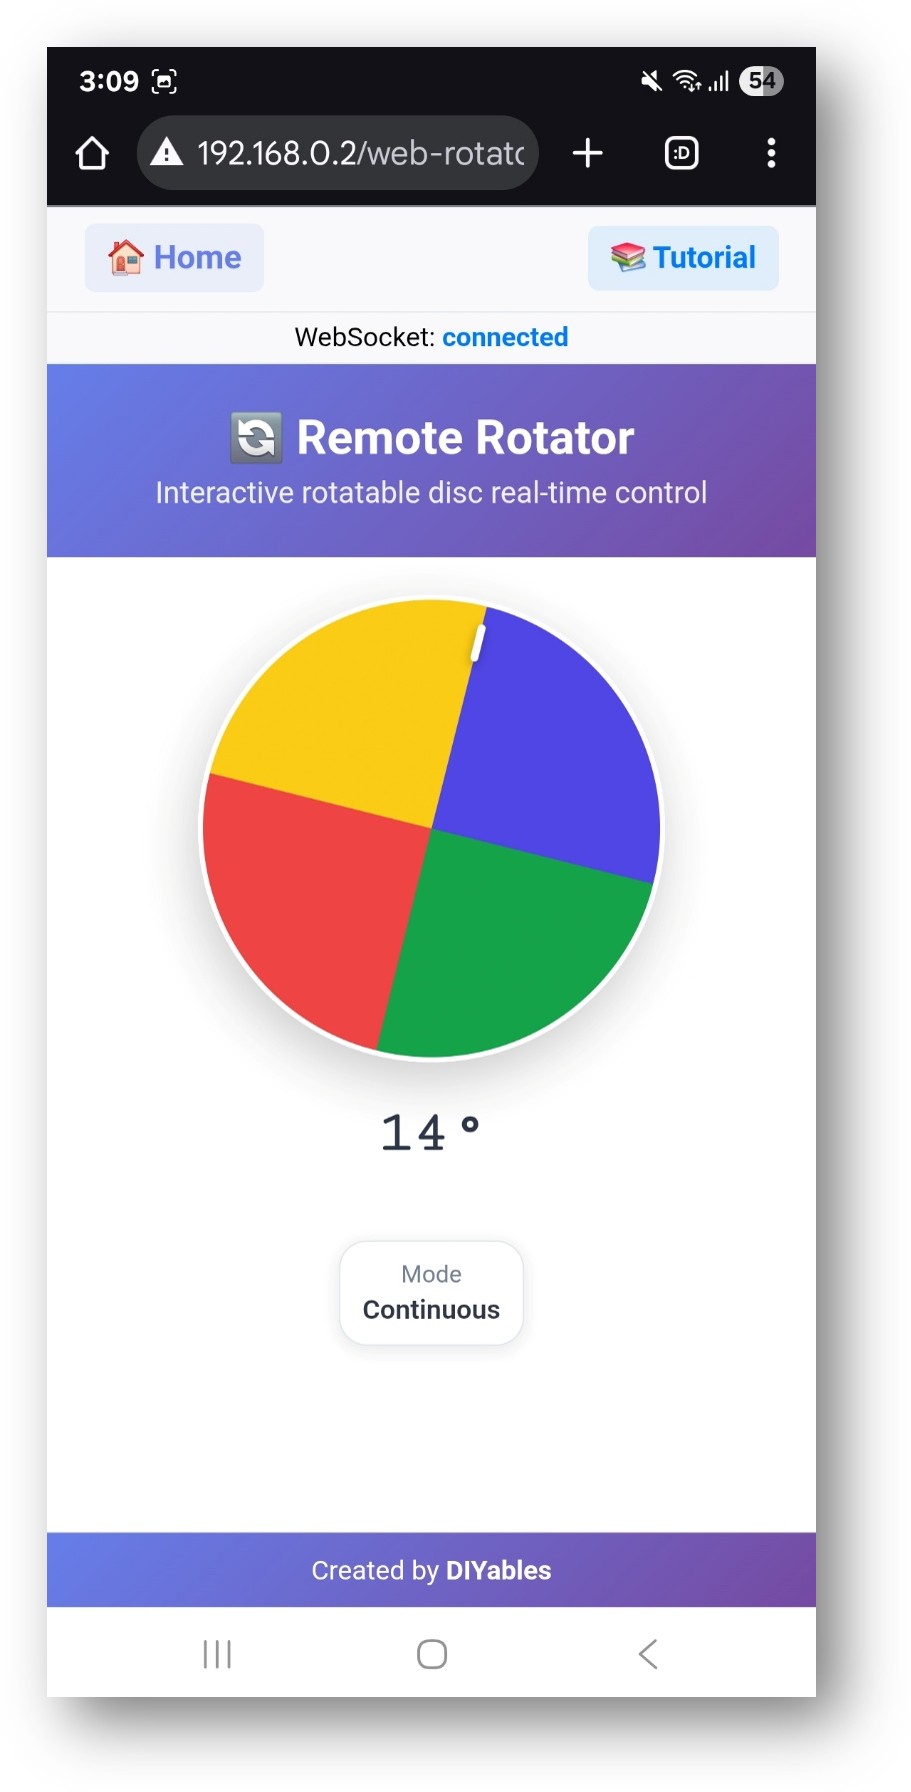
  • Hoặc bạn cũng có thể truy cập trang trực tiếp bằng địa chỉ IP theo sau là /web-rotator. Ví dụ: http://192.168.1.100/web-rotator
  • Bạn sẽ thấy một đĩa xoay tương tác mà bạn có thể kéo để điều khiển xoay

Tính Năng Giao Diện Web

Điều Khiển Đĩa Xoay

  • Đĩa Tương Tác: Nhấp và kéo để xoay đĩa
  • Phản Hồi Trực Quan: Hiển thị góc và chỉ báo vị trí thời gian thực
  • Hoạt Ảnh Mượt Mà: Xoay mượt với thiết kế gradient chuyên nghiệp
  • Hiển Thị Góc: Góc hiện tại hiển thị bằng độ
  • Chỉ Báo Chế Độ: Hiển thị chế độ xoay hiện tại và giới hạn

Hỗ Trợ Cảm Ứng và Chuột

  • Điều Khiển Desktop: Nhấp và kéo chuột
  • Điều Khiển Mobile: Cử chỉ chạm và vuốt
  • Thiết Kế Responsive: Tối ưu cho mọi kích thước màn hình
  • Dấu Hiệu Trực Quan: Chỉ báo rõ ràng cho vùng tương tác

Cấu Hình Code

Thiết Lập Rotator

// Chế độ xoay liên tục (toàn bộ 0-360 độ) DIYablesWebRotatorPage webRotatorPage(ROTATOR_MODE_CONTINUOUS); // Chế độ xoay giới hạn với phạm vi tùy chỉnh DIYablesWebRotatorPage webRotatorPage(ROTATOR_MODE_LIMITED, 0.0, 180.0); // Thiết lập angle callback webRotatorPage.onRotatorAngleFromWeb(onRotatorAngleReceived);

Nhận Lệnh Góc

void onRotatorAngleReceived(float angle) { Serial.print("Rotator angle received: "); Serial.print(angle, 1); Serial.println("°"); // Điều khiển phần cứng của bạn ở đây }

Chế Độ Hoạt Động

Chế Độ Liên Tục

  • Xoay Toàn Phần: 0° đến 360° và hơn nữa, không có giới hạn trên
  • Không Wrap Around: Giá trị góc có thể tăng trên 360° và không reset về 0°
  • Trường Hợp Sử Dụng: Servo xoay liên tục, anten, bàn xoay
  • Cấu Hình: ROTATOR_MODE_CONTINUOUS

Chế Độ Giới Hạn

  • Phạm Vi Tùy Chỉnh: Định nghĩa góc tối thiểu và tối đa
  • Giới Hạn Biên: Ngăn xoay vượt quá giới hạn đặt
  • Trường Hợp Sử Dụng: Servo tiêu chuẩn, cánh tay robot, hệ thống lái
  • Cấu Hình: ROTATOR_MODE_LIMITED, minAngle, maxAngle

Tích Hợp Phần Cứng

Điều Khiển Servo Motor

Lưu ý: Đoạn code dưới đây là một ví dụ một phần và phải được tích hợp vào sketch Arduino chính của bạn để hoạt động đúng cách.

#include <Servo.h> Servo myServo; // Đặt rotator ở chế độ giới hạn: 0 đến 180 độ DIYablesWebRotatorPage webRotatorPage(ROTATOR_MODE_LIMITED, 0.0, 180.0); void setup() { myServo.attach(9); // Servo ở pin 9 webRotatorPage.onRotatorAngleFromWeb(onRotatorAngleReceived); } void onRotatorAngleReceived(float angle) { // Viết trực tiếp góc (0-180) cho servo myServo.write((int)angle); }

Điều Khiển Stepper Motor

#include <Stepper.h> const int stepsPerRevolution = 200; Stepper myStepper(stepsPerRevolution, 8, 9, 10, 11); void onRotatorAngleReceived(float angle) { // Tính toán bước cho góc mong muốn int steps = (angle / 360.0) * stepsPerRevolution; myStepper.step(steps); }

Tùy Chọn Tùy Chỉnh

Phạm Vi Góc

  • Góc Tối Thiểu: Đặt xoay thấp nhất được phép
  • Góc Tối Đa: Đặt xoay cao nhất được phép
  • Vị Trí Mặc Định: Góc bắt đầu khi hệ thống khởi động
  • Độ Phân Giải: Điều khiển độ chính xác của cập nhật góc

Diện Mạo Trực Quan

Giao diện web tự động thích ứng với cấu hình của bạn:

  • Hiển Thị Phạm Vi: Hiển thị giới hạn góc đã cấu hình
  • Chỉ Báo Chế Độ: Hiển thị chế độ hoạt động hiện tại
  • Marker Vị Trí: Chỉ báo trực quan của góc hiện tại
  • Thiết Kế Gradient: Diện mạo chuyên nghiệp với màu sắc mượt mà

Arduino Uno R4 Web Rotator với Servo Motor

Dưới đây là code hoàn chỉnh để áp dụng web app này với servo motor:

#include <DIYablesWebApps.h> #include <Servo.h> Servo myServo; const int SERVO_PIN = 9; // WiFi credentials - UPDATE THESE WITH YOUR NETWORK const char WIFI_SSID[] = "YOUR_WIFI_SSID"; const char WIFI_PASSWORD[] = "YOUR_WIFI_PASSWORD"; // Create WebApp server and page instances UnoR4ServerFactory serverFactory; DIYablesWebAppServer webAppsServer(serverFactory, 80, 81); DIYablesHomePage homePage; // Rotator configuration constants const int ROTATOR_MODE = ROTATOR_MODE_CONTINUOUS; // Change to ROTATOR_MODE_LIMITED for limited rotation const float MIN_ANGLE = 0.0; // Minimum angle for limited mode const float MAX_ANGLE = 180.0; // Maximum angle for limited mode // Create WebRotator page with configuration //DIYablesWebRotatorPage webRotatorPage(ROTATOR_MODE_CONTINUOUS); DIYablesWebRotatorPage webRotatorPage(ROTATOR_MODE_LIMITED, MIN_ANGLE, MAX_ANGLE); // Variables for angle tracking float currentAngle = 0.0; void setup() { Serial.begin(9600); delay(1000); // TODO: Initialize your hardware pins here myServo.attach(SERVO_PIN, 500, 2400); // SG90 Serial.println("DIYables WebApp - Web Rotator Example"); // Add pages to server webAppsServer.addApp(&homePage); webAppsServer.addApp(&webRotatorPage); // Set 404 Not Found page (optional - for better user experience) webAppsServer.setNotFoundPage(DIYablesNotFoundPage()); // Set callback functions for WebRotator webRotatorPage.onRotatorAngleFromWeb(onRotatorAngleReceived); // Start server webAppsServer.begin(WIFI_SSID, WIFI_PASSWORD); delay(3000); Serial.print("WiFi Status: "); Serial.println(WiFi.status()); Serial.print("Local IP: "); Serial.println(WiFi.localIP()); if (ROTATOR_MODE == ROTATOR_MODE_LIMITED) { Serial.println("\nRotator Mode: Limited"); Serial.print("Angle Range: "); Serial.print(MIN_ANGLE); Serial.print("° to "); Serial.print(MAX_ANGLE); Serial.println("°"); } else { Serial.println("\nRotator Mode: Continuous Rotation"); } Serial.println("\nTurn the disc in your web browser to control the rotator!"); } void loop() { // Handle web server and WebSocket connections webAppsServer.loop(); // Simulate rotator movement or control actual hardware here // For demonstration, we'll just echo back the received angle delay(10); } /** * Callback function called when angle is received from web interface * This is where you would control your actual rotator hardware */ void onRotatorAngleReceived(float angle) { currentAngle = angle; Serial.print("Rotator angle received: "); Serial.print(angle, 1); Serial.println("°"); // TODO: Add your rotator control code here // Examples: // - Control servo motor: servo.write(map(angle, 0, 360, 0, 180)); // - Control stepper motor: stepper.moveTo(angle * stepsPerDegree); // - Control DC motor with encoder feedback // - Send commands to external rotator controller // Note: No echo back to avoid interfering with smooth web interface rotation angle = constrain(angle, 0, 180); int servoAngle = 180 - angle; myServo.write(servoAngle); } /** * Example function to change rotator mode at runtime * Call this function to switch between continuous and limited modes */ void setRotatorMode(int mode, float minAng = 0, float maxAng = 360) { webRotatorPage.setRotatorMode(mode, minAng, maxAng); Serial.print("Rotator mode changed to: "); if (mode == ROTATOR_MODE_LIMITED) { Serial.print("Limited ("); Serial.print(minAng); Serial.print("° to "); Serial.print(maxAng); Serial.println("°)"); } else { Serial.println("Continuous"); } } /** * Example function to send angle updates to web interface * Call this function when your rotator position changes */ void sendAngleUpdate(float angle) { currentAngle = angle; webRotatorPage.sendToWebRotator(angle); Serial.print("Angle update sent to web: "); Serial.print(angle, 1); Serial.println("°"); }

Dưới đây là video hướng dẫn từng bước minh họa cách sử dụng servo motor với ứng dụng Web Rotator:

Các Trường Hợp Sử Dụng Phổ Biến

Dự Án Giáo Dục

  • Học Điều Khiển Servo: Hiểu PWM và hoạt động servo
  • Giáo Dục Robotics: Định vị cánh tay, điều khiển khớp
  • Định Vị Anten: Điều khiển anten định hướng
  • Camera Pan/Tilt: Định vị camera từ xa

Ứng Dụng Thực Tế

  • Tự Động Hóa Nhà: Rèm tự động, cửa gió, cửa ra vào
  • Robotics: Khớp cánh tay robot, lái robot di động
  • Dự Án IoT: Hệ thống định vị từ xa
  • Công Nghiệp: Định vị tự động, điều khiển van

Khắc Phục Sự Cố

Xoay Không Hoạt Động

  • Kiểm tra kết nối WiFi và trạng thái WebSocket
  • Xác minh hàm callback được thiết lập đúng
  • Đảm bảo servo/motor được kết nối đúng
  • Kiểm tra nguồn điện cho động cơ

Giá Trị Góc Không Chính Xác

  • Xác minh ánh xạ góc cho phần cứng cụ thể của bạn
  • Kiểm tra thư viện servo và cấu hình pin
  • Đảm bảo scaling phù hợp trong hàm callback
  • Test với output Serial Monitor

Vấn Đề Kết Nối

  • Xác minh địa chỉ IP trong trình duyệt
  • Kiểm tra cài đặt firewall
  • Đảm bảo mạng WiFi 2.4GHz (5GHz không được hỗ trợ)
  • Thử refresh trang trình duyệt

Tính Năng Nâng Cao

Thay Đổi Chế Độ Runtime

Bạn có thể thay đổi chế độ rotator trong quá trình hoạt động:

void setRotatorMode(int mode, float minAng = 0, float maxAng = 360) { webRotatorPage.setRotatorMode(mode, minAng, maxAng); Serial.print("Rotator mode changed to: "); if (mode == ROTATOR_MODE_LIMITED) { Serial.print("Limited ("); Serial.print(minAng); Serial.print("° to "); Serial.print(maxAng); Serial.println("°)"); } else { Serial.println("Continuous"); } }

Phản Hồi Vị Trí

Gửi vị trí hiện tại trở lại giao diện web:

void sendAngleUpdate(float angle) { currentAngle = angle; webRotatorPage.sendToWebRotator(angle); Serial.print("Angle update sent to web: "); Serial.print(angle, 1); Serial.println("°"); }

Lưu ý: Gửi phản hồi góc thường xuyên đến giao diện web có thể làm chuyển động kém mượt hơn. Chỉ sử dụng tính năng này nếu cần cập nhật vị trí thời gian thực.

Điều Khiển Đa Trục

Kết hợp nhiều rotator cho định vị phức tạp:

DIYablesWebRotatorPage panRotator(ROTATOR_MODE_CONTINUOUS); DIYablesWebRotatorPage tiltRotator(ROTATOR_MODE_LIMITED, -90.0, 90.0); server.addApp(&panRotator); server.addApp(&tiltRotator);

Tích Hợp Giáo Dục

Mục Tiêu Học STEM

  • Điều Khiển Động Cơ: Hiểu hoạt động servo và stepper
  • Hệ Tọa Độ: Đo lường góc và định vị
  • Công Nghệ Web: Giao diện điều khiển thời gian thực
  • Lập Trình: Hàm callback, điều khiển phần cứng

Hoạt Động Lớp Học

  • Hiệu Chuẩn Servo: Học hoạt động servo và tín hiệu PWM
  • Điều Khiển Vị Trí: Luyện tập các nhiệm vụ định vị chính xác
  • Tích Hợp Hệ Thống: Kết hợp cảm biến với điều khiển động cơ
  • Giải Quyết Vấn Đề: Debug phần cứng và phần mềm

Ví dụ này cung cấp nền tảng toàn diện cho hệ thống điều khiển xoay, hoàn hảo cho cả ứng dụng giáo dục và robotics thực tế.