Arduino UNO R4 Màn Hình OLED
Hướng dẫn này sẽ chỉ bạn cách sử dụng Arduino UNO R4 với màn hình OLED 128x64 I2C. Cụ thể, chúng ta sẽ học:
- Cách kết nối màn hình OLED 128x64 với Arduino UNO R4.
- Cách lập trình Arduino UNO R4 để hiển thị văn bản và số trên màn hình OLED.
- Cách căn giữa văn bản và số theo chiều dọc và ngang trên màn hình OLED.
- Cách tạo đồ họa trên màn hình OLED với Arduino UNO R4.
- Cách hiển thị hình ảnh trên màn hình OLED với Arduino UNO R4.
Linh Kiện Cần Thiết
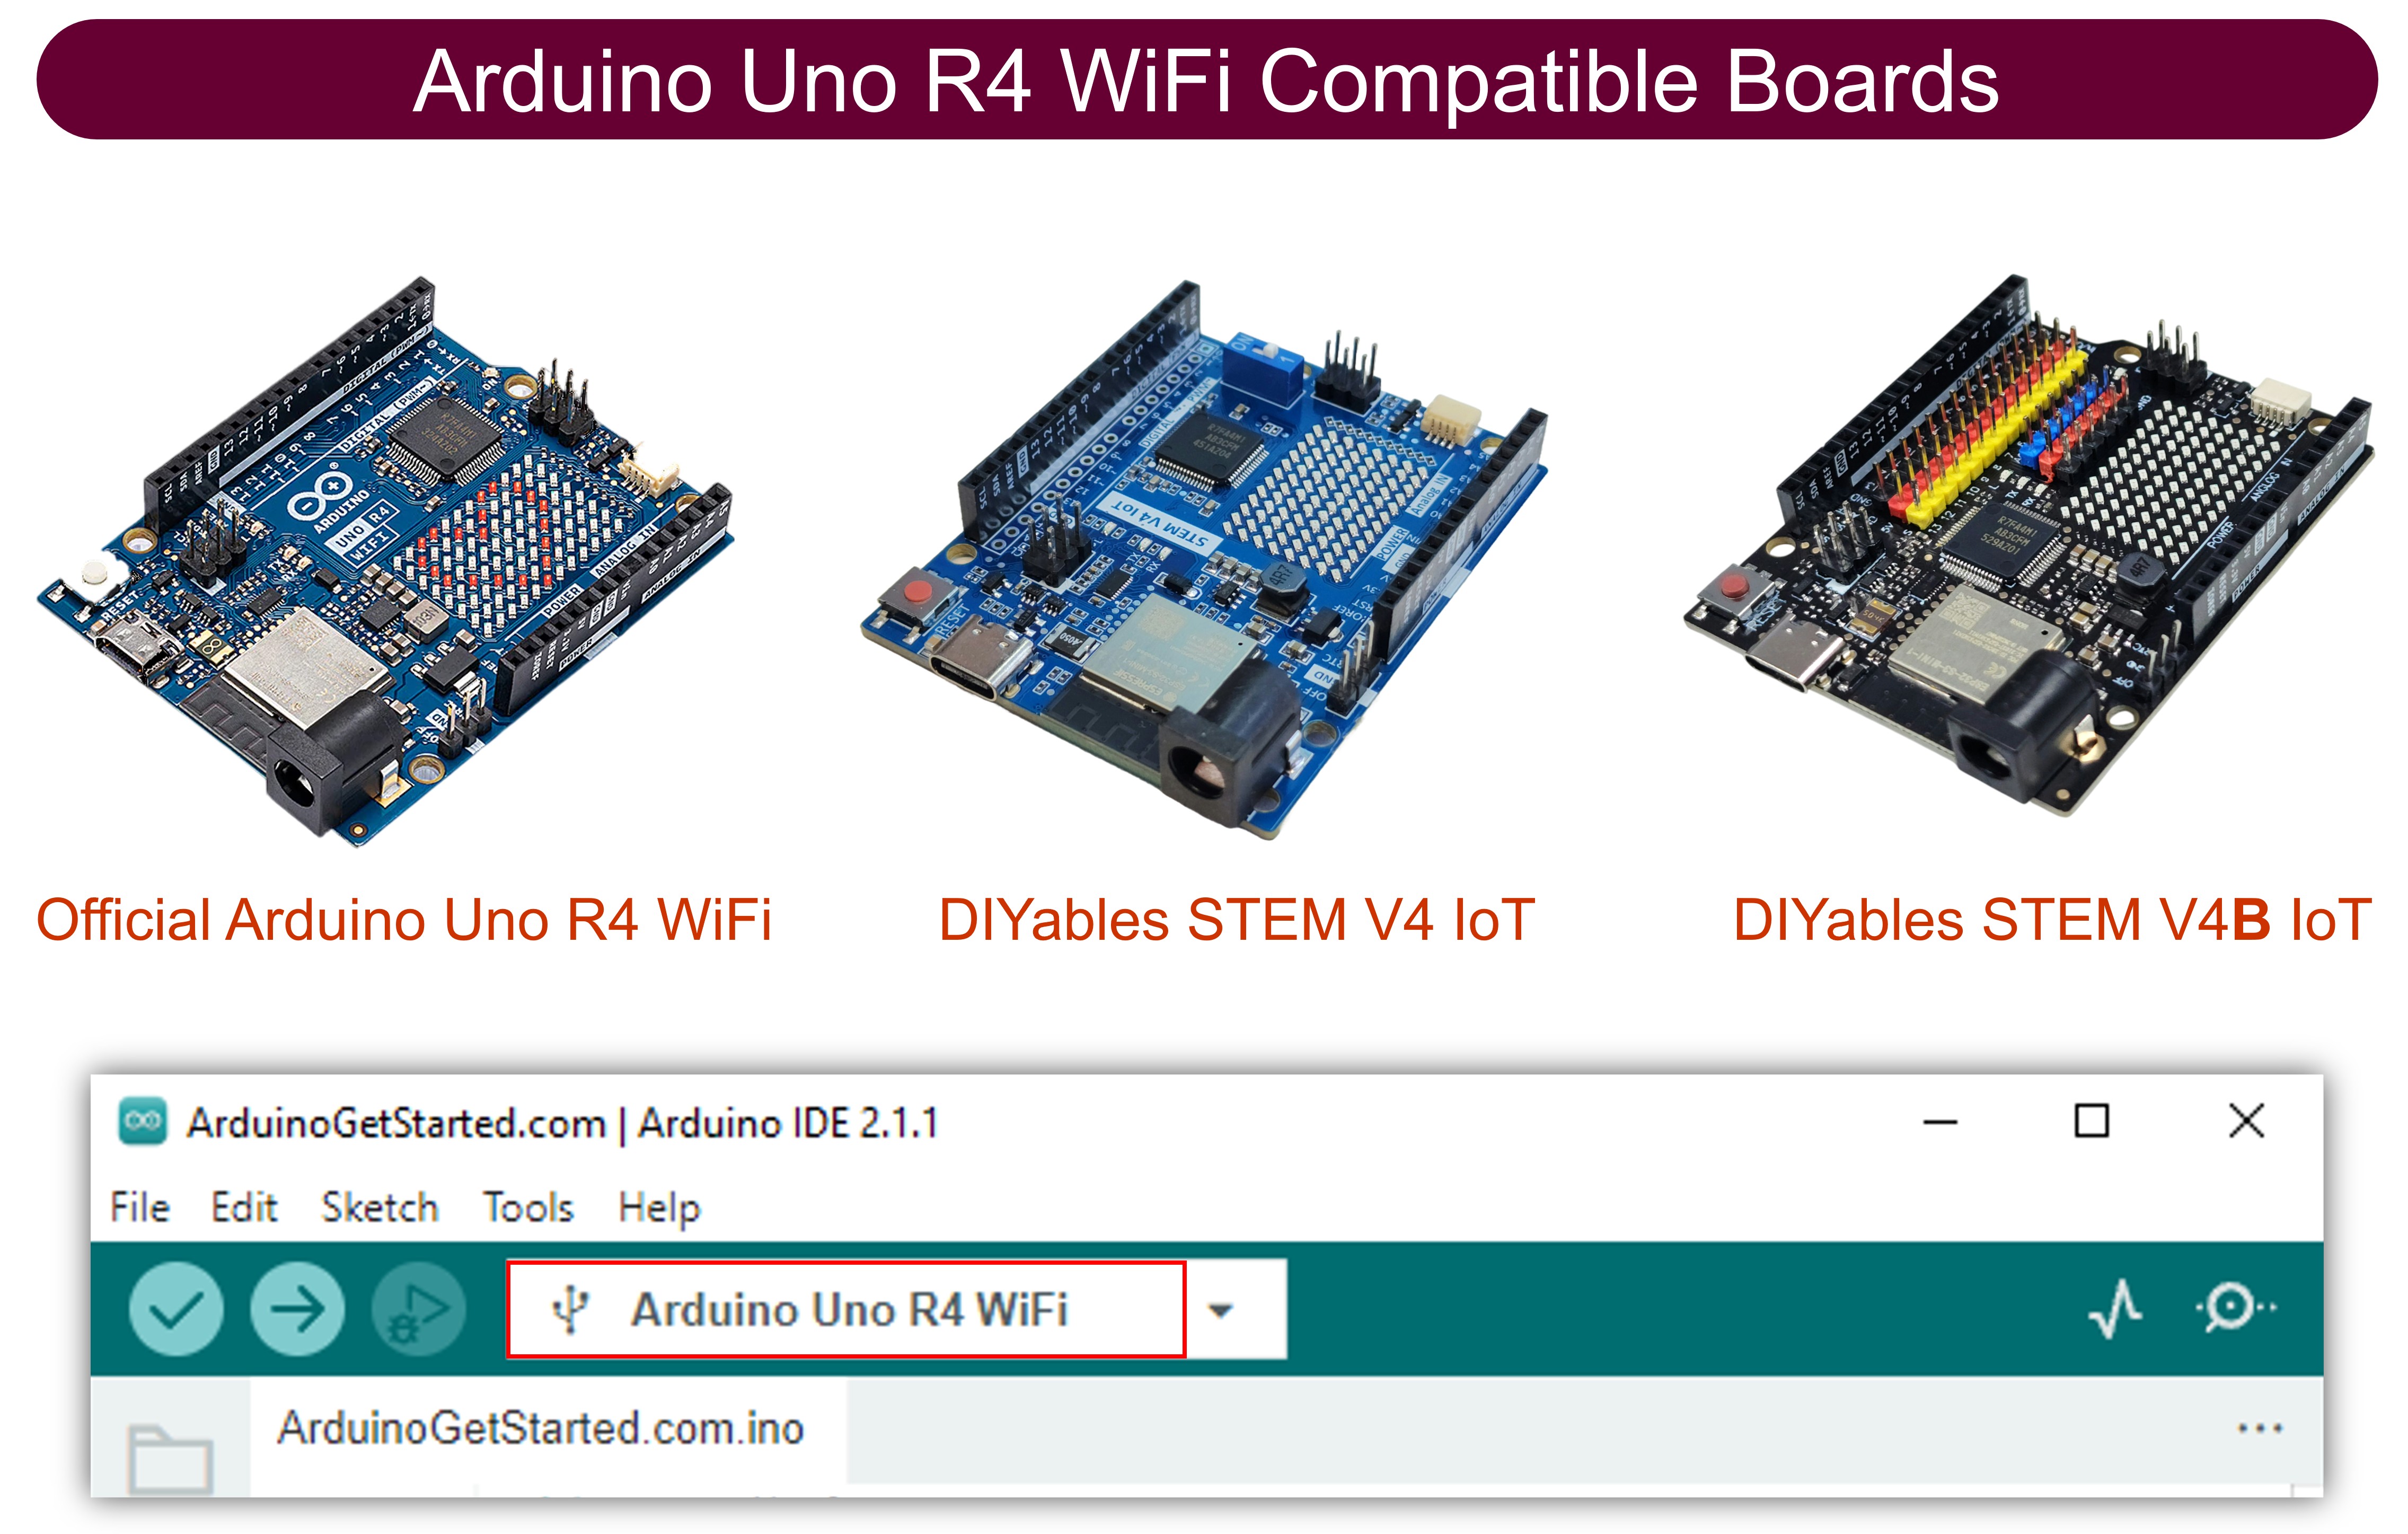
| 1 | × | Arduino UNO R4 WiFi hoặc Arduino UNO R4 Minima | ||
| 1 | × | (Tùy chọn) DIYables STEM V4 IoT, tương thích với Arduino Uno R4 WiFi | Amazon | |
| 1 | × | Arduino UNO R4 Minima (Tùy chọn) | Amazon | |
| 1 | × | Cáp USB Type-C | Amazon | |
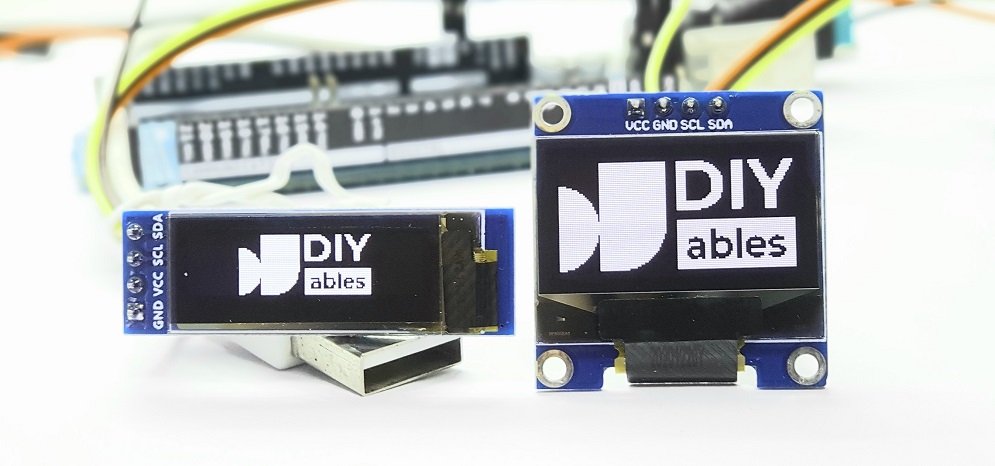
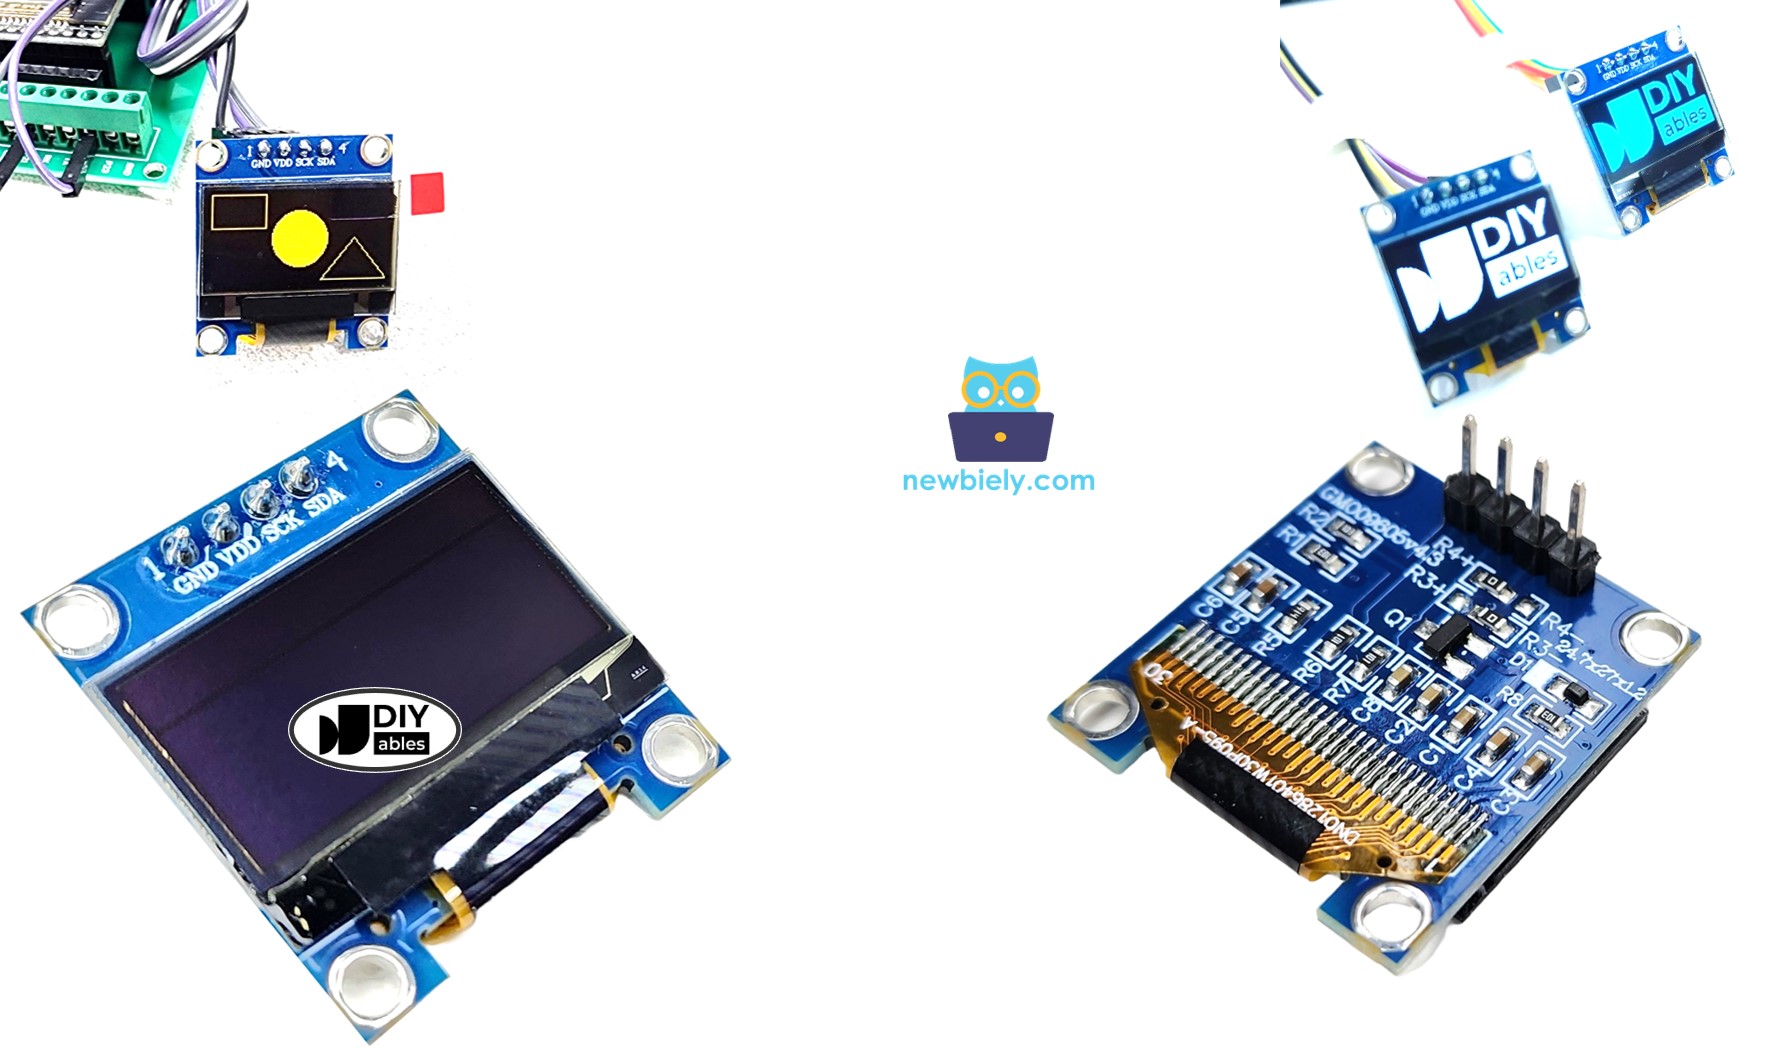
| 1 | × | SSD1306 I2C OLED Display 128x64 | Amazon | |
| 1 | × | Dây Jumper | Amazon | |
| 1 | × | (Khuyến nghị) Screw Terminal Block Shield for Arduino UNO R4 | Amazon | |
| 1 | × | (Khuyến nghị) Sensors/Servo Expansion Shield for Arduino UNO R4 | Amazon | |
| 1 | × | (Khuyến nghị) Breadboard Shield for Arduino UNO R4 | Amazon | |
| 1 | × | (Khuyến nghị) Enclosure for Arduino UNO R4 | Amazon | |
| 1 | × | (Khuyến nghị) Power Splitter for Arduino UNO R4 | Amazon | |
| 1 | × | (Khuyến nghị) Prototyping Base Plate & Breadboard Kit for Arduino UNO | Amazon |
Or you can buy the following kits:
| 1 | × | DIYables STEM V4 IoT Starter Kit (Arduino included) | Amazon | |
| 1 | × | DIYables Sensor Kit (18 sensors/displays) | Amazon |
Về Màn Hình OLED
Có nhiều loại màn hình OLED khác nhau. Chúng khác biệt về cách giao tiếp, kích thước và màu sắc.
- Phương thức giao tiếp: I2C, SPI
- Kích thước: 128x64, 128x32...
- Màu sắc: trắng, xanh, hai màu...
SPI thường nhanh hơn I2C nhưng cần nhiều chân hơn trên Arduino UNO R4. Ngược lại, I2C chỉ cần hai chân và những chân này có thể kết nối với nhiều thiết bị I2C. Bạn phải lựa chọn giữa việc sử dụng ít chân hơn hoặc có tốc độ giao tiếp nhanh hơn. Đối với màn hình OLED sử dụng I2C, có các driver khác nhau như SSD1306 và SH1106. Hướng dẫn này sử dụng màn hình OLED 128x64 SSD1306 I2C.
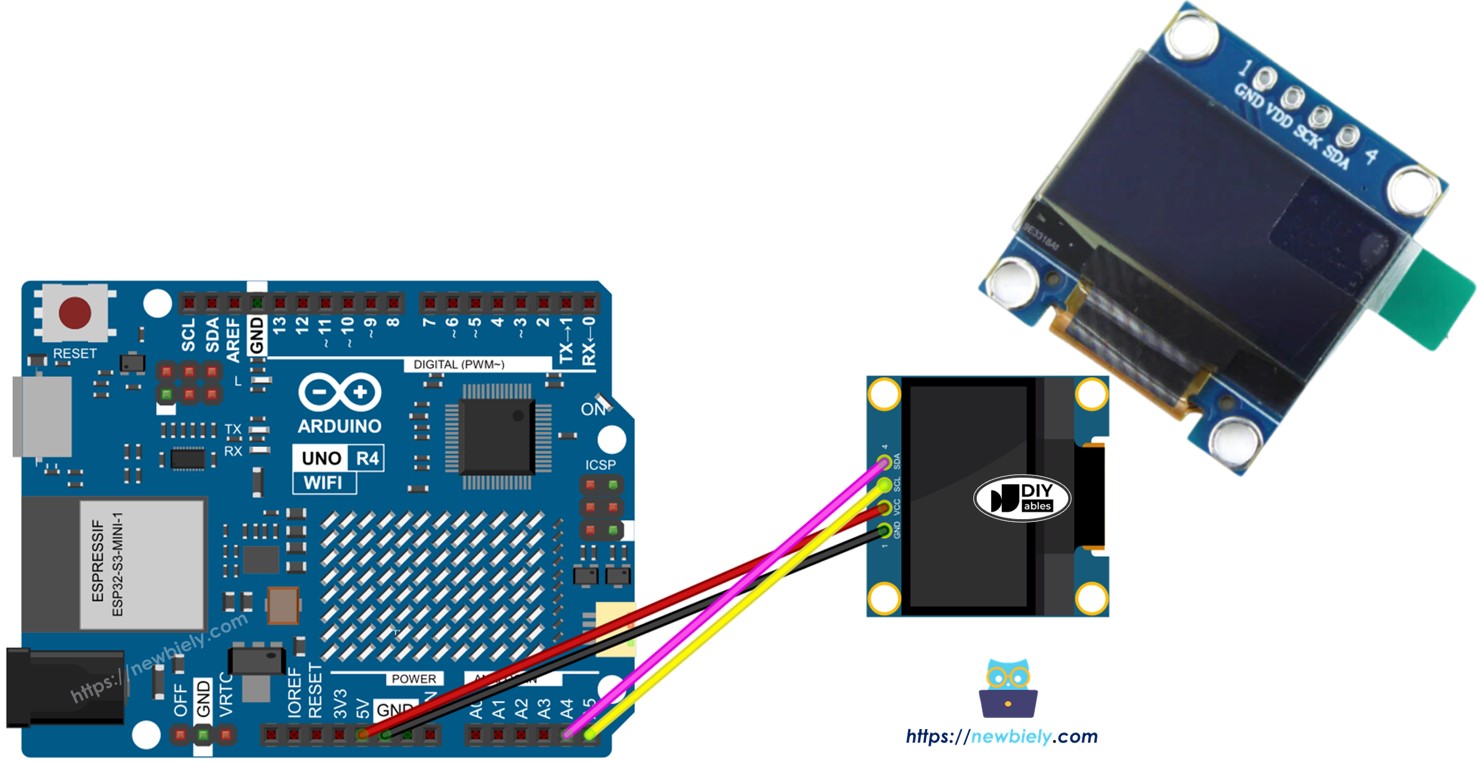
Sơ Đồ Chân OLED Display I2C
- Chân GND: nên được kết nối với ground của Arduino UNO R4
- Chân VCC: là nguồn cung cấp cho màn hình, chúng ta kết nối với chân 5 volt trên Arduino UNO R4.
- Chân SCL: là chân clock nối tiếp cho giao tiếp I2C.
- Chân SDA: là chân dữ liệu nối tiếp cho giao tiếp I2C.
※ Lưu ý:
Sự sắp xếp chân trên module OLED có thể khác nhau tùy thuộc vào nhà sản xuất và model của module. Luôn kiểm tra và theo nhãn trên module OLED. Hãy chú ý!
Hướng dẫn này dành cho màn hình OLED sử dụng driver SSD1306 I2C. Chúng tôi đã thử nghiệm với màn hình OLED từ DIYables. Nó hoạt động hoàn hảo mà không có vấn đề gì.
Sơ Đồ Đấu Nối
- Sơ đồ kết nối Arduino UNO R4 với màn hình OLED 128x64

This image is created using Fritzing. Click to enlarge image
Nếu bạn sử dụng loại Arduino UNO R4 khác, sơ đồ chân sẽ không giống như Uno. Tham khảo bảng dưới đây để biết thông tin về các model Arduino UNO R4 khác.
| Module OLED | Arduino UNO R4 |
|---|---|
| Vin | 5V |
| GND | GND |
| SDA | A4 |
| SCL | A5 |
Cách Sử Dụng OLED với Arduino UNO R4
Cài Đặt Thư Viện SSD1306 OLED
- Truy cập biểu tượng Libraries ở phía bên trái của Arduino IDE.
- Gõ "SSD1306" vào ô tìm kiếm và tìm thư viện SSD1306 của Adafruit.
- Nhấn nút Install để thêm thư viện.
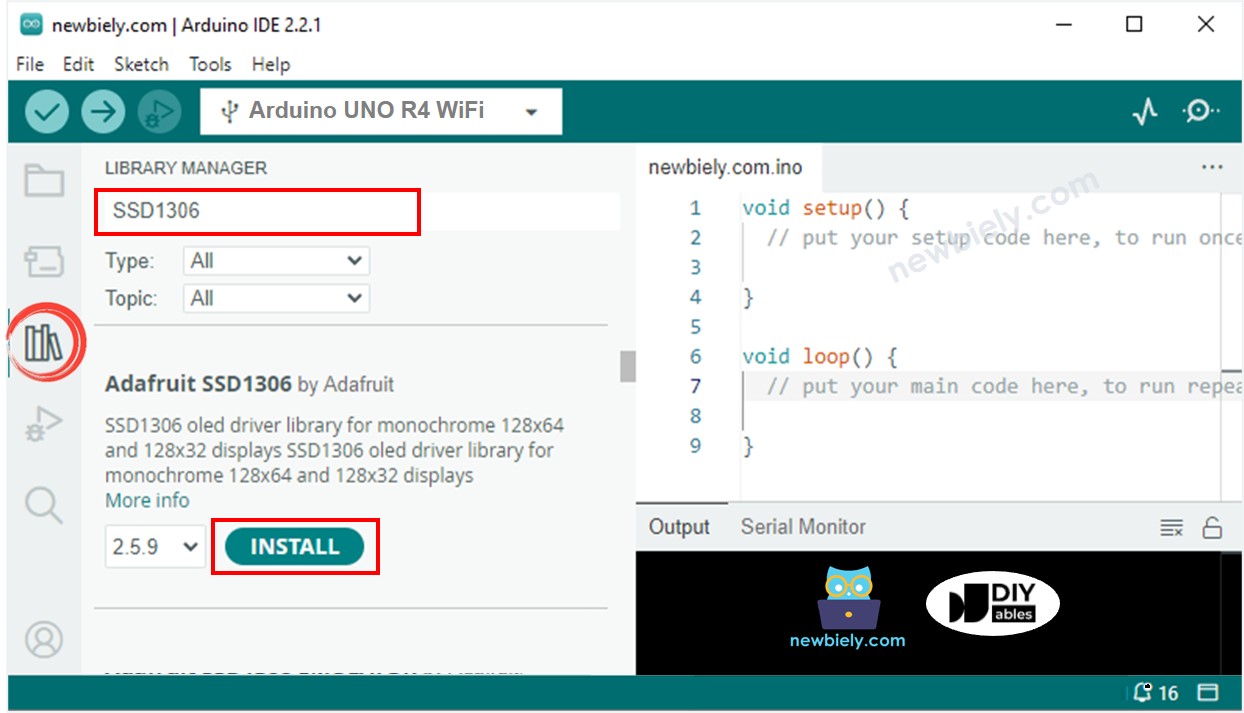
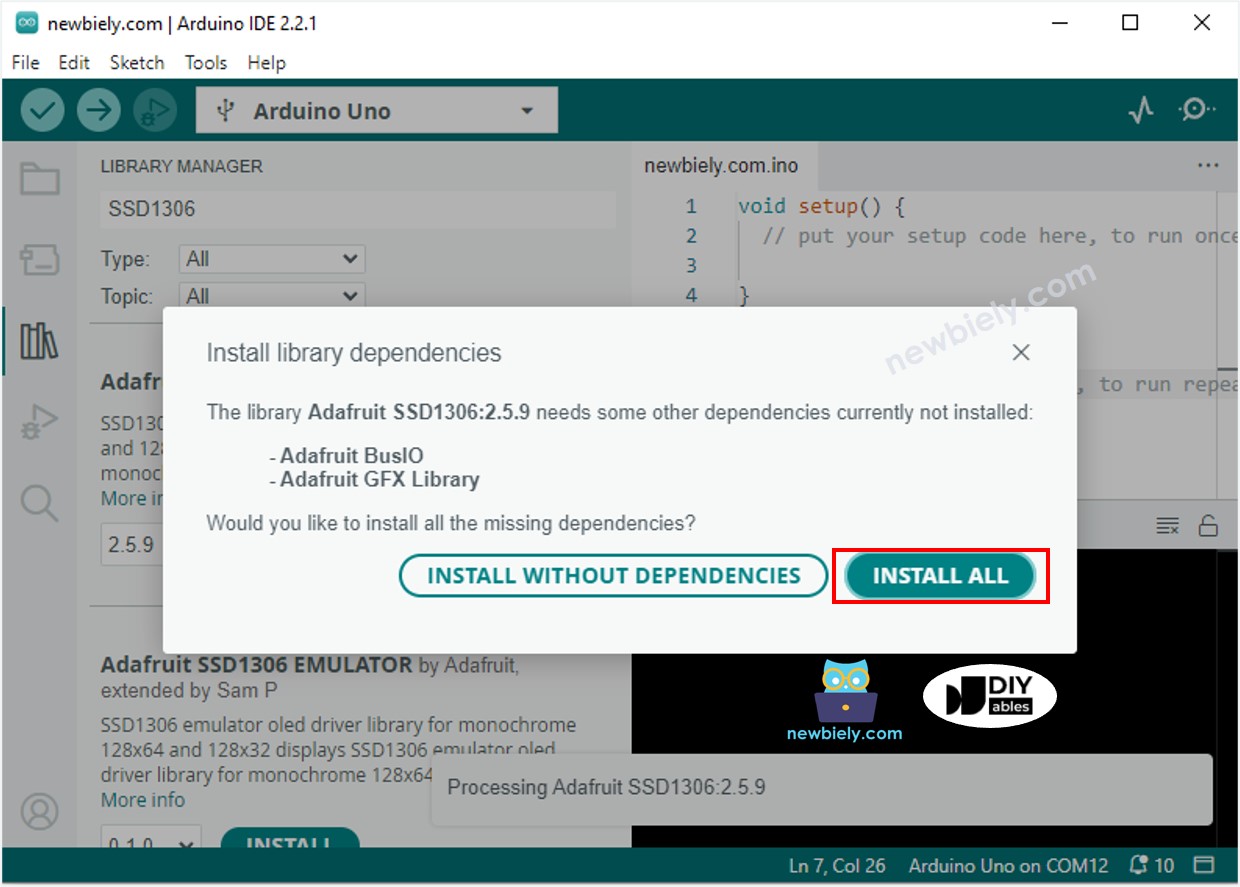
- Bạn sẽ cần cài đặt một số thư viện bổ sung.
- Nhấn nút Install All để cài đặt tất cả các thư viện cần thiết.
Cách lập trình cho OLED
- Bao gồm thư viện.
- Đặt kích thước màn hình cho OLED 128x64.
- Tạo đối tượng SSD1306 OLED.
- Trong hàm setup(), thiết lập màn hình OLED.
- Sau đó bạn có thể hiển thị văn bản, hình ảnh và vẽ đường.
Code Arduino UNO R4 - Hiển Thị Văn Bản Trên OLED
Dưới đây là một số hàm bạn có thể sử dụng để hiển thị văn bản trên OLED:
- oled.clearDisplay(): tắt tất cả các pixel.
- oled.drawPixel(x, y, color): vẽ một pixel tại tọa độ x, y.
- oled.setTextSize(n): thay đổi kích thước văn bản, với lựa chọn từ 1 đến 8.
- oled.setCursor(x, y): đặt điểm bắt đầu cho văn bản.
- oled.setTextColor(WHITE): đặt màu văn bản thành trắng.
- oled.setTextColor(BLACK, WHITE): đặt màu văn bản thành đen và nền trắng.
- oled.println("message"): hiển thị văn bản.
- oled.println(number): hiển thị một số.
- oled.println(number, HEX): hiển thị số ở định dạng thập lục phân.
- oled.display(): cập nhật màn hình với các thay đổi.
- oled.startscrollright(start, stop): di chuyển văn bản từ trái sang phải.
- oled.startscrollleft(start, stop): di chuyển văn bản từ phải sang trái.
- oled.startscrolldiagright(start, stop): di chuyển văn bản theo đường chéo từ dưới-trái lên trên-phải.
- oled.startscrolldiagleft(start, stop): di chuyển văn bản theo đường chéo từ dưới-phải lên trên-trái.
- oled.stopscroll(): dừng mọi cuộn văn bản.
Cách căn giữa văn bản/số theo chiều dọc và ngang trên OLED
Code Arduino UNO R4 - Vẽ Trên OLED
Code Arduino UNO R4 – Hiển Thị Hình Ảnh
Để hiển thị hình ảnh trên màn hình OLED, trước tiên hãy chuyển đổi hình ảnh (định dạng bất kỳ) thành mảng bitmap. Bạn có thể sử dụng công cụ Image to Bitmap Converter để chuyển đổi. Xem hình ảnh dưới đây để biết cách thay đổi hình ảnh thành mảng bitmap. Tôi đã chuyển đổi biểu tượng Arduino thành mảng bitmap.
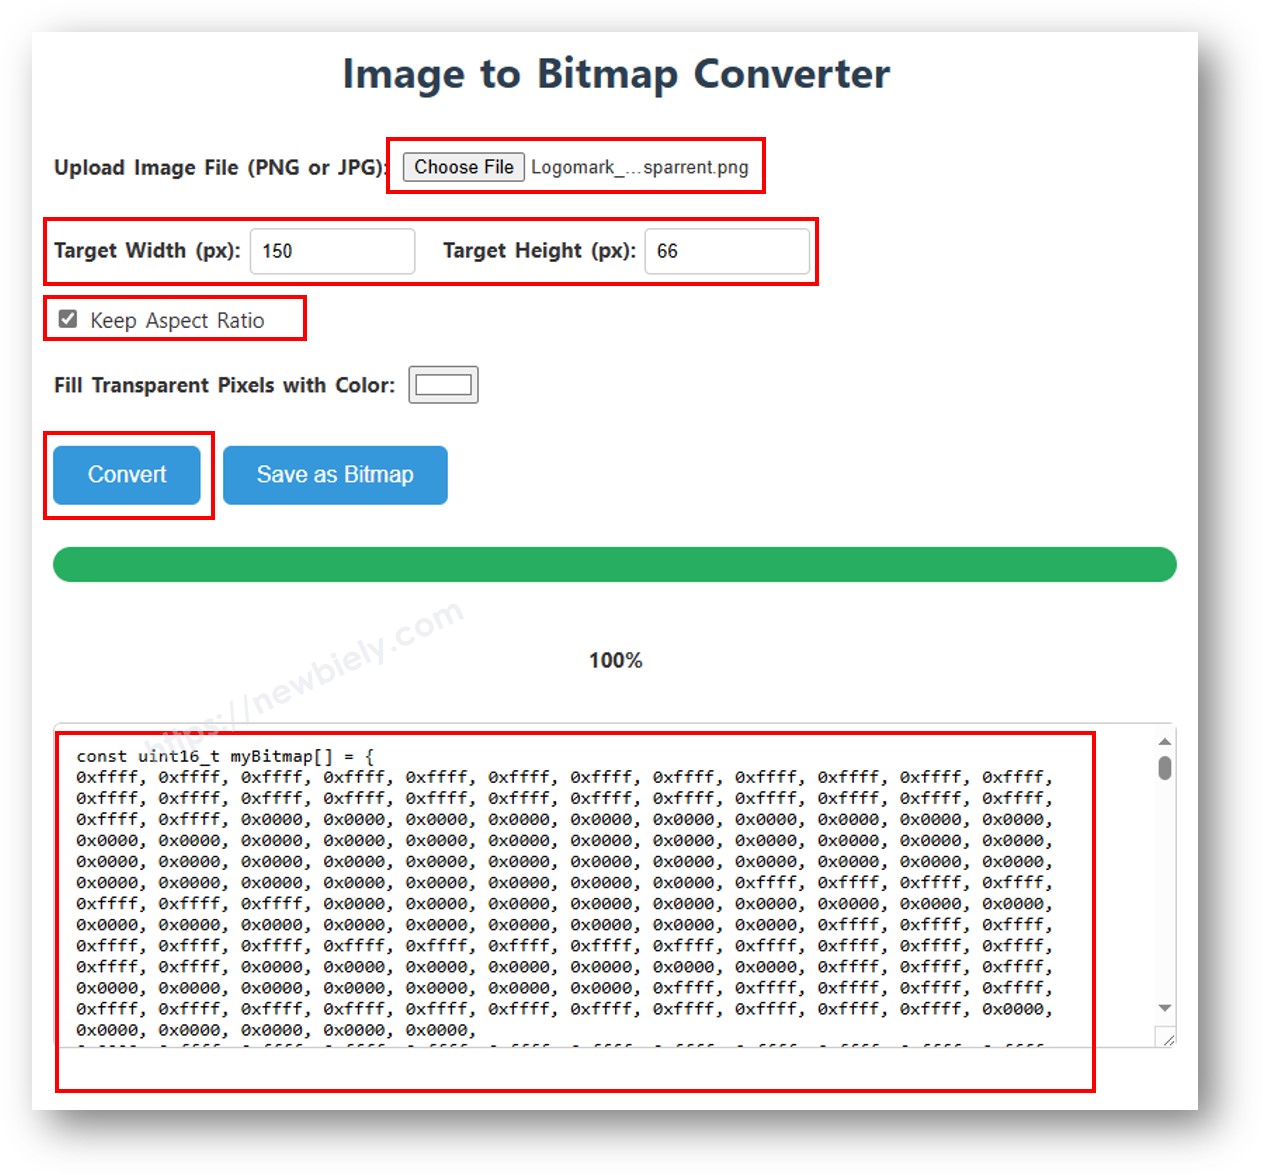
Sao chép code mảng mới và cập nhật nó trong mảng biểu tượng Arduino trong code dưới đây.
※ Lưu ý:
- Kích thước hình ảnh phải bằng hoặc nhỏ hơn kích thước màn hình.
- Để sử dụng code được cung cấp cho OLED 128x32, bạn phải thay đổi kích thước hình ảnh và điều chỉnh chiều rộng và chiều cao trong hàm oled.drawBitmap();.
Khắc Phục Sự Cố OLED
Nếu màn hình OLED không hiển thị gì, vui lòng làm theo các bước sau:
- Đảm bảo việc đấu nối được thực hiện đúng cách.
- Xác nhận rằng I2C OLED của bạn được trang bị driver SSD1306.
- Xác minh địa chỉ I2C của OLED bằng cách sử dụng code I2C Address Scanner sau trên Arduino UNO R4.
Kết quả trên Serial Monitor:
Bài hướng dẫn liên quan
📱 Ứng dụng đề xuất
 English for KidsHọc tiếng Anh vui nhộn cho trẻ nhỏ.Tải về trênGoogle PlayTải về trênApp Store
 Bubble NoteGhi chú tự xóa — viết như nhắn tin.Tải về trênGoogle PlayTải về trênApp Store
 Tôi Không MuaĐánh bại mua sắm bốc đồng, tiết kiệm hơn.Tải về trênGoogle PlayTải về trênApp Store
 Con Đường Tri ThứcBài thi thử để học mọi thứ.Tải về trênGoogle PlayTải về trênApp Store