Arduino UNO R4 nhiều Button
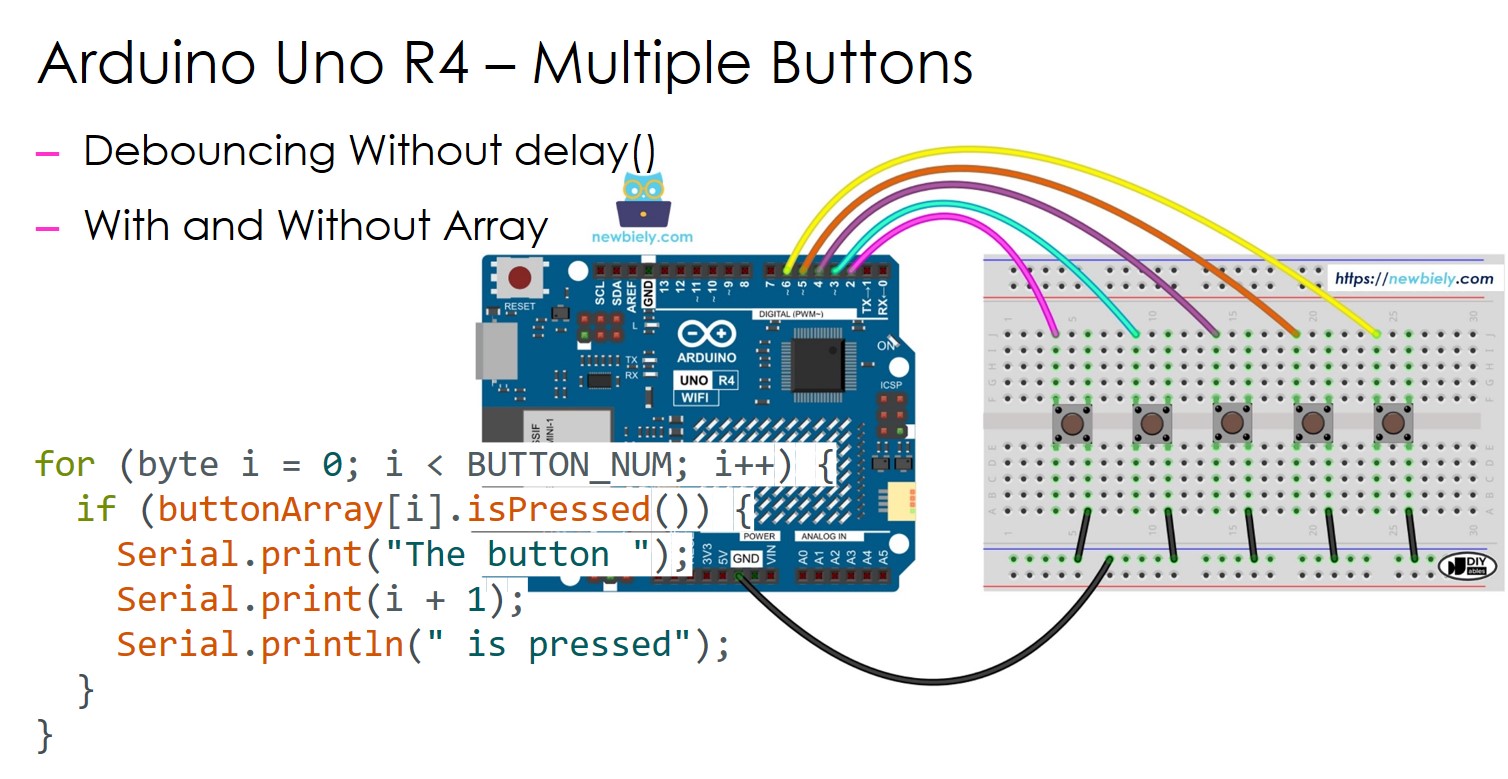
Hướng dẫn này sẽ chỉ cho bạn cách sử dụng Arduino UNO R4 với nhiều button cùng lúc mà không cần hàm delay() để debounce. Hướng dẫn cung cấp code theo hai phương pháp khác nhau:
- Code Arduino UNO R4 debounce nhiều button mà không sử dụng hàm delay().
- Code Arduino UNO R4 debounce nhiều button sử dụng mảng mà không sử dụng hàm delay().
Chúng ta sẽ sử dụng năm button làm ví dụ. Bạn có thể dễ dàng thay đổi cho hai button, bốn button, hoặc thậm chí nhiều hơn.
Linh Kiện Cần Thiết
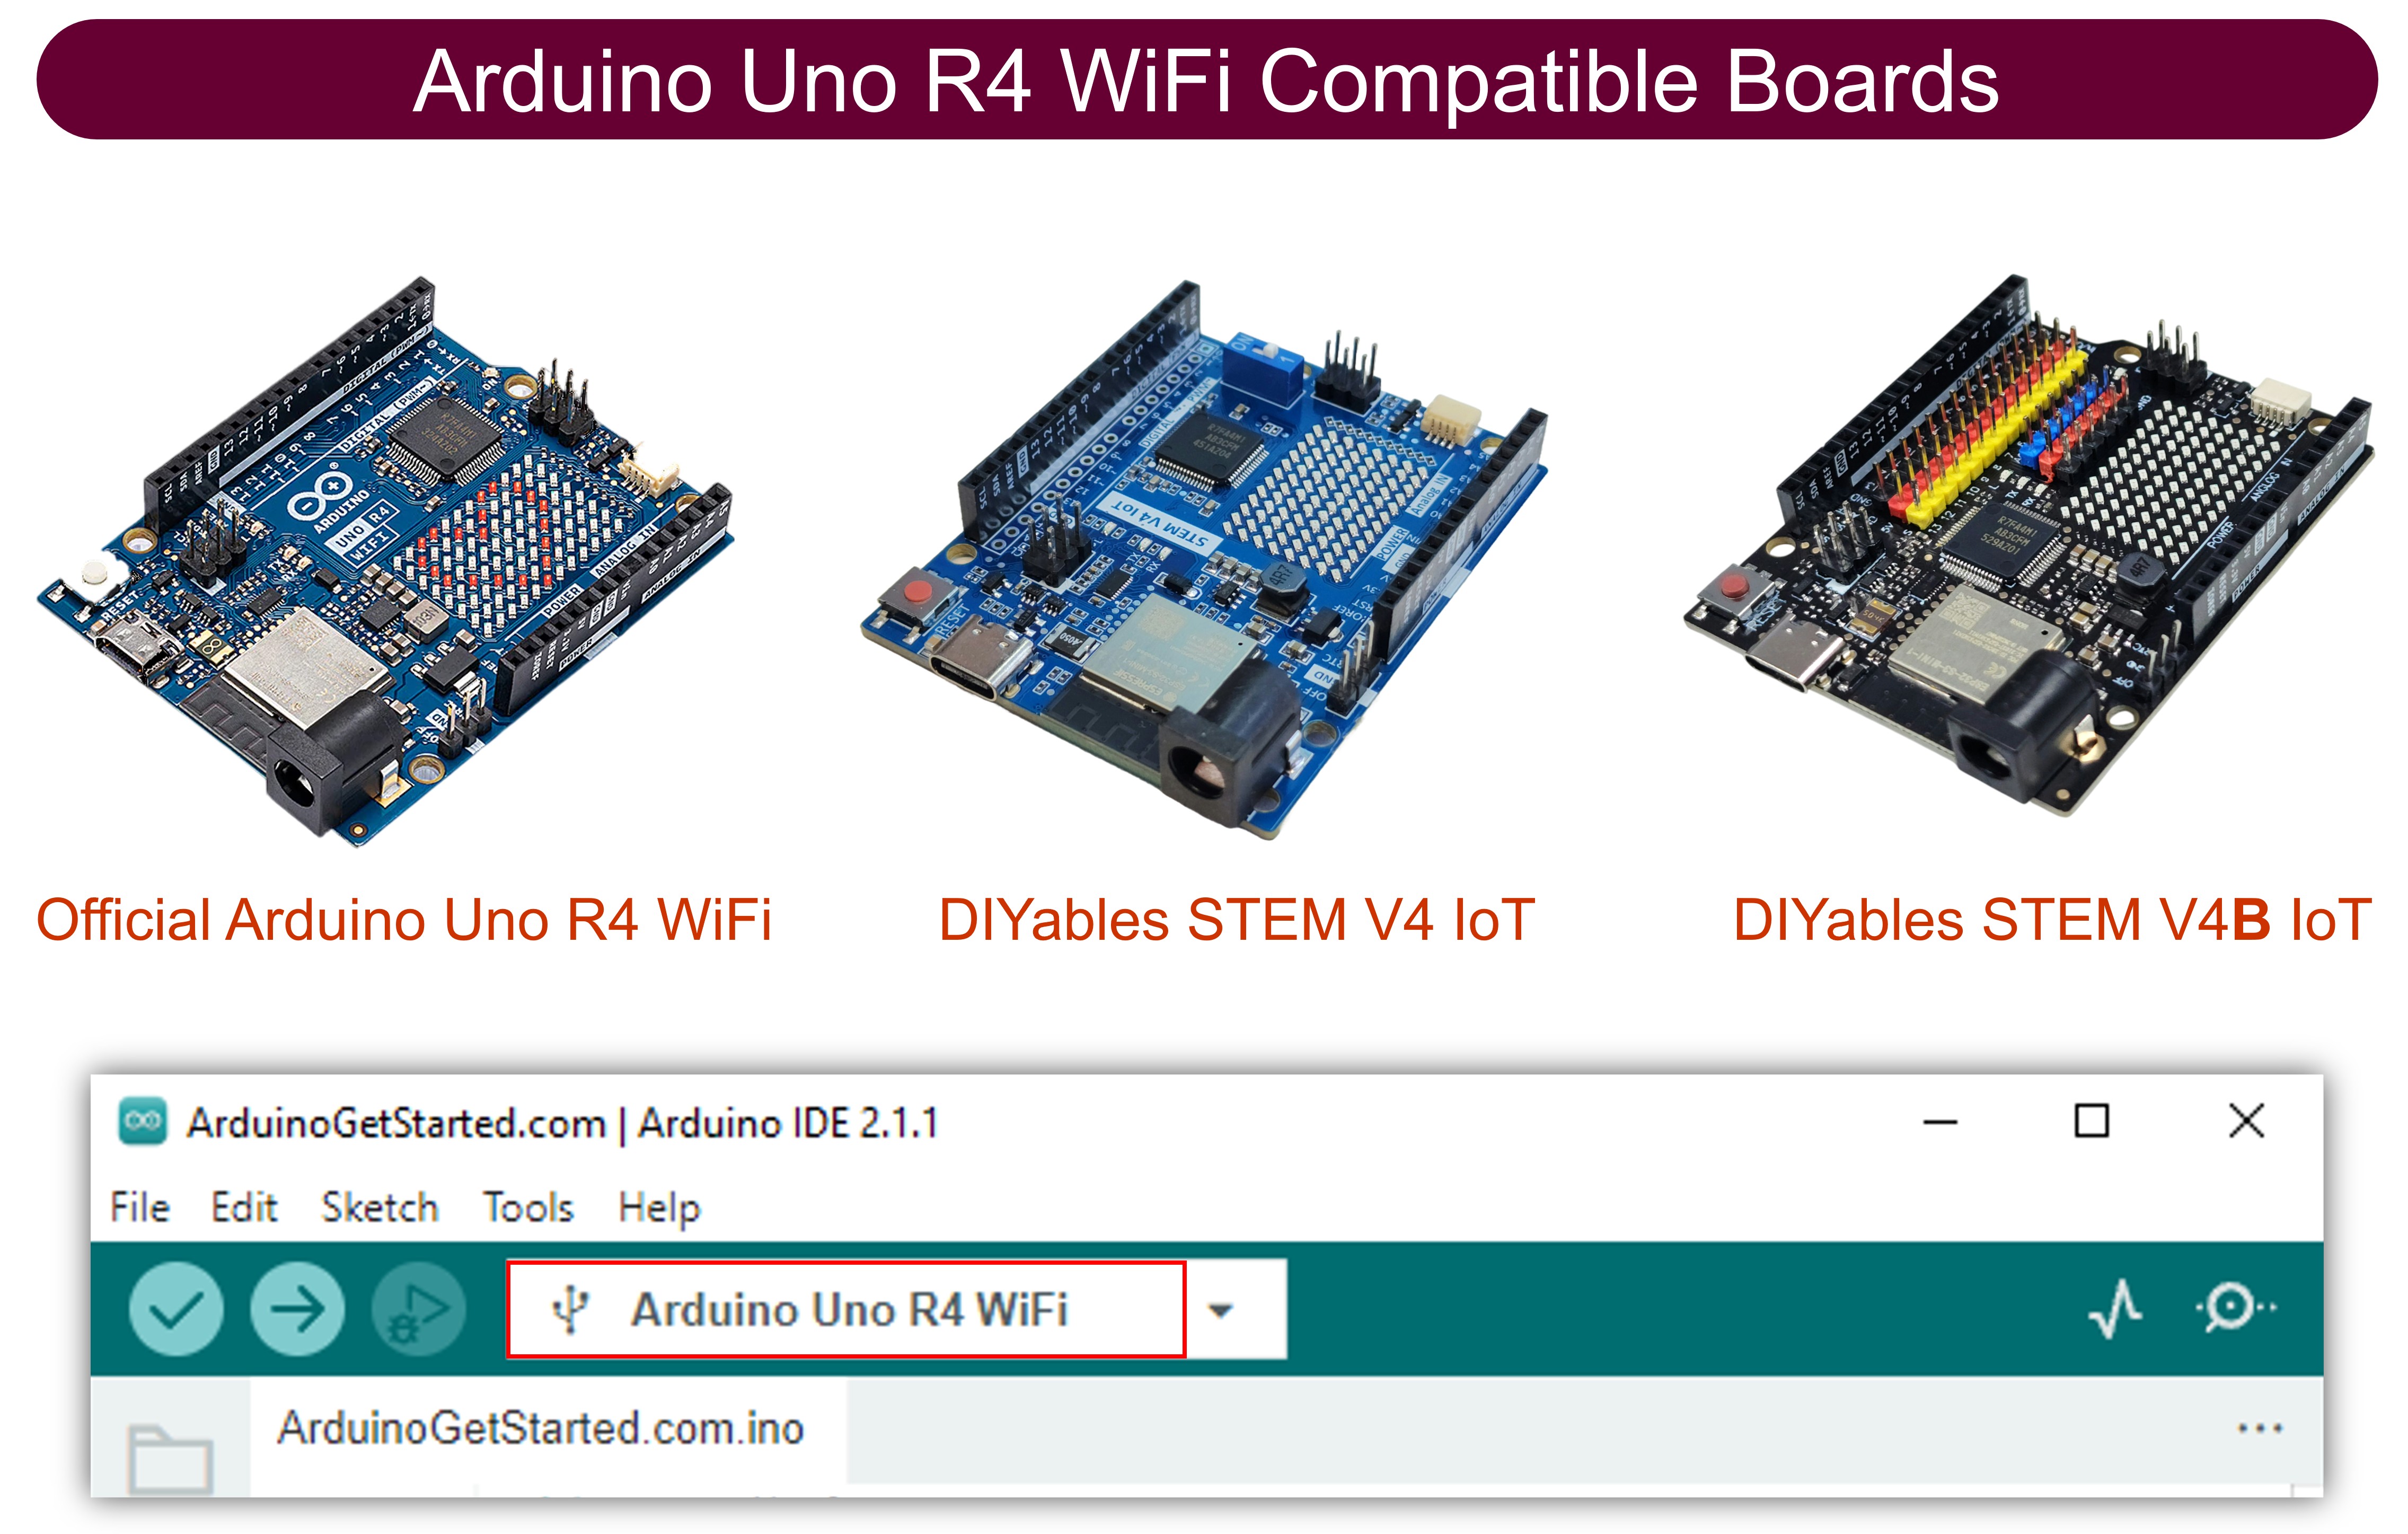
| 1 | × | Arduino UNO R4 WiFi hoặc Arduino UNO R4 Minima | ||
| 1 | × | (Tùy chọn) DIYables STEM V4 IoT, tương thích với Arduino Uno R4 WiFi | Amazon | |
| 1 | × | Arduino UNO R4 Minima (Thay thế) | Amazon | |
| 1 | × | Cáp USB Type-C | Amazon | |
| 1 | × | Nút Nhấn Gắn Breadboard có Nắp | Amazon | |
| 1 | × | Bộ Kit Nút Nhấn Gắn Breadboard | Amazon | |
| 1 | × | Nút Nhấn Gắn Panel | Amazon | |
| 1 | × | mô-đun nút nhấn | Amazon | |
| 1 | × | breadboard | Amazon | |
| 1 | × | Dây Jumper | Amazon | |
| 1 | × | (Khuyến nghị) Screw Terminal Block Shield for Arduino UNO R4 | Amazon | |
| 1 | × | (Khuyến nghị) Sensors/Servo Expansion Shield for Arduino UNO R4 | Amazon | |
| 1 | × | (Khuyến nghị) Breadboard Shield for Arduino UNO R4 | Amazon | |
| 1 | × | (Khuyến nghị) Enclosure for Arduino UNO R4 | Amazon | |
| 1 | × | (Khuyến nghị) Power Splitter for Arduino UNO R4 | Amazon | |
| 1 | × | (Khuyến nghị) Prototyping Base Plate & Breadboard Kit for Arduino UNO | Amazon |
Or you can buy the following kits:
| 1 | × | DIYables STEM V4 IoT Starter Kit (Arduino included) | Amazon | |
| 1 | × | DIYables Sensor Kit (18 sensors/displays) | Amazon |
Sơ Đồ Đấu Nối
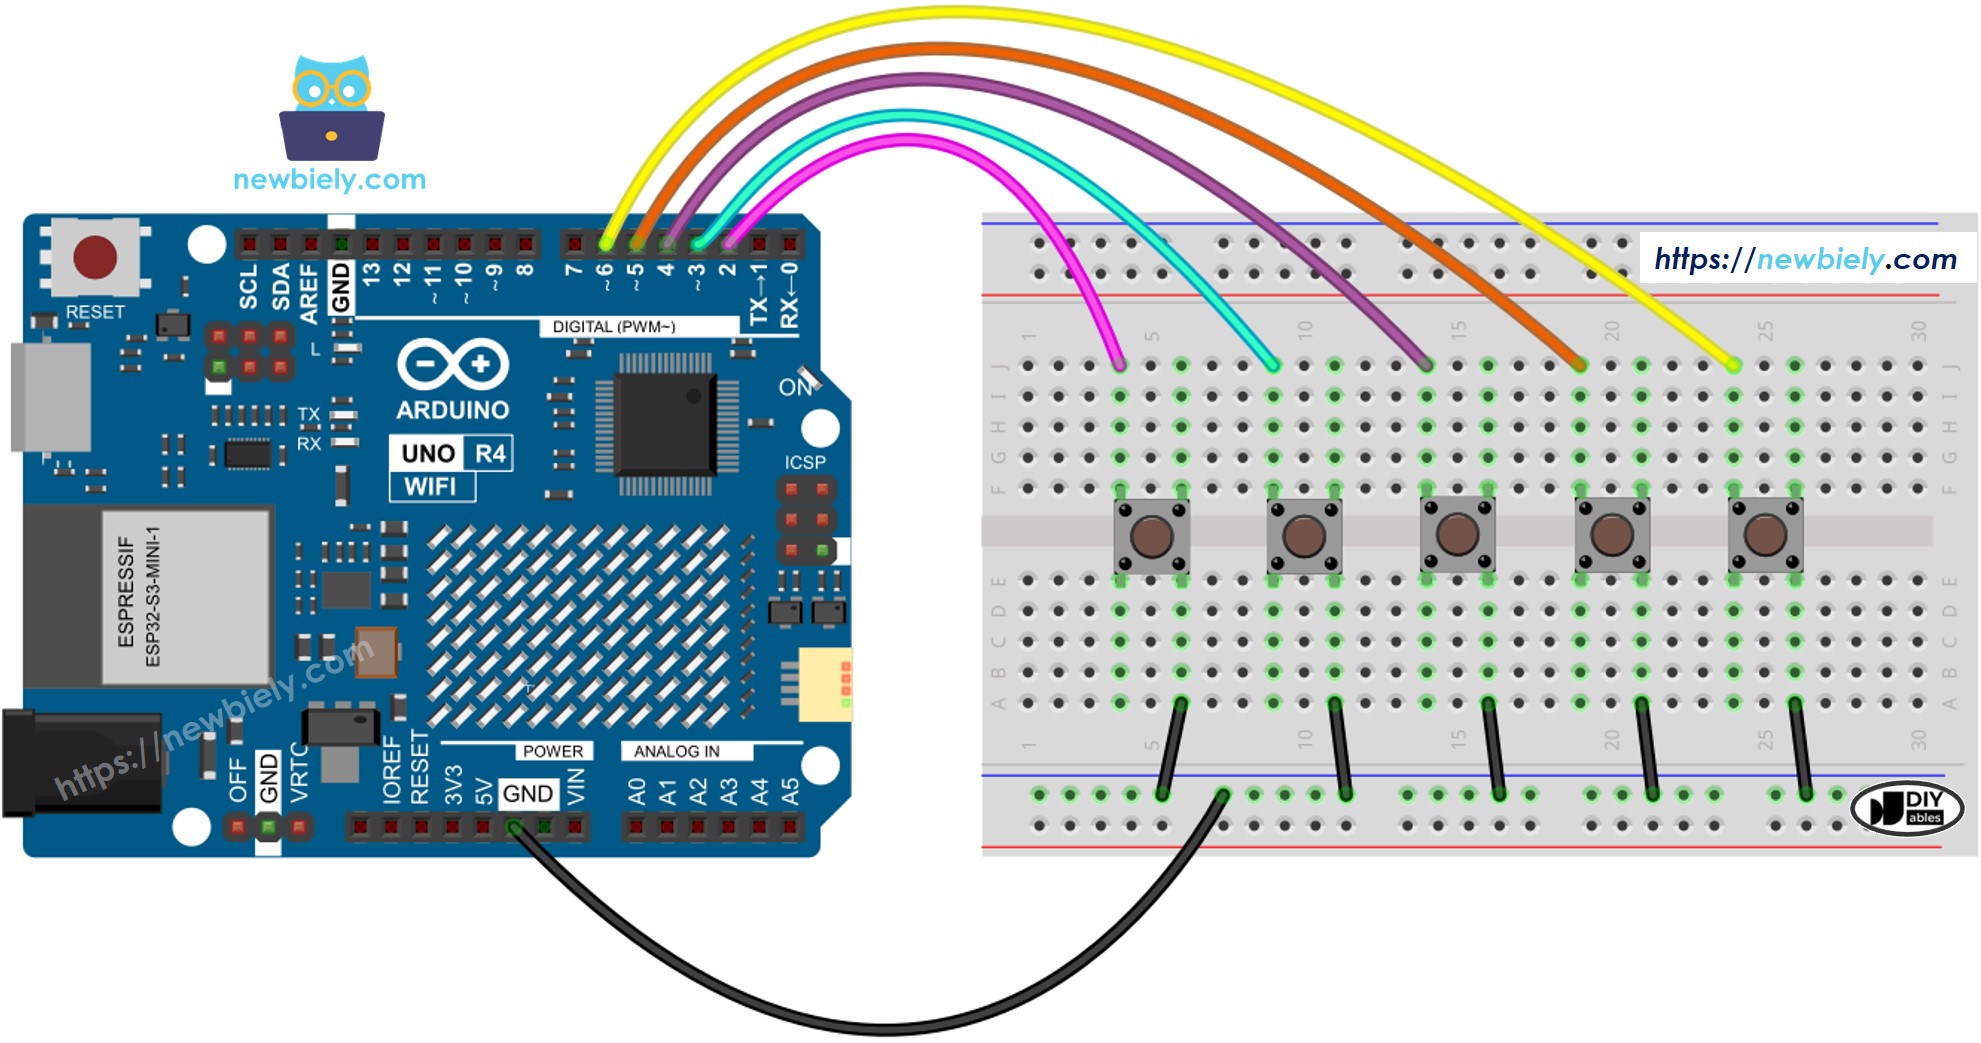
This image is created using Fritzing. Click to enlarge image
Code Arduino UNO R4 - Nhiều Button với debounce
Khi sử dụng nhiều button, tình huống có thể trở nên phức tạp.
- Ứng dụng cần debouncing button
- Ứng dụng phải xác định khi button được nhấn hoặc thả
Thư viện ezButton giúp đơn giản hóa việc làm việc với button bằng cách xử lý debounce và các sự kiện button bên trong. Người dùng không cần lo lắng về việc quản lý thời gian và biến khi sử dụng thư viện này. Ngoài ra, việc sử dụng nhiều button có thể làm cho code rõ ràng và ngắn gọn hơn.
Các Bước Thực Hiện
Thực hiện theo hướng dẫn từng bước:
- Nếu đây là lần đầu tiên bạn sử dụng Arduino Uno R4 WiFi/Minima, hãy tham khảo hướng dẫn về Arduino UNO R4 - Cài Đặt Phần Mềm.
- Kết nối Arduino Uno R4 với các button theo sơ đồ được cung cấp.
- Kết nối bo mạch Arduino Uno R4 với máy tính của bạn bằng cáp USB.
- Khởi động Arduino IDE trên máy tính của bạn.
- Chọn bo mạch Arduino Uno R4 phù hợp (ví dụ: Arduino Uno R4 WiFi) và cổng COM.
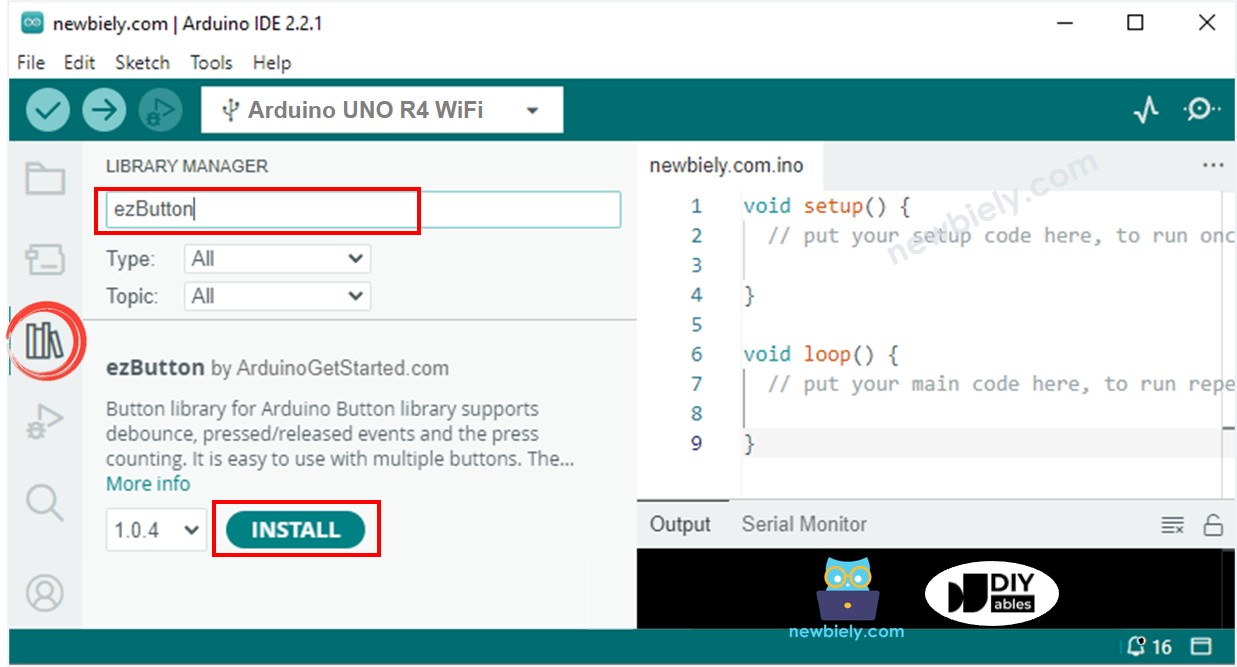
- Nhấp vào biểu tượng Libraries ở phía bên trái của Arduino IDE.
- Tìm kiếm ezButton và tìm thư viện button được tạo bởi ArduinoGetStarted.com.
- Nhấp vào nút Install để cài đặt thư viện ezButton.
- Sao chép code và dán vào Arduino IDE.
- Nhấp nút Upload trong Arduino IDE để biên dịch và tải code lên bo mạch Arduino UNO R4.
- Mở Serial Monitor trong Arduino IDE.
- Nhấn và thả từng button một cách tuần tự.
Video Tutorial
Việc sản xuất video tốn rất nhiều thời gian. Nếu video hướng dẫn hữu ích cho việc học của bạn, hãy đăng ký kênh YouTube để ủng hộ. Nếu nhu cầu đủ cao, chúng tôi sẽ cố gắng làm thêm nhiều video.
Bài hướng dẫn liên quan
📱 Ứng dụng đề xuất
 English for KidsHọc tiếng Anh vui nhộn cho trẻ nhỏ.Tải về trênGoogle PlayTải về trênApp Store
 Bubble NoteGhi chú tự xóa — viết như nhắn tin.Tải về trênGoogle PlayTải về trênApp Store
 Tôi Không MuaĐánh bại mua sắm bốc đồng, tiết kiệm hơn.Tải về trênGoogle PlayTải về trênApp Store
 Con Đường Tri ThứcBài thi thử để học mọi thứ.Tải về trênGoogle PlayTải về trênApp Store