Arduino Cảm biến chuyển động LED
Chúng ta sẽ học cách sử dụng Arduino để bật/tắt đèn LED dựa trên việc phát hiện chuyển động từ cảm biến HC-SR501:
- Nếu phát hiện được chuyển động, bật đèn LED.
- Nếu không phát hiện được chuyển động, tắt đèn LED.
Phần cứng cần chuẩn bị
| 1 | × | Arduino Uno R3 | Amazon | |
| 1 | × | USB 2.0 cable type A/B (for USB-A PC) | Amazon | |
| 1 | × | USB 2.0 cable type C/B (for USB-C PC) | Amazon | |
| 1 | × | HC-SR501 Motion Sensor | Amazon | |
| 1 | × | Alternatively, AM312 Mini Motion Sensor | Amazon | |
| 1 | × | LED Kit | Amazon | |
| 1 | × | LED (red) | Amazon | |
| 1 | × | LED Module | Amazon | |
| 1 | × | Alternatively, Button and LED Kit | Amazon | |
| 1 | × | 220Ω Resistor | Amazon | |
| 1 | × | breadboard | Amazon | |
| 1 | × | dây jumper | Amazon | |
| 1 | × | (Khuyến nghị) Screw Terminal Block Shield for Arduino Uno | Amazon | |
| 1 | × | (Khuyến nghị) Sensors/Servo Expansion Shield for Arduino Uno | Amazon | |
| 1 | × | (Khuyến nghị) Breadboard Shield for Arduino Uno | Amazon | |
| 1 | × | (Khuyến nghị) Enclosure for Arduino Uno | Amazon | |
| 1 | × | (Khuyến nghị) Prototyping Base Plate & Breadboard Kit for Arduino UNO | Amazon |
Or you can buy the following kits:
| 1 | × | DIYables STEM V3 Starter Kit (Arduino included) | Amazon | |
| 1 | × | DIYables Sensor Kit (18 sensors/displays) | Amazon |
Tiết lộ: Một số liên kết trong bài viết này là liên kết tiếp thị Amazon và có thể nhận hoa hồng theo chính sách của chương trình.
Về đèn LED và cảm biến chuyển động
Nếu bạn chưa biết về LED và cảm biến chuyển động (bố trí chân, cách hoạt động, cách lập trình ...), hãy tìm hiểu về chúng trong các bài hướng dẫn sau đây:
Sơ đồ đấu dây
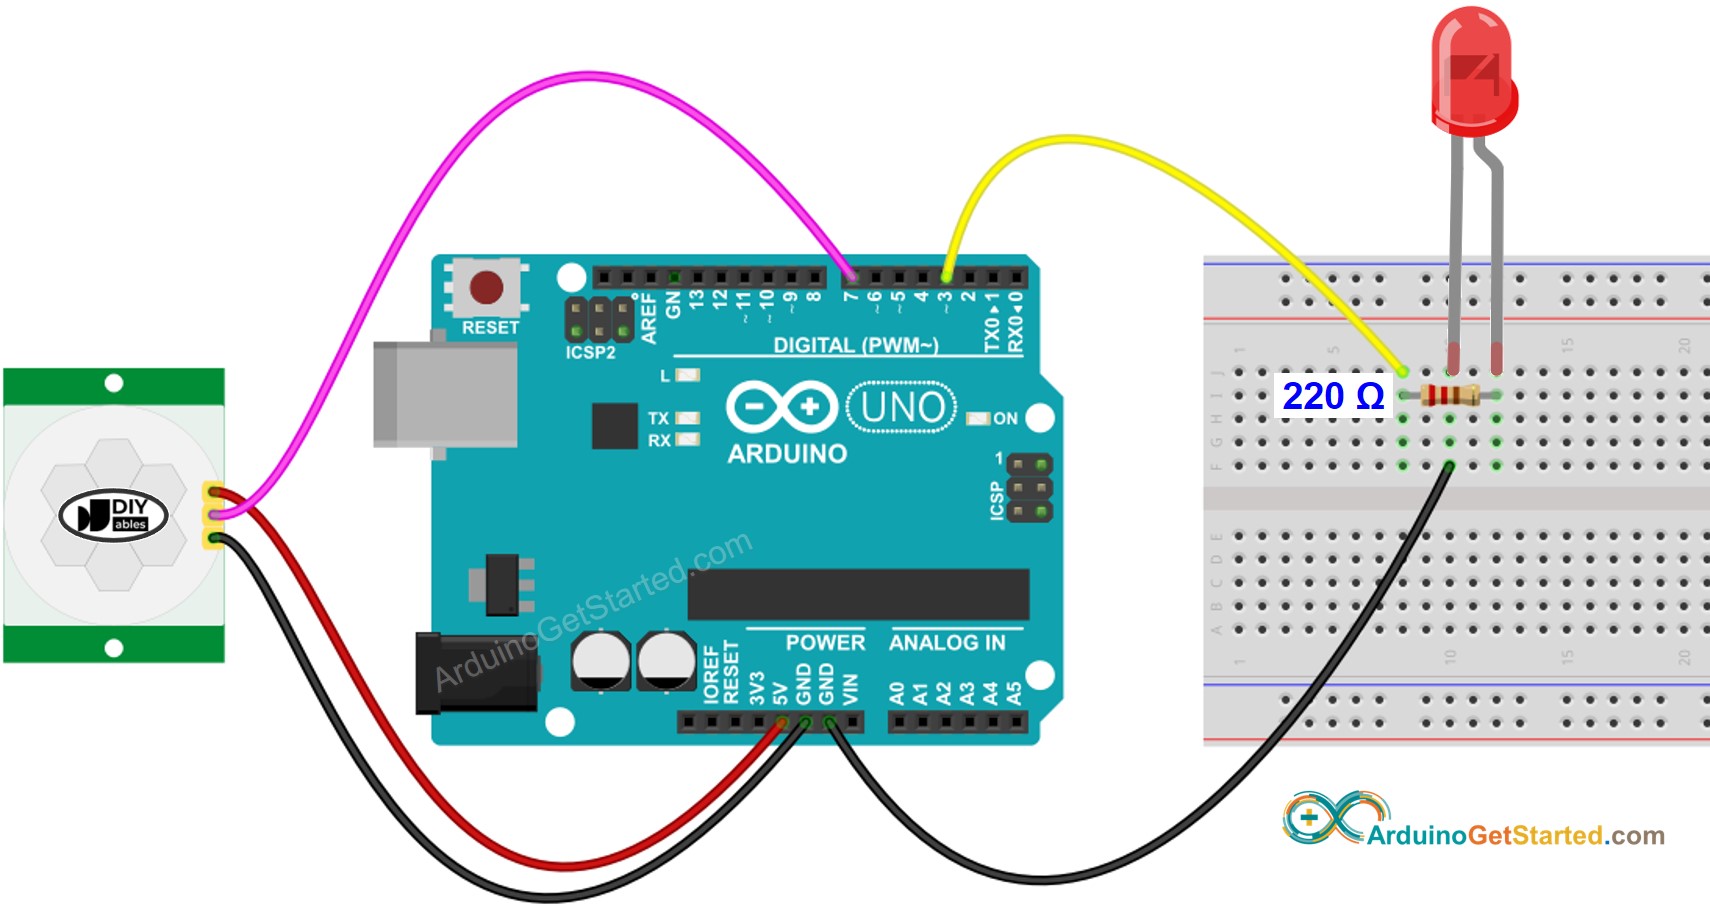
This image is created using Fritzing. Click to enlarge image
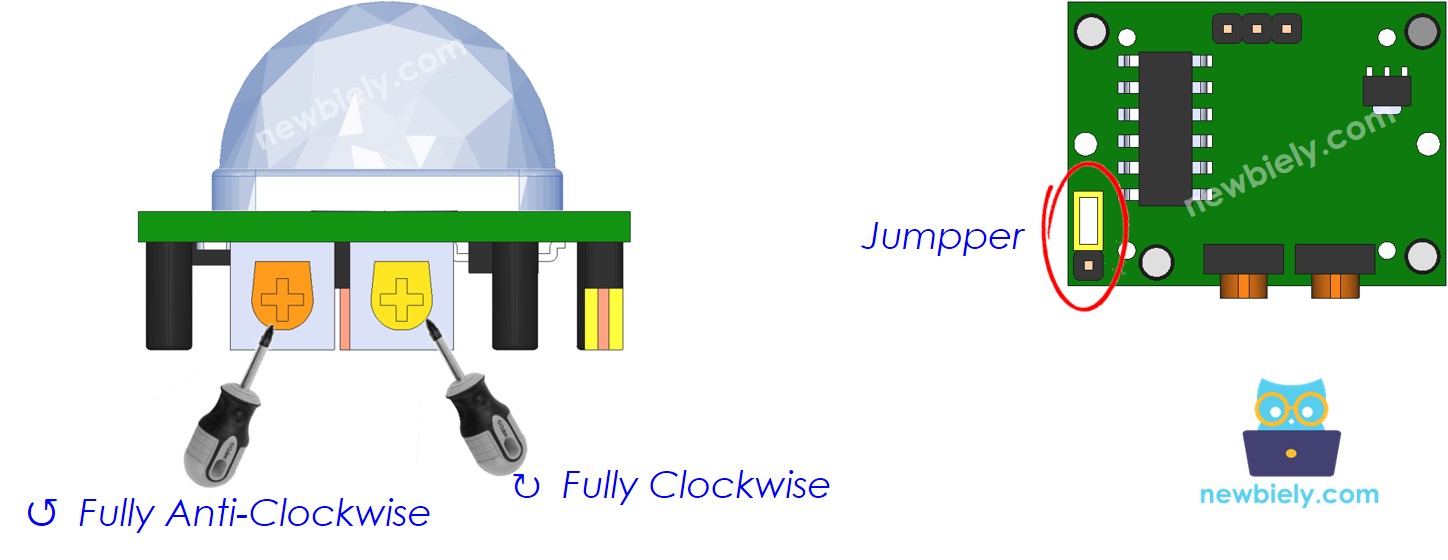
Thiết lập ban đầu
| Time Delay Adjuster | Screw it in anti-clockwise direction fully. |
| Detection Range Adjuster | Screw it in clockwise direction fully. |
| Repeat Trigger Selector | Put jumper as shown on the image. |
Mã Arduino
/*
* Mã Arduino này được phát triển bởi newbiely.vn
* Mã Arduino này được cung cấp để sử dụng công khai, không có ràng buộc.
* Để xem hướng dẫn chi tiết và sơ đồ kết nối, vui lòng truy cập:
* https://newbiely.vn/tutorials/arduino/arduino-motion-sensor-led
*/
const int MOTION_SENSOR_PIN = 7; // Arduino pin connected to the OUTPUT pin of motion sensor
const int LED_PIN = 3; // Arduino pin connected to LED's pin
int motionStateCurrent = LOW; // current state of motion sensor's pin
int motionStatePrevious = LOW; // previous state of motion sensor's pin
void setup() {
Serial.begin(9600); // initialize serial
pinMode(MOTION_SENSOR_PIN, INPUT); // set arduino pin to input mode
pinMode(LED_PIN, OUTPUT); // set arduino pin to output mode
}
void loop() {
motionStatePrevious = motionStateCurrent; // store old state
motionStateCurrent = digitalRead(MOTION_SENSOR_PIN); // read new state
if (motionStatePrevious == LOW && motionStateCurrent == HIGH) { // pin state change: LOW -> HIGH
Serial.println("Motion detected!");
digitalWrite(LED_PIN, HIGH); // turn on
}
else
if (motionStatePrevious == HIGH && motionStateCurrent == LOW) { // pin state change: HIGH -> LOW
Serial.println("Motion stopped!");
digitalWrite(LED_PIN, LOW); // turn off
}
}
Hướng dẫn từng bước
- Kết nối Arduino với máy tính qua cáp USB
- Mở Arduino IDE, chọn board và cổng đúng
- Sao chép mã ở trên và mở bằng Arduino IDE
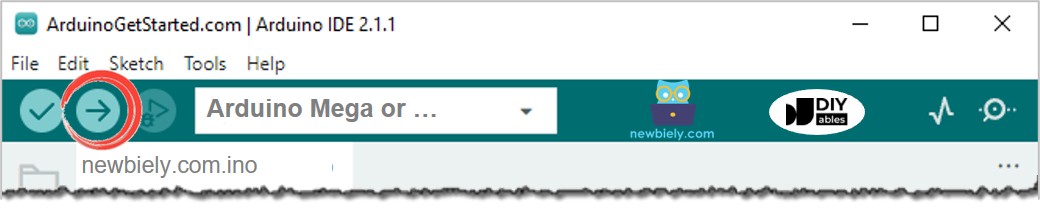
- Nhấp nút Tải lên trên Arduino IDE để tải mã lên Arduino
- Đưa tay bạn trước cảm biến
- Quan sát sự thay đổi trạng thái của LED
Giải thích mã nguồn
Đọc phần giải thích theo từng dòng trong các chú thích của mã nguồn!
Video Tutorial
Việc sản xuất video tốn rất nhiều thời gian. Nếu video hướng dẫn hữu ích cho việc học của bạn, hãy đăng ký kênh YouTube để ủng hộ. Nếu nhu cầu đủ cao, chúng tôi sẽ cố gắng làm thêm nhiều video.
Bài hướng dẫn liên quan
📱 Ứng dụng đề xuất
 English for KidsHọc tiếng Anh vui nhộn cho trẻ nhỏ.Tải về trênGoogle PlayTải về trênApp Store
 Bubble NoteGhi chú tự xóa — viết như nhắn tin.Tải về trênGoogle PlayTải về trênApp Store
 Tôi Không MuaĐánh bại mua sắm bốc đồng, tiết kiệm hơn.Tải về trênGoogle PlayTải về trênApp Store
 Con Đường Tri ThứcBài thi thử để học mọi thứ.Tải về trênGoogle PlayTải về trênApp Store