
Arduino Cảm biến chuyển động Chuông Piezo
Chúng ta sẽ học cách sử dụng Arduino để điều khiển chuông Piezo khi được cảm biến HC-SR501 phát hiện chuyển động. Cụ thể:
- Nếu có sự chuyển động được phát hiện, hãy phát ra âm thanh
- Nếu không phát hiện được sự chuyển động, hãy ngừng phát ra âm thanh
- Nếu có sự chuyển động được phát hiện, hãy phát ra giai điệu của bài hát
Phần cứng cần chuẩn bị
| 1 | × | Arduino Uno R3 | Amazon | |
| 1 | × | USB 2.0 cable type A/B (for USB-A PC) | Amazon | |
| 1 | × | USB 2.0 cable type C/B (for USB-C PC) | Amazon | |
| 1 | × | HC-SR501 Motion Sensor | Amazon | |
| 1 | × | Alternatively, AM312 Mini Motion Sensor | Amazon | |
| 1 | × | 3-24V Active Piezo Buzzer | Amazon | |
| 1 | × | Active Piezo Buzzer Module | Amazon | |
| 1 | × | Passive Piezo Buzzer Module | Amazon | |
| 1 | × | breadboard | Amazon | |
| 1 | × | dây jumper | Amazon | |
| 1 | × | (Khuyến nghị) Screw Terminal Block Shield for Arduino Uno | Amazon | |
| 1 | × | (Khuyến nghị) Sensors/Servo Expansion Shield for Arduino Uno | Amazon | |
| 1 | × | (Khuyến nghị) Breadboard Shield for Arduino Uno | Amazon | |
| 1 | × | (Khuyến nghị) Enclosure for Arduino Uno | Amazon | |
| 1 | × | (Khuyến nghị) Prototyping Base Plate & Breadboard Kit for Arduino UNO | Amazon |
Or you can buy the following kits:
| 1 | × | DIYables STEM V3 Starter Kit (Arduino included) | Amazon | |
| 1 | × | DIYables Sensor Kit (18 sensors/displays) | Amazon |
Về Piezo Buzzer và Cảm biến chuyển động
Nếu bạn chưa biết về buzzer piezo và cảm biến chuyển động (cấu hình chân, cách hoạt động, cách lập trình ...), hãy tìm hiểu về chúng trong các bài hướng dẫn dưới đây:
Xin lưu ý rằng hướng dẫn này sử dụng còi 3-5V, nhưng bạn có thể điều chỉnh nó cho còi 12V. Bạn có thể tìm hiểu về Arduino - Chuông điện
Sơ đồ đấu dây
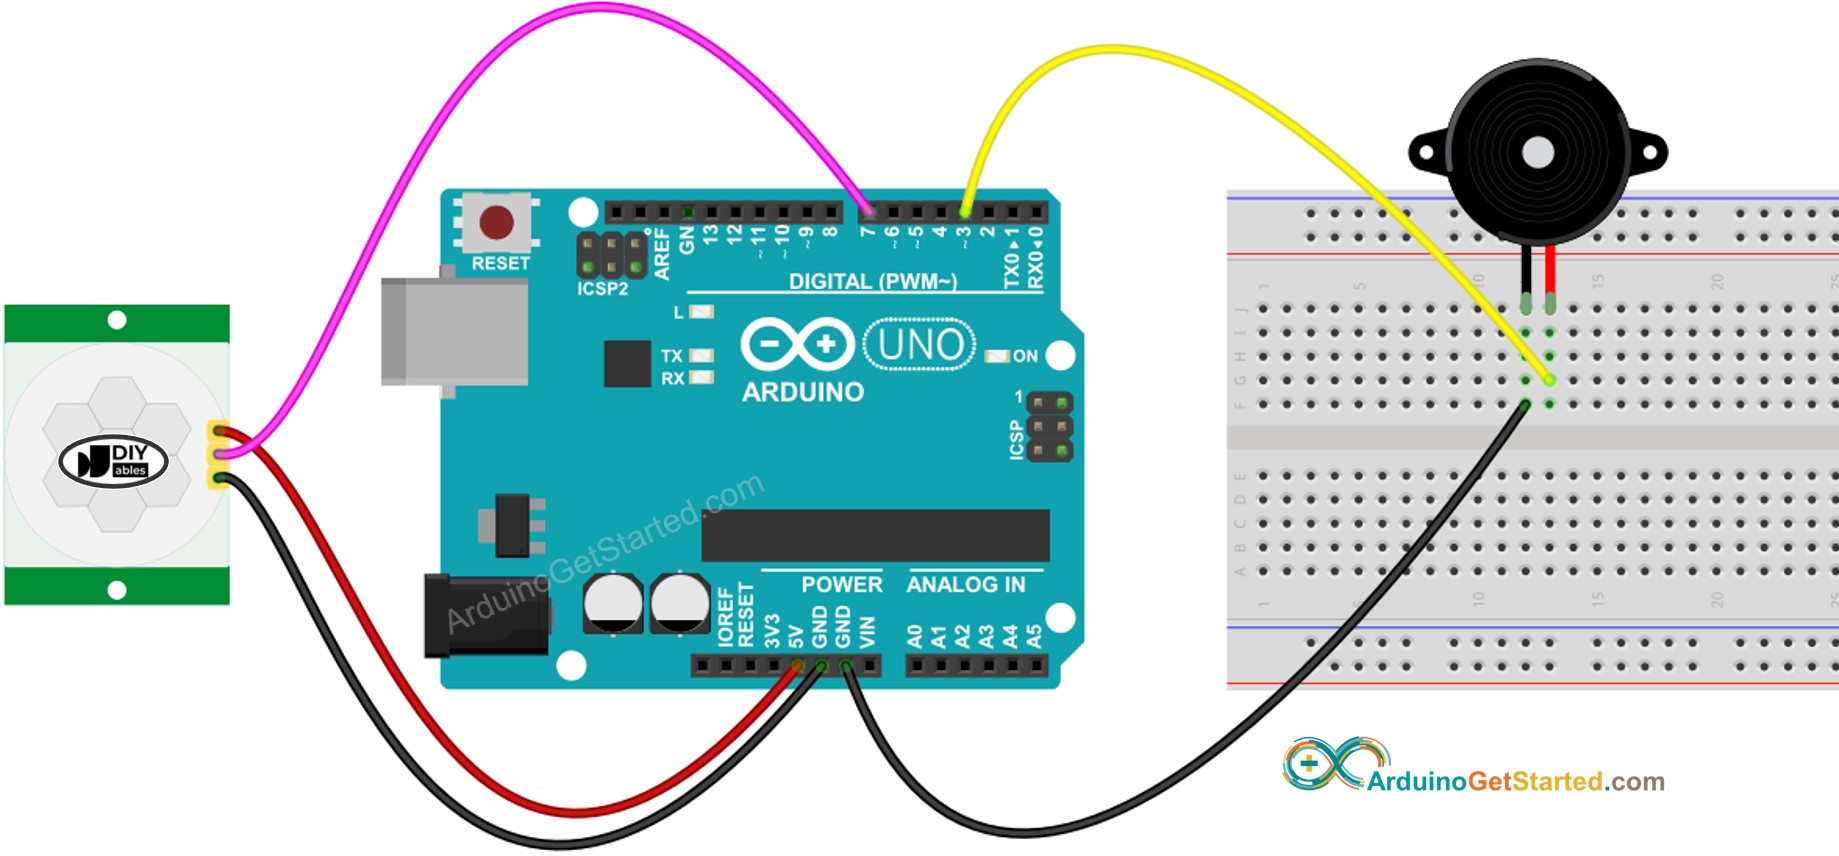
This image is created using Fritzing. Click to enlarge image
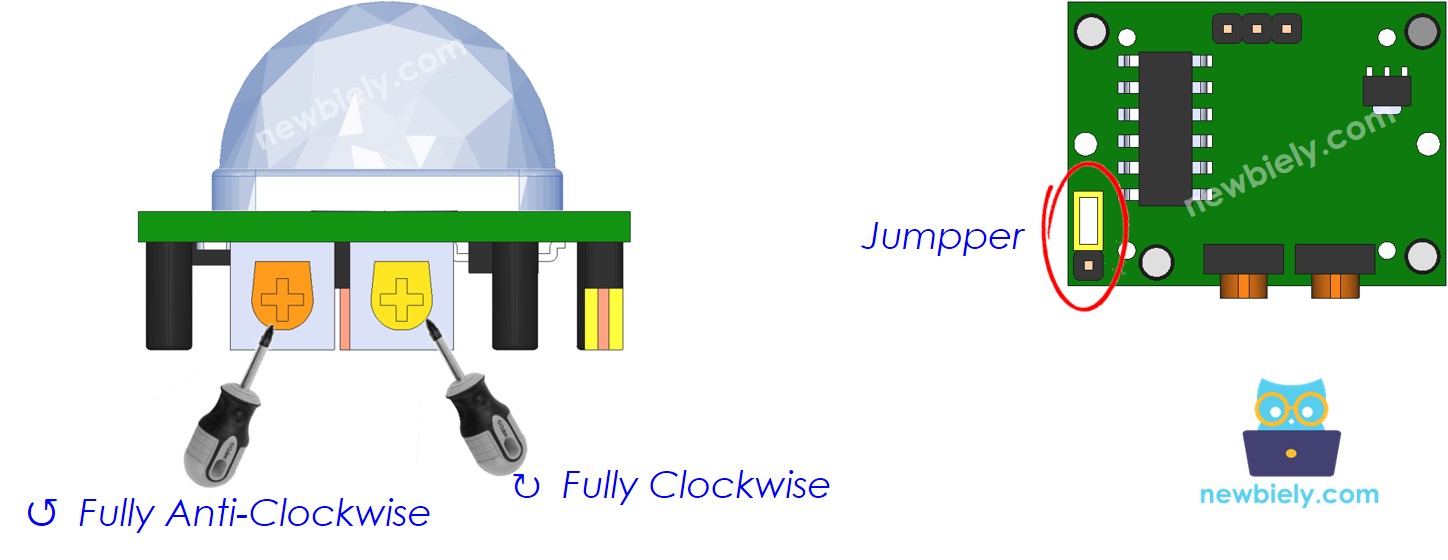
Cài đặt ban đầu
| Time Delay Adjuster | Screw it in anti-clockwise direction fully. |
| Detection Range Adjuster | Screw it in clockwise direction fully. |
| Repeat Trigger Selector | Put jumper as shown on the image. |
Mã Arduino - Âm thanh đơn giản
Hướng dẫn từng bước
- Kết nối Arduino với máy tính bằng cáp USB
- Mở Arduino IDE, chọn board và cổng đúng
- Sao chép mã ở trên và mở bằng Arduino IDE
- Nhấn nút Tải lên trên Arduino IDE để tải mã lên Arduino
- Di chuyển tay trước cảm biến
- Nghe âm thanh của buzzer Piezo
Giải thích mã nguồn
Đọc lời giải thích theo từng dòng trong các dòng chú thích của mã nguồn!
Mã Arduino - Giai điệu
Hướng dẫn từng bước
- Sao chép mã ở trên và mở bằng Arduino IDE
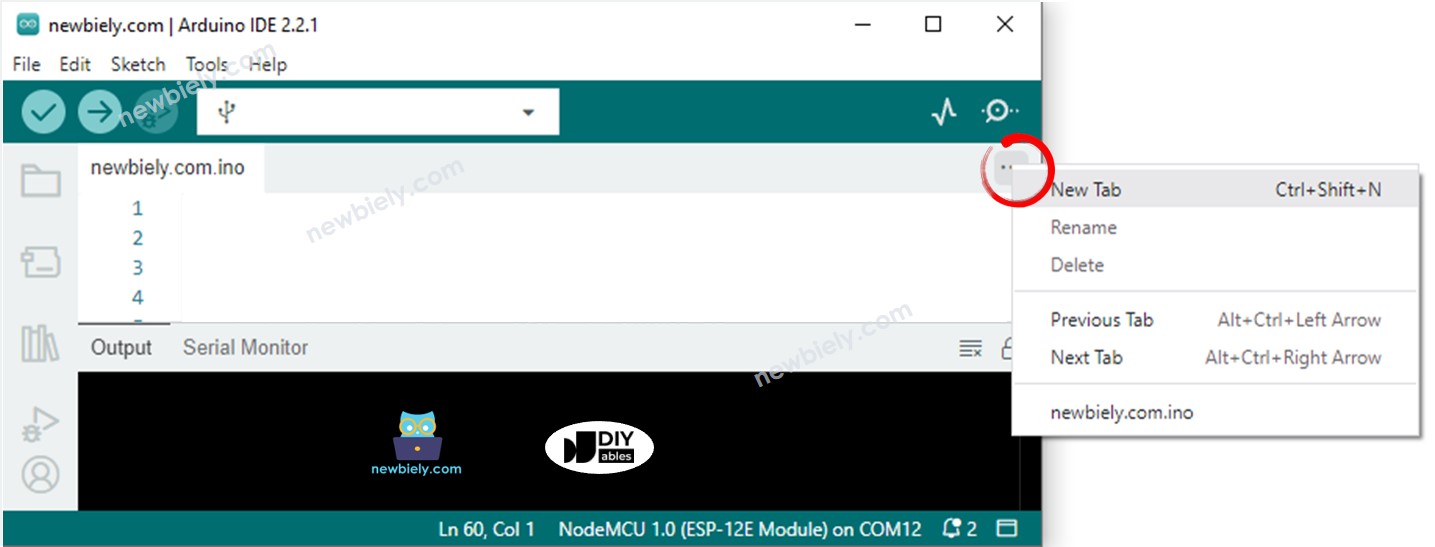
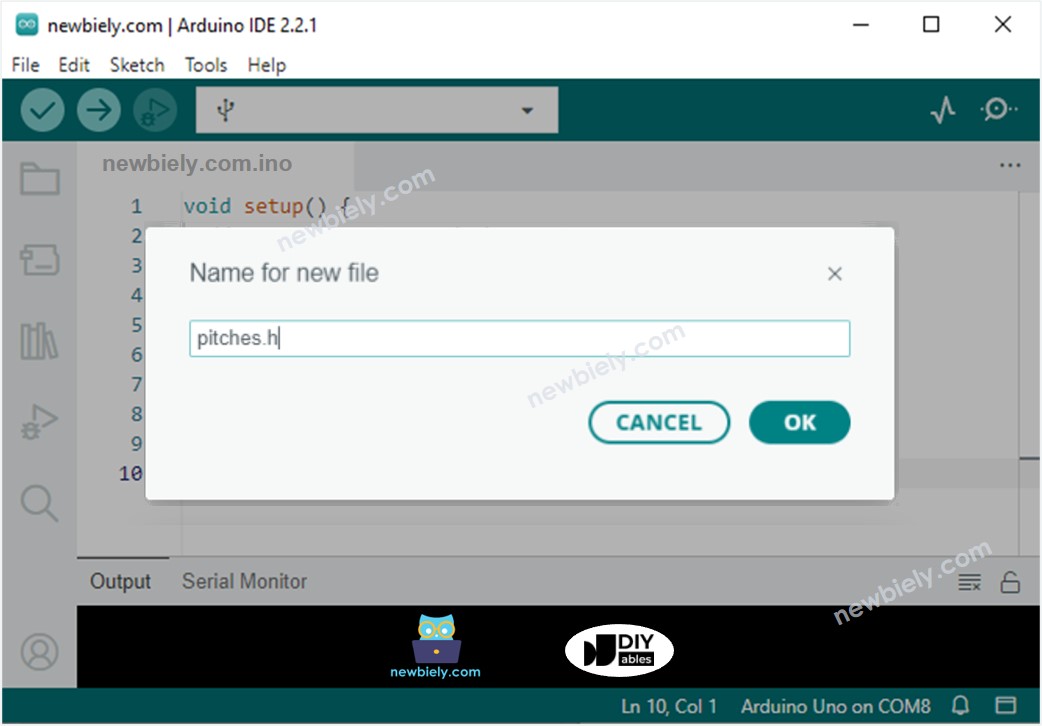
- Tạo tệp pitches.h trên Arduino IDE bằng cách:
- Hoặc nhấp vào nút ngay dưới biểu tượng Serial Monitor và chọn Tab Mới, hoặc dùng tổ hợp phím Ctrl+Shift+N.
- Đặt tên tệp là pitches.h và nhấn nút OK
- Sao chép mã dưới đây và dán nó vào tệp được tạo pitches.h.
- Nhấn nút Upload trên Arduino IDE để tải mã lên cho Arduino
- Di chuyển tay bạn trước cảm biến
- Nghe giai điệu của còi piezo
Giải thích mã nguồn
Đọc giải thích từng dòng trong các dòng chú thích của mã nguồn!
Video Tutorial
Việc sản xuất video tốn rất nhiều thời gian. Nếu video hướng dẫn hữu ích cho việc học của bạn, hãy đăng ký kênh YouTube để ủng hộ. Nếu nhu cầu đủ cao, chúng tôi sẽ cố gắng làm thêm nhiều video.
Bài hướng dẫn liên quan
📱 Ứng dụng đề xuất
 English for KidsHọc tiếng Anh vui nhộn cho trẻ nhỏ.Tải về trênGoogle PlayTải về trênApp Store
 Bubble NoteGhi chú tự xóa — viết như nhắn tin.Tải về trênGoogle PlayTải về trênApp Store
 Tôi Không MuaĐánh bại mua sắm bốc đồng, tiết kiệm hơn.Tải về trênGoogle PlayTải về trênApp Store
 Con Đường Tri ThứcBài thi thử để học mọi thứ.Tải về trênGoogle PlayTải về trênApp Store