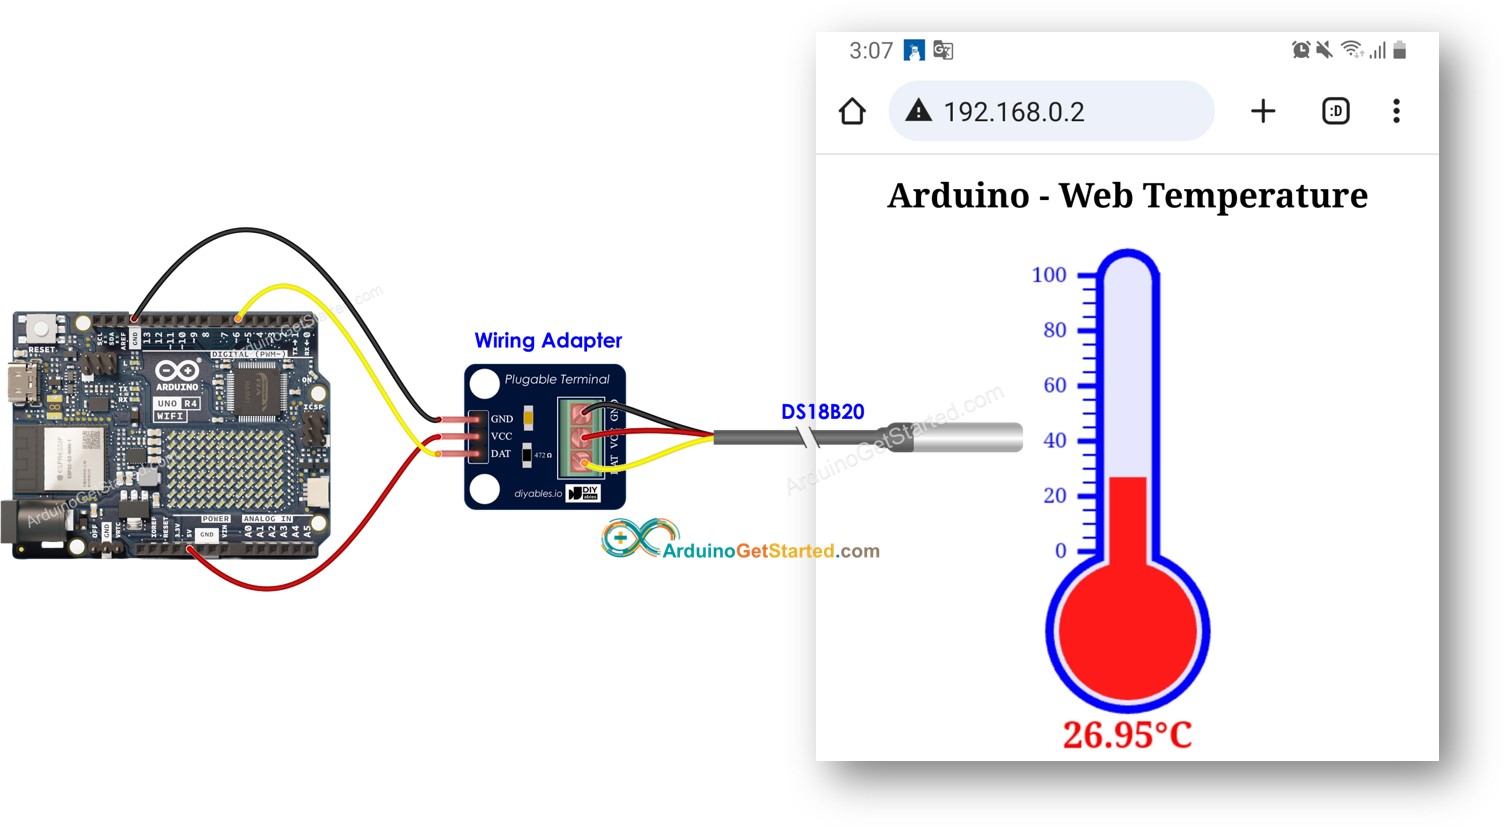
Trong bài hướng dẫn này, chúng ta sẽ học cách lập trình Arduino để trở thành một máy chủ web cung cấp nhiệt độ cho bạn qua web. Bạn có thể truy cập trang web do Arduino cung cấp để xem nhiệt độ từ cảm biến DS18B20. Dưới đây là cách nó hoạt động:
Arduino được lập trình làm máy chủ web.
Bạn nhập địa chỉ IP của Arduino vào trình duyệt web trên điện thoại thông minh hoặc máy tính của bạn.
Arduino trả lời yêu cầu từ trình duyệt web bằng một trang web chứa nhiệt độ được đọc từ cảm biến DS18B20.
Chúng ta sẽ xem qua hai đoạn mã ví dụ:
Mã Arduino cung cấp một trang web rất đơn giản hiển thị nhiệt độ từ cảm biến DS18B20. Điều này giúp bạn dễ hiểu cách nó hoạt động.
Mã Arduino cung cấp một trang web đồ họa hiển thị nhiệt độ từ cảm biến DS18B20.
Tiết lộ: Một số liên kết trong bài viết này là liên kết tiếp thị Amazon và có thể nhận hoa hồng theo chính sách của chương trình.
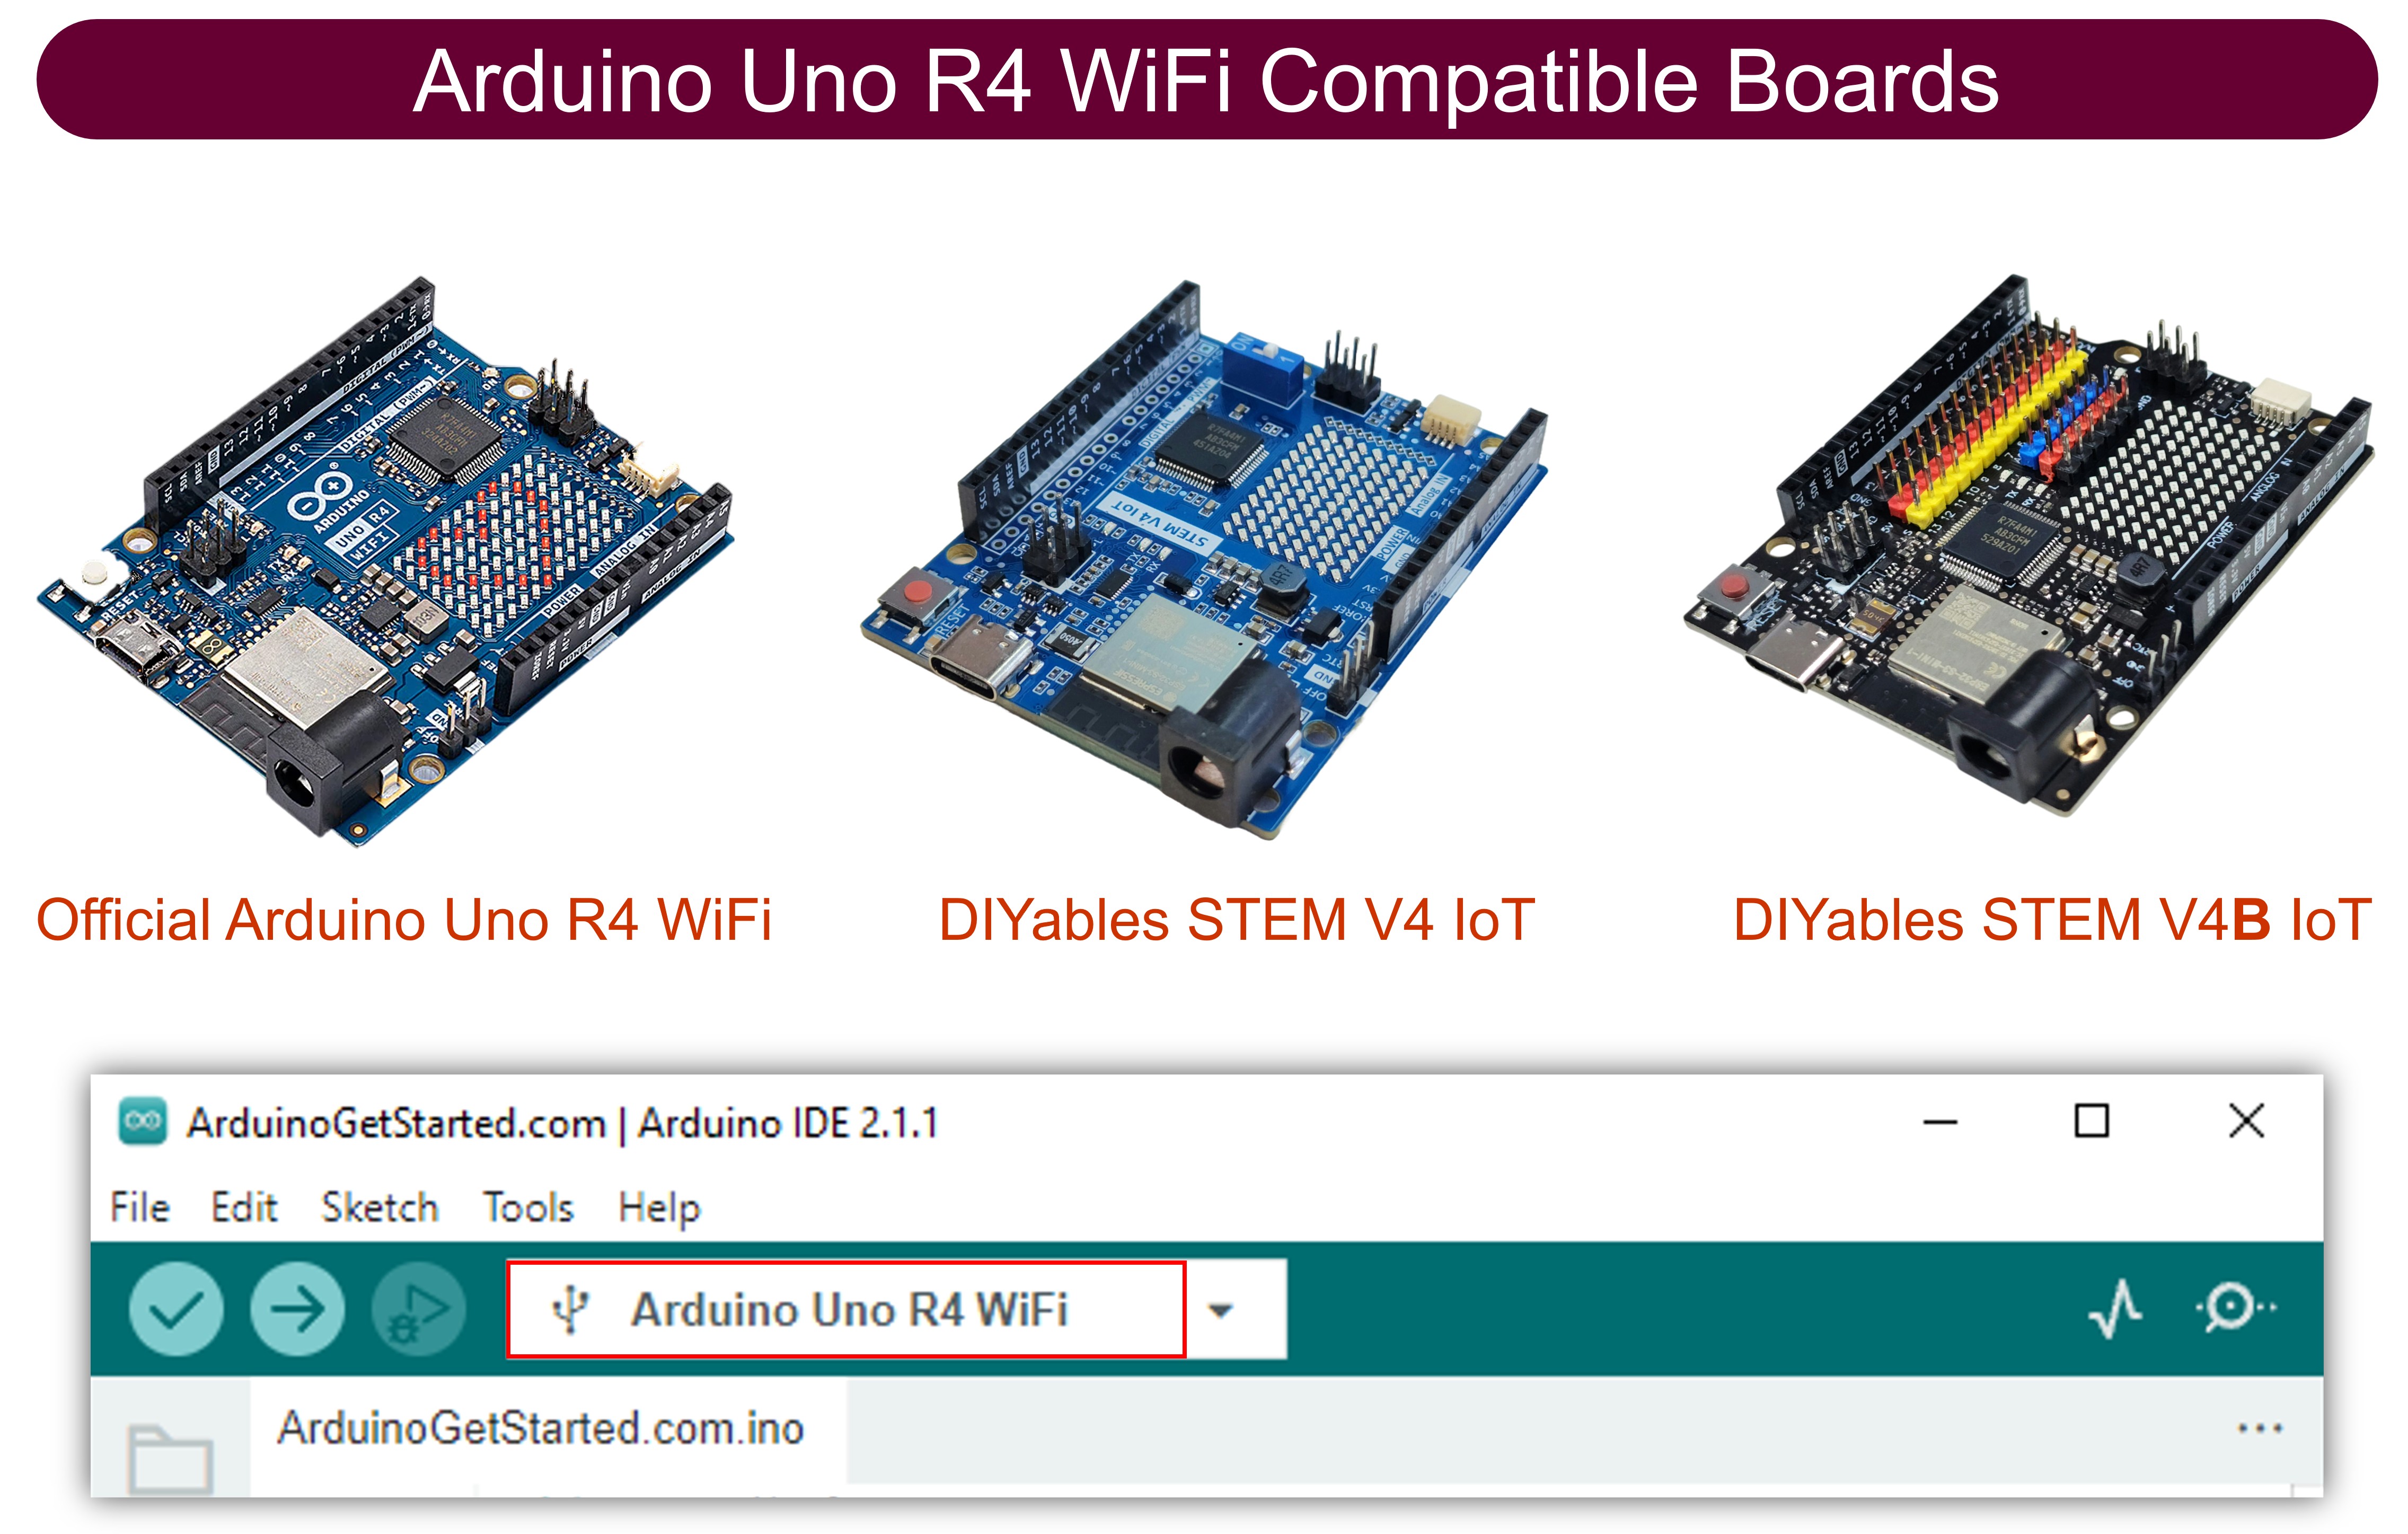
Về Arduino Uno R4 và cảm biến nhiệt độ DS18B20
Nếu bạn chưa biết về Arduino Uno R4 và cảm biến nhiệt DS18B20 (bố trí các chân, cách hoạt động, cách lập trình ...), hãy tìm hiểu về chúng trong các bài hướng dẫn sau:
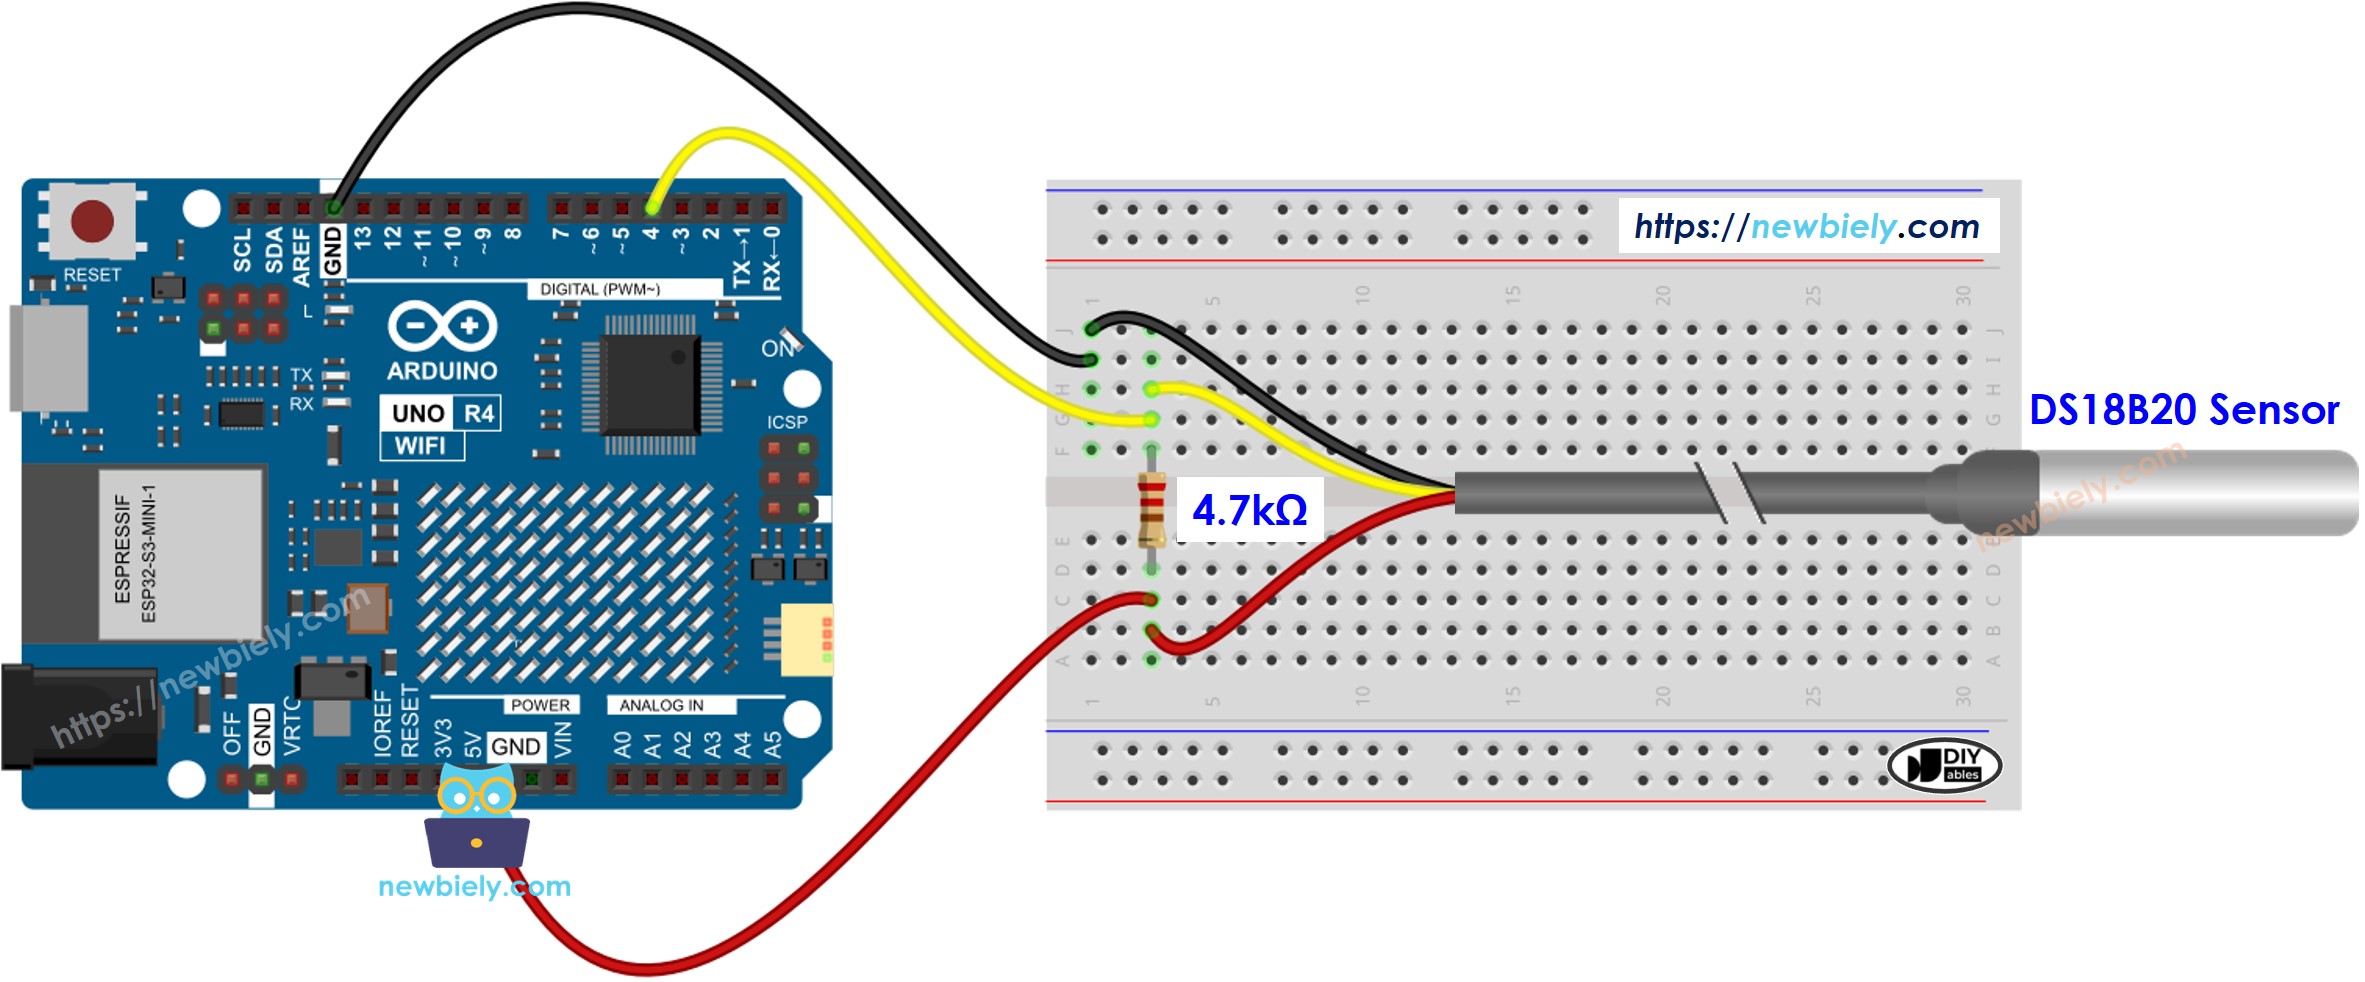
This image is created using Fritzing. Click to enlarge image
Mã Arduino - Trang web đơn giản
/* * Mã Arduino này được phát triển bởi newbiely.vn * Mã Arduino này được cung cấp để sử dụng công khai, không có ràng buộc. * Để xem hướng dẫn chi tiết và sơ đồ kết nối, vui lòng truy cập: * https://newbiely.vn/tutorials/arduino/arduino-temperature-via-web */#include <UnoR4WiFi_WebServer.h>#include <OneWire.h>#include <DallasTemperature.h>constchar HTML_CONTENT[] PROGMEM = R"rawliteral(<!DOCTYPE HTML><html><head><link rel="icon" href="data:,"></head><p>Temperature: <span style="color: red;">%TEMP_PLACE_HOLDER% °C</span></p></html>)rawliteral";constchar WIFI_SSID[] = "YOUR_WIFI_SSID"; // change your network SSID (name)constchar WIFI_PASSWORD[] = "YOUR_WIFI_PASSWORD"; // change your network passwordconstint SENSOR_PIN = 6; // Arduino pin connected to DS18B20 sensor's DQ pinOneWire oneWire(SENSOR_PIN); // setup a oneWire instanceDallasTemperature tempSensor(&oneWire); // pass oneWire to DallasTemperature libraryUnoR4WiFi_WebServer server;floatgetTemperature() { tempSensor.requestTemperatures(); // send the command to get temperaturesfloat tempCelsius = tempSensor.getTempCByIndex(0); // read temperature in Celsiusreturn tempCelsius;}void handleHome(WiFiClient& client, constString& method, constString& request, const QueryParams& params, constString& jsonData) {float tempC = getTemperature();String response = HTML_CONTENT; response.replace("%TEMP_PLACE_HOLDER%", String(tempC, 1)); server.sendResponse(client, response.c_str());}voidsetup() {Serial.begin(9600);delay(1000); tempSensor.begin(); // initialize the temperature sensorSerial.println("Arduino Uno R4 WiFi - Temperature via Web");// Connect to WiFiSerial.print("Connecting to ");Serial.println(WIFI_SSID);WiFi.begin(WIFI_SSID, WIFI_PASSWORD);while (WiFi.status() != WL_CONNECTED) {delay(500);Serial.print("."); }Serial.println("connected!");Serial.print("IP address: ");Serial.println(WiFi.localIP());// Configure routes server.addRoute("/", handleHome);// Start server server.begin();Serial.println("\n=== Web Server Ready! ===");Serial.print("Visit: http://");Serial.println(WiFi.localIP());}voidloop() { server.handleClient();}
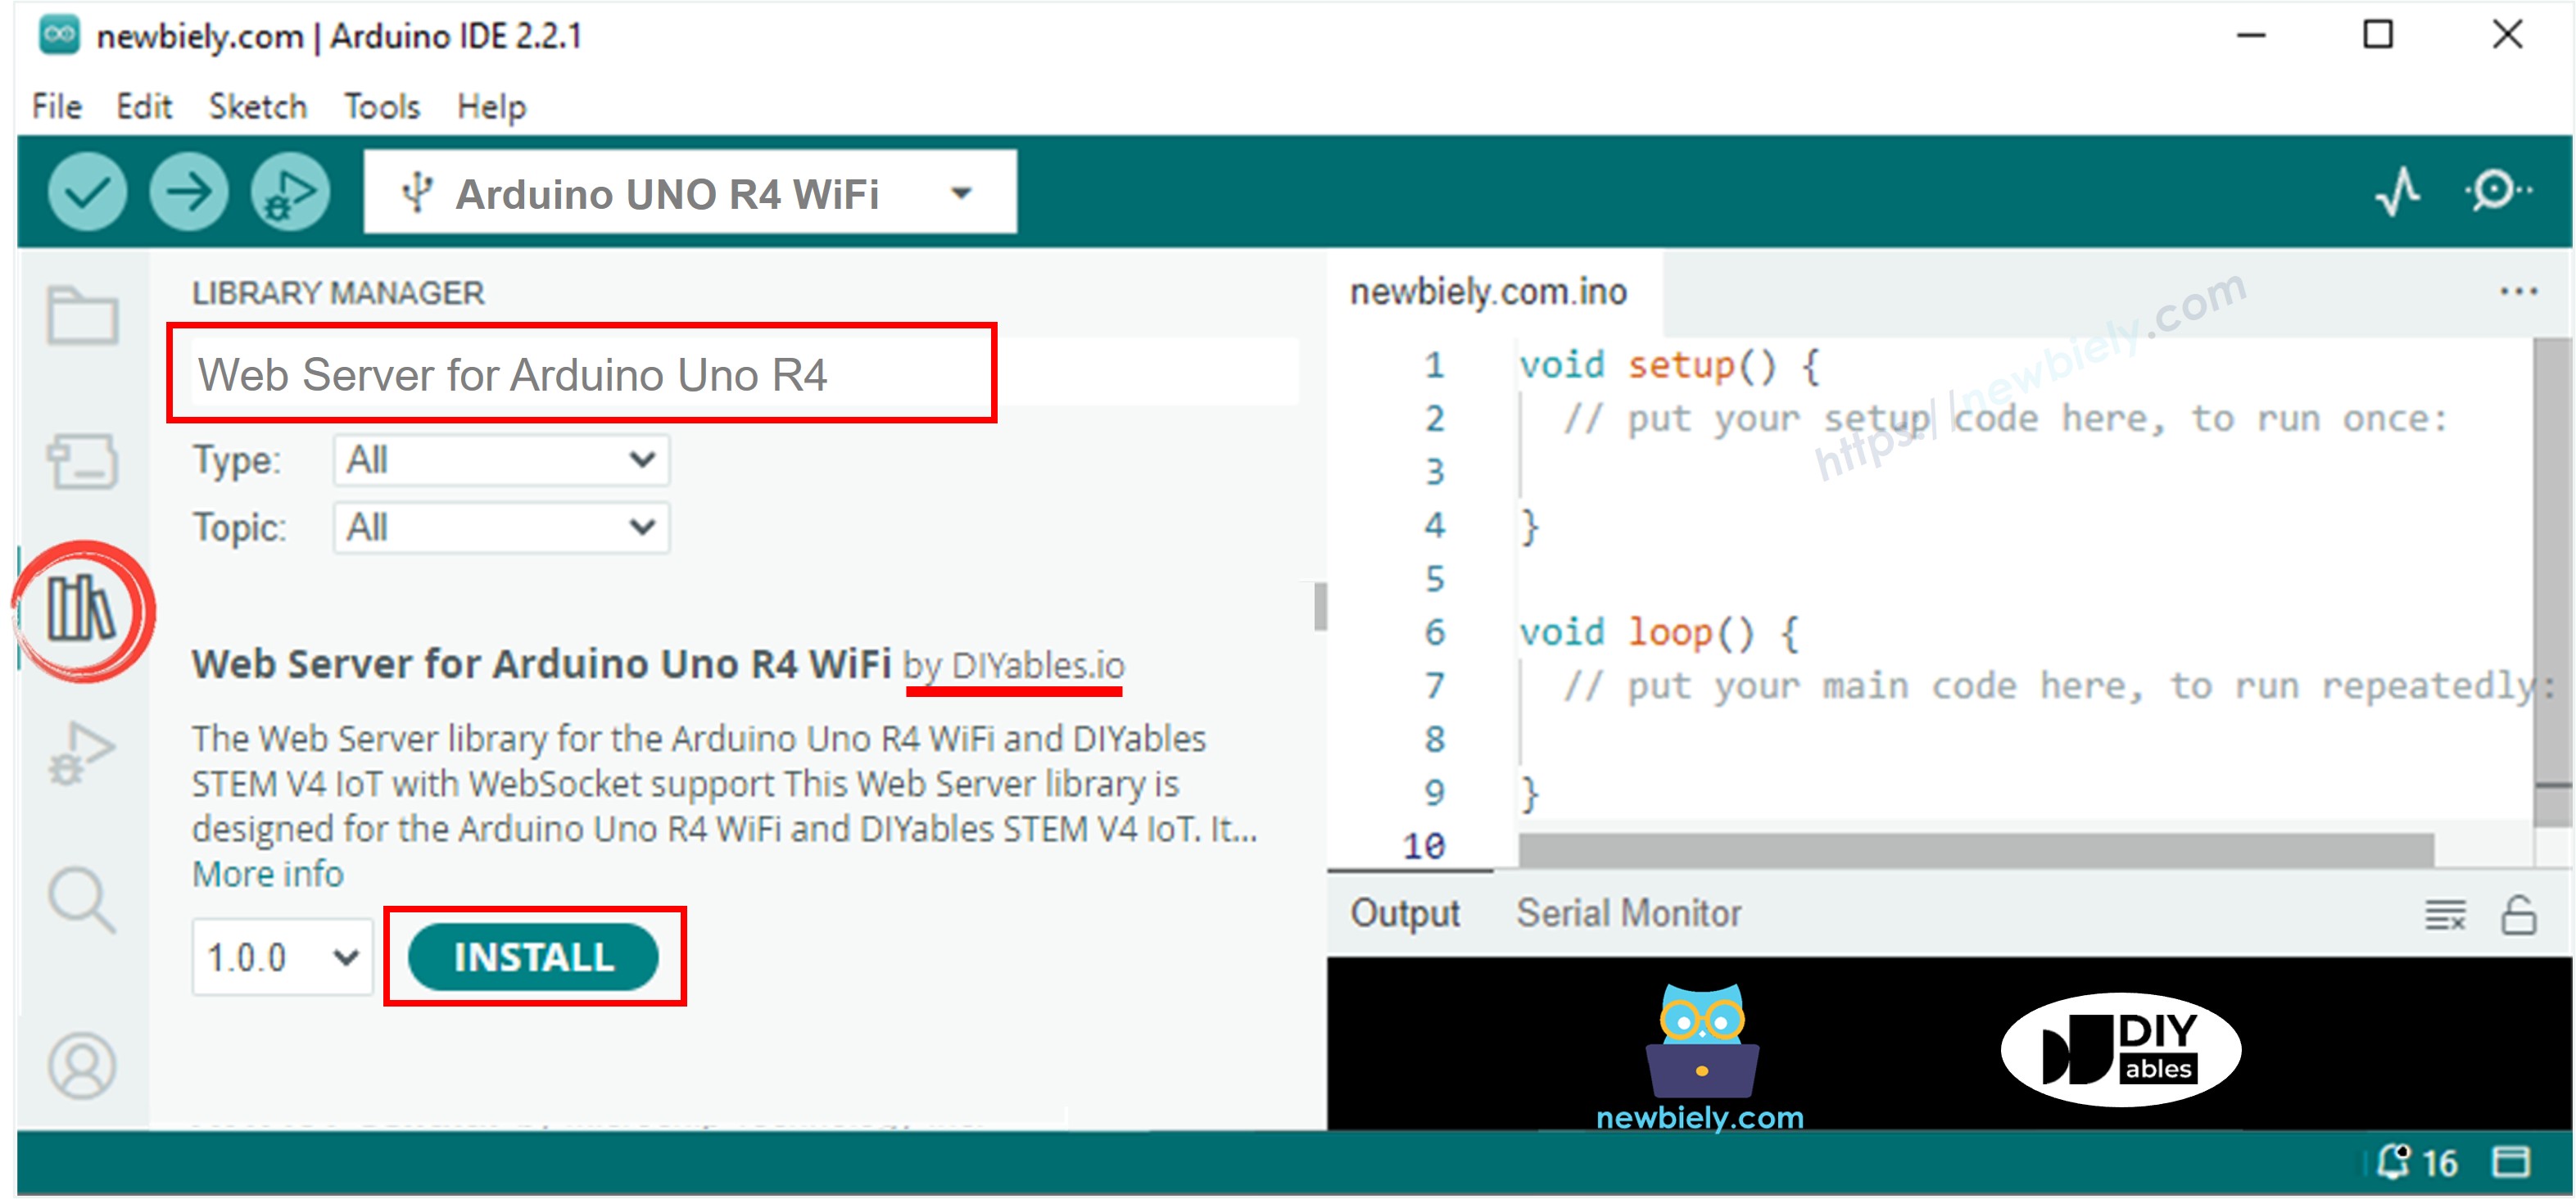
Mở Library Manager bằng cách nhấn vào biểu tượng Library Manager ở bên trái của Arduino IDE.
Tìm kiếm Web Server for Arduino Uno R4 WiFi và tìm thư viện Web Server do DIYables tạo ra.
Nhấn vào nút Install để thêm thư viện Web Server.
Sao chép mã ở trên và mở bằng Arduino IDE
Thay đổi thông tin wifi (SSID và mật khẩu) trong mã thành của bạn
Nhấp nút Tải lên trên Arduino IDE để tải mã lên Arduino
Mở Serial Monitor
Xem kết quả trên Serial Monitor
Newbiely | Arduino IDE 2.3.8
──
☐
✕
File
Edit
Sketch
Tools
Help
Arduino Uno
Newbiely.ino
···
8Serial.println("Hello World!");
Output
Serial Monitor
Message (Enter to send message to 'Arduino Uno' on 'COM15')
New Line
9600 baud
Arduino Uno R4 WiFi - Temperature via Web
Connecting to YOUR_WIFI_SSID
connected!
IP address: 192.168.0.254
Starting web server on IP: 192.168.0.254
=== Web Server Ready! ===
Visit: http://192.168.0.254
Ln 11, Col 1
Arduino Uno on COM15
2
Bạn sẽ tìm thấy một địa chỉ IP.
Nhập địa chỉ IP này vào thanh địa chỉ của trình duyệt web trên điện thoại thông minh hoặc máy tính của bạn.
Bạn sẽ thấy đầu ra như sau trên Serial Monitor.
Newbiely | Arduino IDE 2.3.8
──
☐
✕
File
Edit
Sketch
Tools
Help
Arduino Uno
Newbiely.ino
···
8Serial.println("Hello World!");
Output
Serial Monitor
Message (Enter to send message to 'Arduino Uno' on 'COM15')
New Line
9600 baud
Arduino Uno R4 WiFi - Temperature via Web
Connecting to YOUR_WIFI_SSID
connected!
IP address: 192.168.0.254
Starting web server on IP: 192.168.0.254
=== Web Server Ready! ===
Visit: http://192.168.0.254
Method: GET
Requested path: /
Client disconnected
Ln 11, Col 1
Arduino Uno on COM15
2
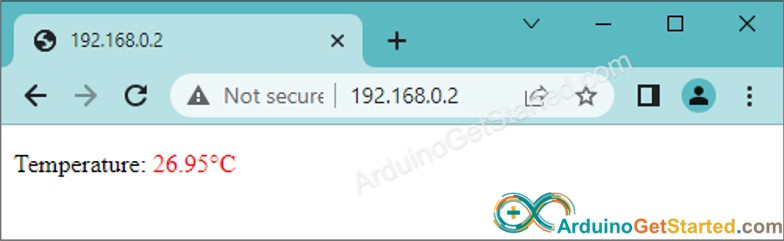
Bạn sẽ thấy một trang web rất đơn giản về bo mạch Arduino trên trình duyệt web như dưới đây:
Mã Arduino - Trang web đồ họa
Vì một trang web đồ họa chứa một lượng lớn nội dung HTML, việc nhúng nó vào mã Arduino như trước đây trở nên bất tiện. Để giải quyết vấn đề này, chúng ta cần tách mã Arduino và mã HTML thành các tệp riêng biệt:
Mã Arduino sẽ được đặt vào một tệp .ino.
Mã HTML (bao gồm HTML, CSS và JavaScript) sẽ được đặt vào tệp .h.
Hướng dẫn từng bước
Mở Arduino IDE và tạo một sketch mới. Đặt tên cho nó, ví dụ ArduinoGetStarted.com.ino
Sao chép mã dưới đây và mở bằng Arduino IDE
/* * Mã Arduino này được phát triển bởi newbiely.vn * Mã Arduino này được cung cấp để sử dụng công khai, không có ràng buộc. * Để xem hướng dẫn chi tiết và sơ đồ kết nối, vui lòng truy cập: * https://newbiely.vn/tutorials/arduino/arduino-temperature-via-web */#include <UnoR4WiFi_WebServer.h>#include"index.h"#include <OneWire.h>#include <DallasTemperature.h>constchar WIFI_SSID[] = "YOUR_WIFI_SSID"; // change your network SSID (name)constchar WIFI_PASSWORD[] = "YOUR_WIFI_PASSWORD"; // change your network passwordconstint SENSOR_PIN = 6; // Arduino pin connected to DS18B20 sensor's DQ pinOneWire oneWire(SENSOR_PIN); // setup a oneWire instanceDallasTemperature tempSensor(&oneWire); // pass oneWire to DallasTemperature libraryUnoR4WiFi_WebServer server;floatgetTemperature() { tempSensor.requestTemperatures(); // send the command to get temperaturesfloat tempCelsius = tempSensor.getTempCByIndex(0); // read temperature in Celsiusreturn tempCelsius;}void handleHome(WiFiClient& client, constString& method, constString& request, const QueryParams& params, constString& jsonData) {float tempC = getTemperature();String response = HTML_CONTENT; response.replace("TEMPERATURE_MARKER", String(tempC, 1)); server.sendResponse(client, response.c_str());}voidsetup() {Serial.begin(9600);delay(1000); tempSensor.begin(); // initialize the temperature sensorSerial.println("Arduino Uno R4 WiFi - Temperature via Web");// Connect to WiFiSerial.print("Connecting to ");Serial.println(WIFI_SSID);WiFi.begin(WIFI_SSID, WIFI_PASSWORD);while (WiFi.status() != WL_CONNECTED) {delay(500);Serial.print("."); }Serial.println("connected!");Serial.print("IP address: ");Serial.println(WiFi.localIP());// Configure routes server.addRoute("/", handleHome);// Start server server.begin();Serial.println("\n=== Web Server Ready! ===");Serial.print("Visit: http://");Serial.println(WiFi.localIP());}voidloop() { server.handleClient();}
Thay đổi thông tin WiFi (SSID và mật khẩu) trong mã thành của bạn
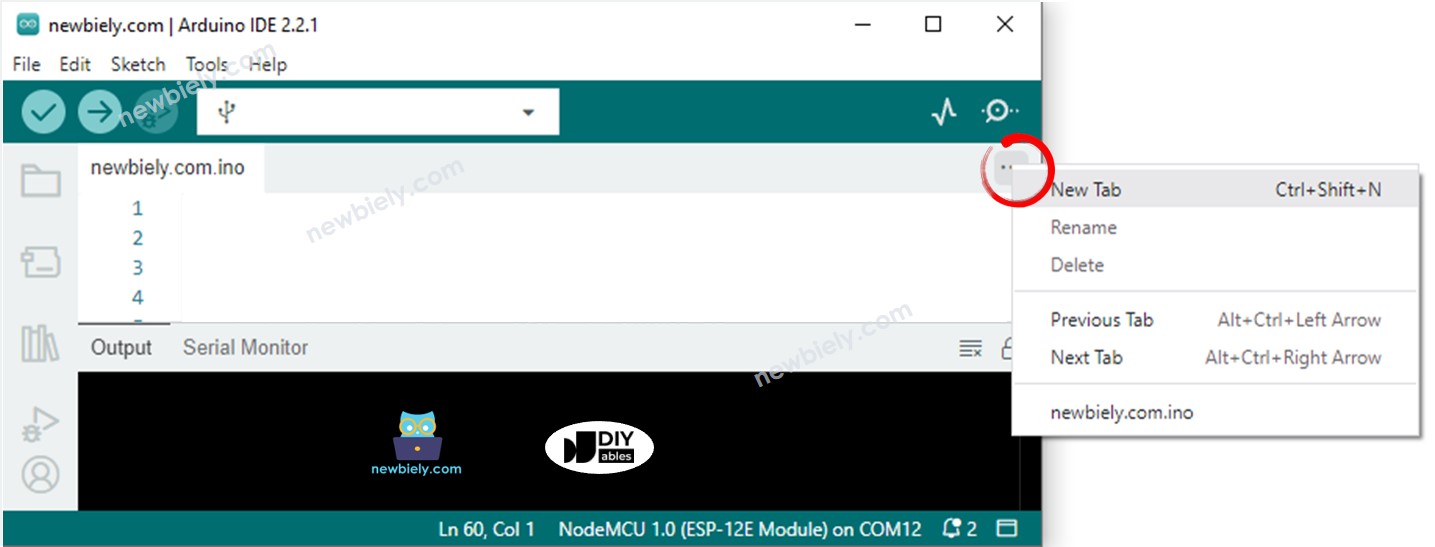
Tạo tệp index.h trong Arduino IDE bằng cách:
Nhấp vào nút ngay bên dưới biểu tượng Serial Monitor và chọn New Tab, hoặc dùng phím Ctrl+Shift+N.
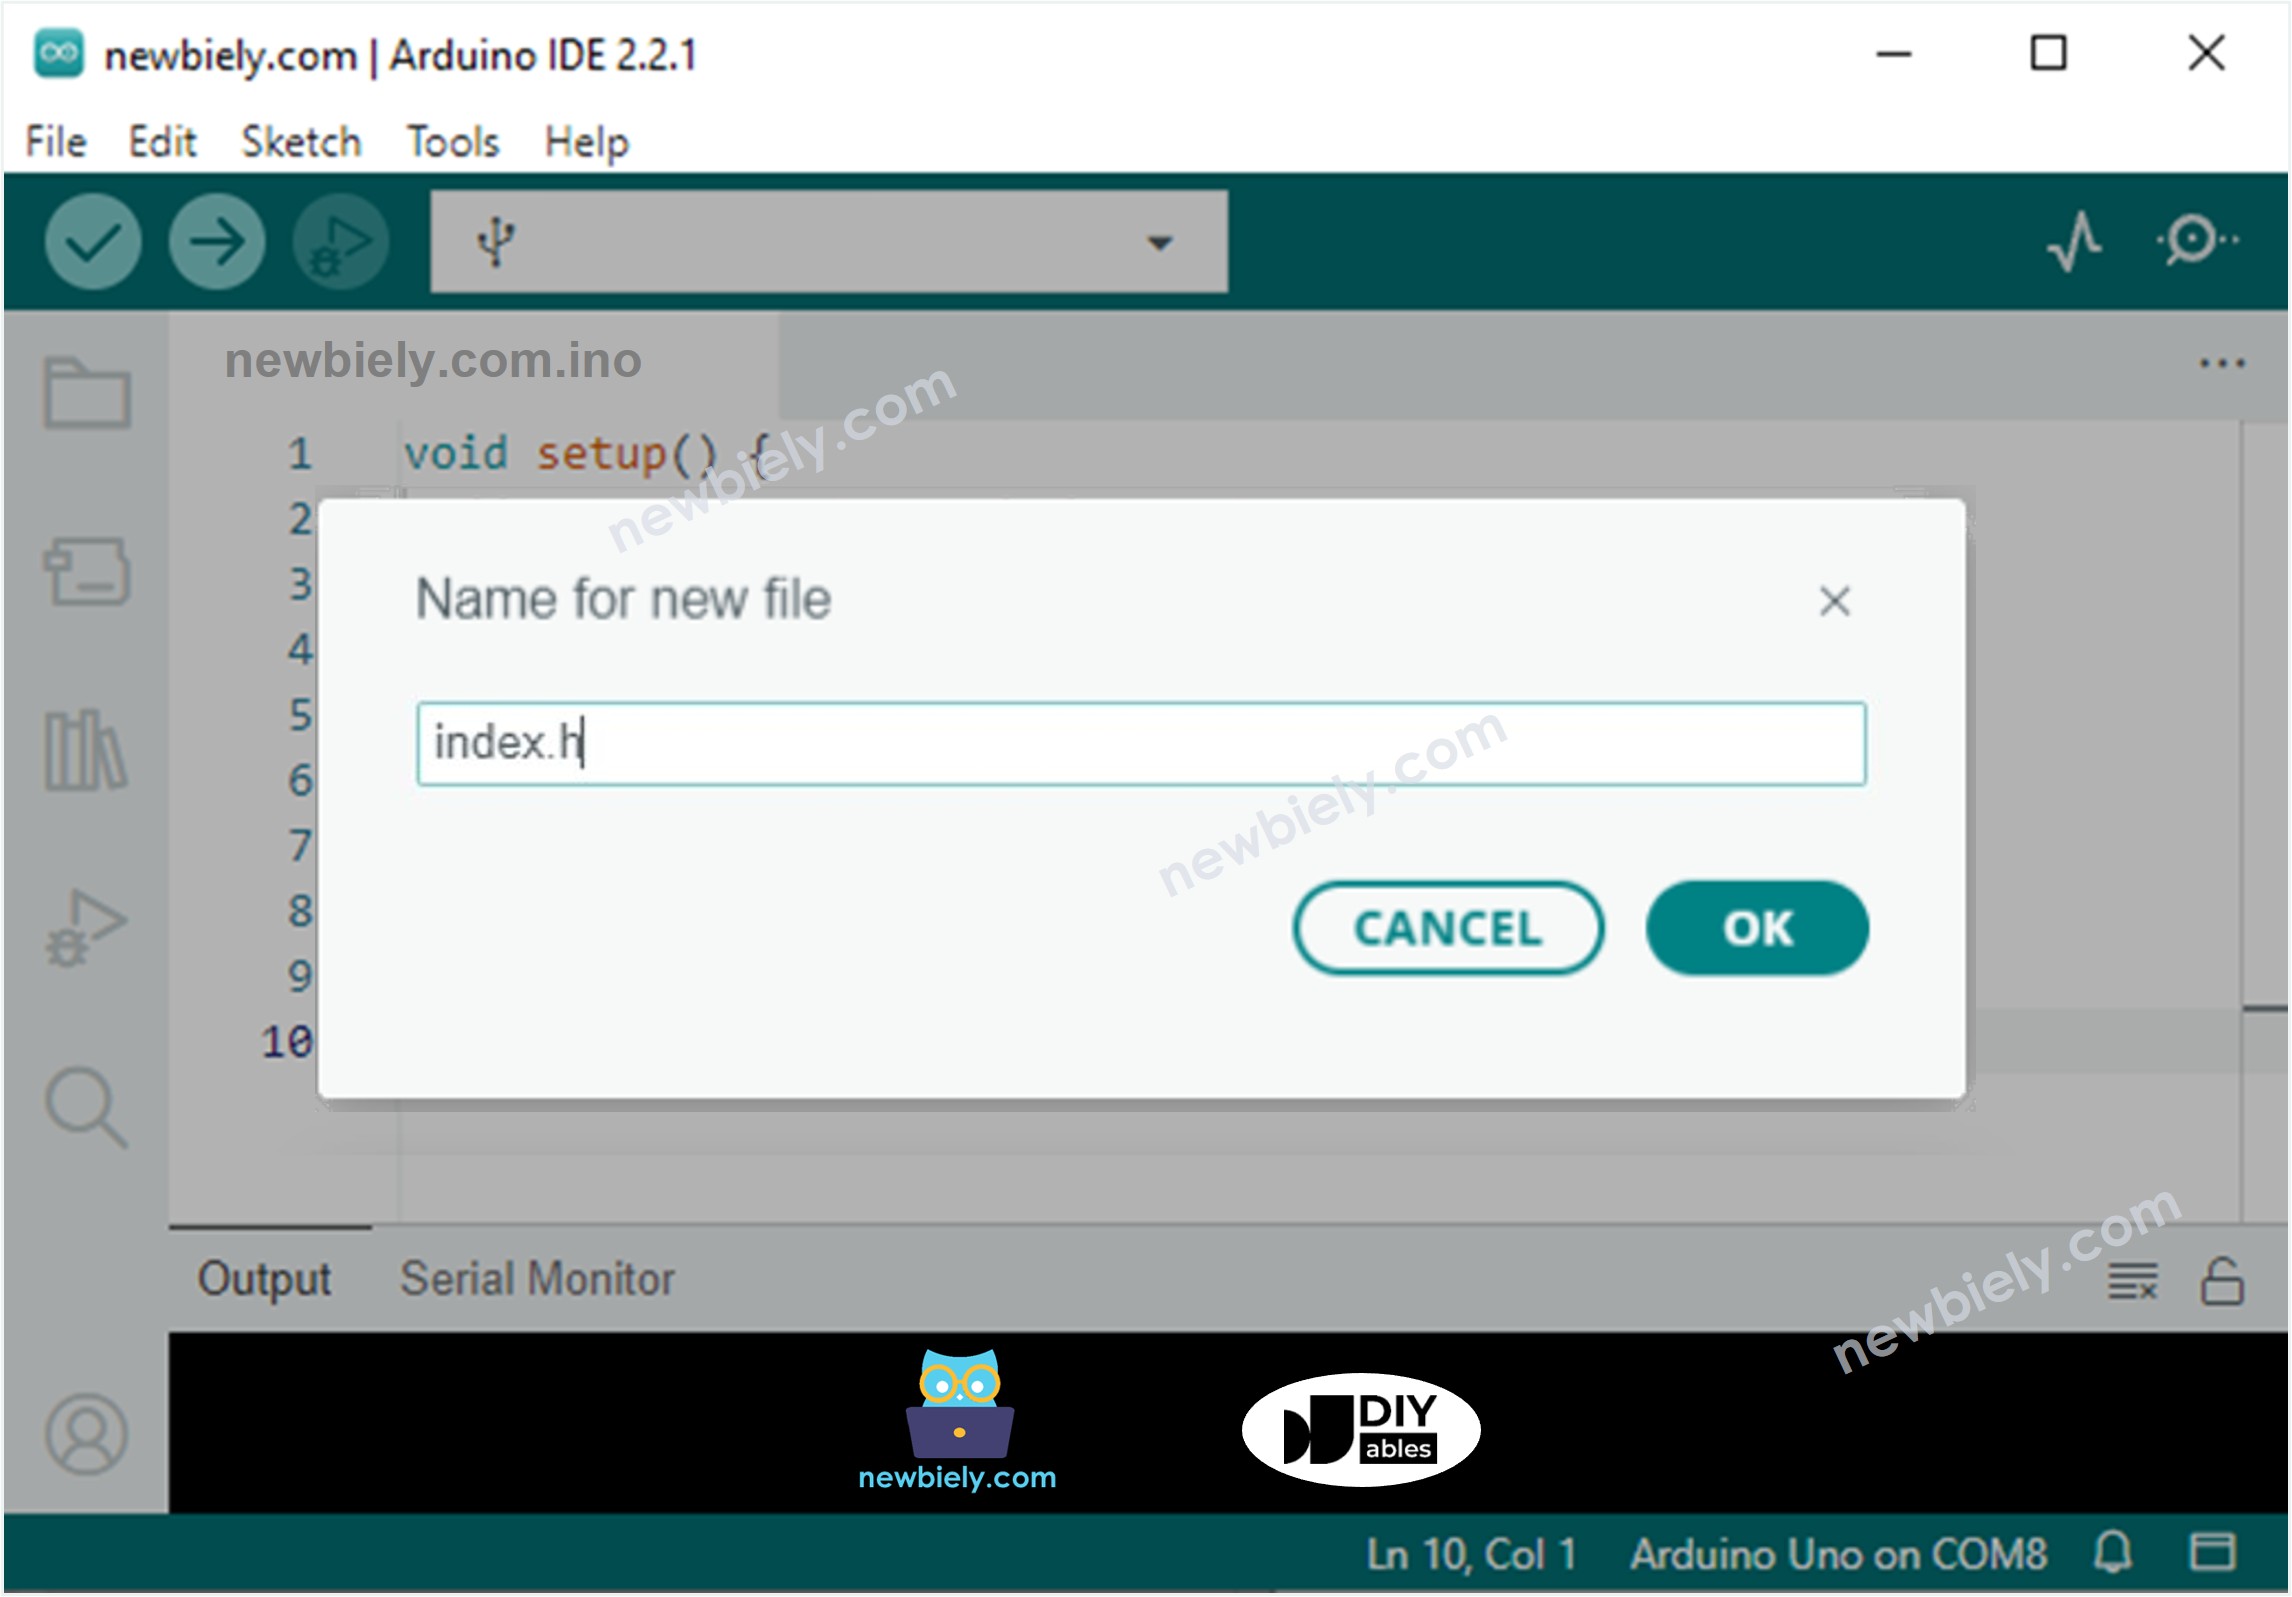
Hãy đặt tên cho tệp tin là index.h và nhấp nút OK
Sao chép mã ở dưới đây và dán vào index.h.
/* * Mã Arduino này được phát triển bởi newbiely.vn * Mã Arduino này được cung cấp để sử dụng công khai, không có ràng buộc. * Để xem hướng dẫn chi tiết và sơ đồ kết nối, vui lòng truy cập: * https://newbiely.vn/tutorials/arduino/arduino-temperature-via-web */constchar *HTML_CONTENT = R""""(<!DOCTYPE html><html><head><title>Arduino - Web Temperature</title><meta name="viewport" content="width=device-width, initial-scale=0.7, maximum-scale=0.7"><meta charset="utf-8"><link rel="icon" href="https://diyables.io/images/page/diyables.svg"><style>body { font-family: "Georgia"; text-align: center; font-size: width/2pt;}h1 { font-weight: bold; font-size: width/2pt;}h2 { font-weight: bold; font-size: width/2pt;}button { font-weight: bold; font-size: width/2pt;}</style><script>var cvs_width = 200, cvs_height = 450;function init() { var canvas = document.getElementById("cvs"); canvas.width = cvs_width; canvas.height = cvs_height + 50; var ctx = canvas.getContext("2d"); ctx.translate(cvs_width/2, cvs_height - 80); update_view(TEMPERATURE_MARKER);}function update_view(temp) { var canvas = document.getElementById("cvs"); var ctx = canvas.getContext("2d"); var radius = 70; var offset = 5; var width = 45; var height = 330; ctx.clearRect(-cvs_width/2, -350, cvs_width, cvs_height); ctx.strokeStyle="blue"; ctx.fillStyle="blue";//5-step Degree var x = -width/2; ctx.lineWidth=2;for (var i = 0; i <= 100; i+=5) { var y = -(height - radius)*i/100 - radius - 5; ctx.beginPath(); ctx.lineTo(x, y); ctx.lineTo(x - 20, y); ctx.stroke(); }//20-step Degree ctx.lineWidth=5;for (var i = 0; i <= 100; i+=20) { var y = -(height - radius)*i/100 - radius - 5; ctx.beginPath(); ctx.lineTo(x, y); ctx.lineTo(x - 25, y); ctx.stroke(); ctx.font="20px Georgia"; ctx.textBaseline="middle"; ctx.textAlign="right"; ctx.fillText(i.toString(), x - 35, y); }// shape ctx.lineWidth=16; ctx.beginPath(); ctx.arc(0, 0, radius, 0, 2 * Math.PI); ctx.stroke(); ctx.beginPath(); ctx.rect(-width/2, -height, width, height); ctx.stroke(); ctx.beginPath(); ctx.arc(0, -height, width/2, 0, 2 * Math.PI); ctx.stroke(); ctx.fillStyle="#e6e6ff"; ctx.beginPath(); ctx.arc(0, 0, radius, 0, 2 * Math.PI); ctx.fill(); ctx.beginPath(); ctx.rect(-width/2, -height, width, height); ctx.fill(); ctx.beginPath(); ctx.arc(0, -height, width/2, 0, 2 * Math.PI); ctx.fill(); ctx.fillStyle="#ff1a1a"; ctx.beginPath(); ctx.arc(0, 0, radius - offset, 0, 2 * Math.PI); ctx.fill(); temp = Math.round(temp * 100) / 100; var y = (height - radius)*temp/100.0 + radius + 5; ctx.beginPath(); ctx.rect(-width/2 + offset, -y, width - 2*offset, y); ctx.fill(); ctx.fillStyle="red"; ctx.font="bold 34px Georgia"; ctx.textBaseline="middle"; ctx.textAlign="center"; ctx.fillText(temp.toString() + "°C", 0, 100);}window.onload = init;</script></head><body><h1>Arduino - Web Temperature</h1><canvas id="cvs"></canvas></body></html>)"""";
Bây giờ bạn có mã trong hai tệp: ArduinoGetStarted.com.ino và index.h
Nhấp Tải lên nút trên Arduino IDE để tải mã lên Arduino
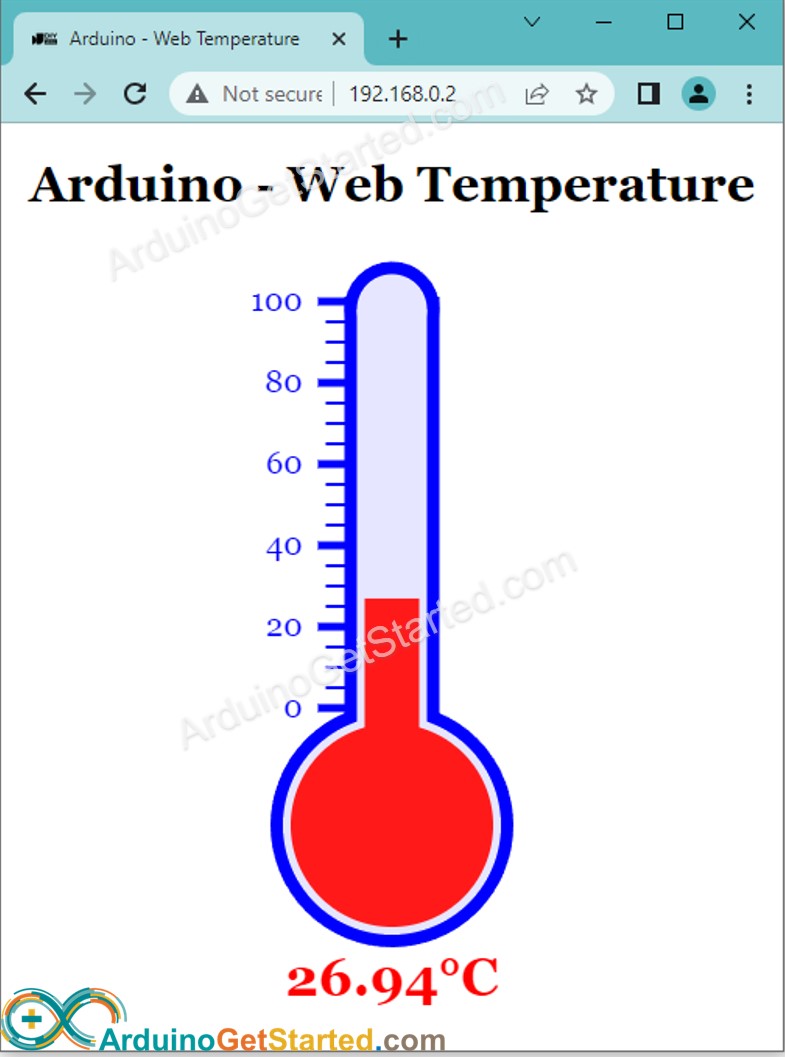
Truy cập trang web của bo mạch Arduino thông qua trình duyệt web như trước. Bạn sẽ thấy nó như dưới đây:
※ Lưu ý:
Nếu bạn thực hiện thay đổi nội dung HTML bên trong tệp index.h nhưng không chỉnh sửa bất kỳ điều gì trong tệp ArduinoGetStarted.com.ino, IDE Arduino sẽ không làm mới hoặc cập nhật nội dung HTML khi bạn biên dịch và tải mã lên ESP32.
Để buộc IDE Arduino cập nhật nội dung HTML trong tình huống này, bạn cần thực hiện một chỉnh sửa trong tệp ArduinoGetStarted.com.ino. Ví dụ, bạn có thể thêm một dòng trống hoặc chèn một chú thích. Hành động này kích hoạt IDE nhận ra rằng có sự thay đổi trong dự án, đảm bảo nội dung HTML được cập nhật của bạn được đưa vào lần tải lên.
 English for KidsHọc tiếng Anh vui nhộn cho trẻ nhỏ.Tải về trênGoogle PlayTải về trênApp Store
 Bubble NoteGhi chú tự xóa — viết như nhắn tin.Tải về trênGoogle PlayTải về trênApp Store
 Tôi Không MuaĐánh bại mua sắm bốc đồng, tiết kiệm hơn.Tải về trênGoogle PlayTải về trênApp Store
 Con Đường Tri ThứcBài thi thử để học mọi thứ.Tải về trênGoogle PlayTải về trênApp Store